Whadayaknow, Ableton users?
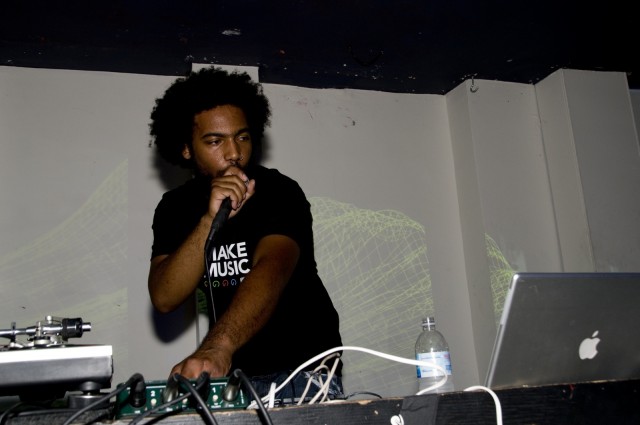
Whether you’re an existing user or considering it for the first time, this month online school Dubspot is giving away 30 video lessons on using the software, free, through the end of June only. So, I turned to my friend Thavius Beck (Plug Research Records), LA-based producer and rapper, and master instructor, to make something exclusively for CDM to add a little more free knowledge. If you are playing with Ableton for the first time, you can unlock the 30-day free trial and give it a shot.
I’m just glad to read Thavius’ tips. You’ll feel a little more like an expert afterward, I guarantee – or, alternatively, count how many of these you did already know. (Yes, some of us have been using Live since its first release.)
30 Tips for Ableton Live
Thavius Beck
1. Holding SHIFT while adjusting a Transpose parameter with your UP/DOWN arrow keys will Transpose by an octave instead of 1 semitone
2. “Z” will transpose your computer keyboard DOWN one octave. “X” will transpose it UP one octave
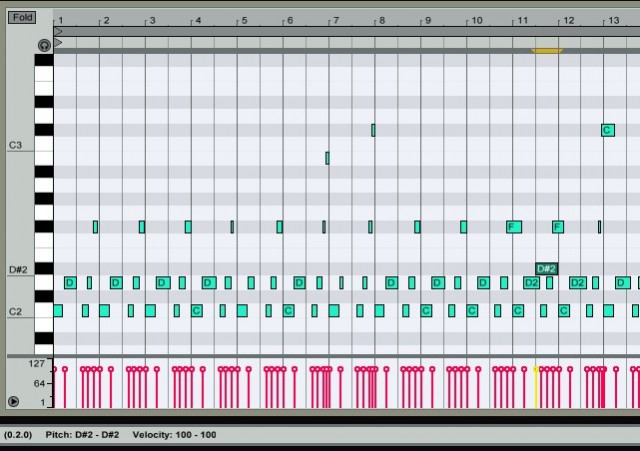
3. “C” decreases the velocity of midi notes entered with the computer keyboard or mouse by 20. “V” increases the velocity by 20
4. You can disable the grid in the Arrangement View and in the Sample Editor by Right-Clicking in the grid area, and selecting OFF under Fixed Grid in the contextual menu
5. Individual drum cells in Impulse can be routed to other audio tracks to be mixed separately or given individual effects. Enable the I-O (inputs and outputs) button on the Session View, and in the Audio From tab select your Impulse instrument. In the tab below that, you’ll see all the sounds in your Impulse. Choose one, then either arm the track or set the Monitor status to IN.
6. The Ableton Device Spectrum not only shows you the frequencies being generated by your music in real time, it also will show you the specific note that a frequency corresponds to. Hold your mouse anywhere over the graphical display in Spectrum and a box in the lower right corner will show you the exact frequency, decibel level, and corresponding note based on where your mouse is.
7. If you have Live Suite, when using Slice to New Midi track try slicing to a single Sampler instead of the Built-In preset. When your slices are in the Sampler, you can change the pitch, attack, decay, voices, etc. of all the slices at once without using Macro knobs.
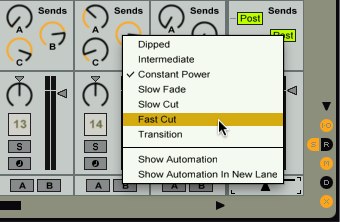
8. Right-clicking on the crossfader allows you to choose different crossfader curves.
9. If your audio interface has multiple outputs that are enabled (go to Live’s Audio Preferences and select Output Config), you can enable a separate CUE output so you can monitor on your headphones without affecting what is coming out of the Master. Make sure your I-O button is enabled, and on the master channel you will see Cue Out and Master Out. If the Cue Out is different from the Master out, your tracks solo buttons will become cue buttons, allowing you to cue up tracks in the headphones while the party people continue to party…
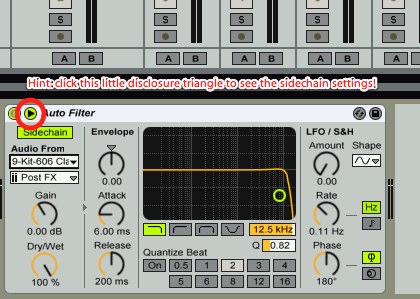
10. AutoFilter and Gate also have sidechain sections that allow an incoming signal to trigger/exaggerate/alter the effect.
11. Right-clicking on the metronome allows you to set a count-in. Helpful if you need to record something right at the beginning of bar 1.
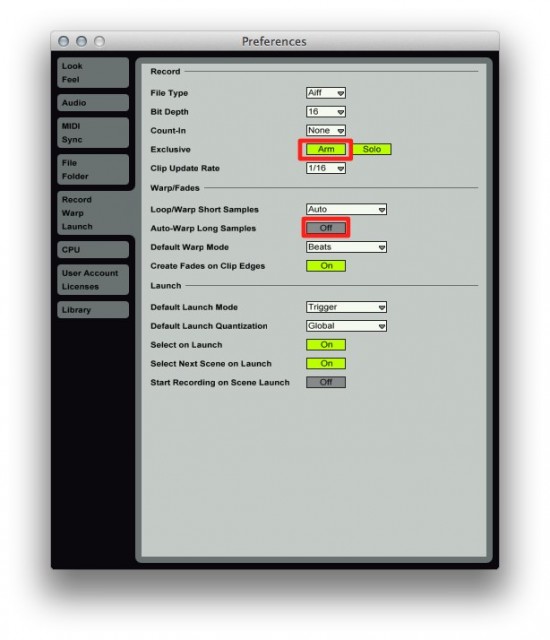
12. If you need to record multiple tracks at once, go to Live’s Preferences, select the Record/Warp/Launch tab, and under the Record section disable the Arm button next to where it says Exclusive (you can also do the same thing to the Solo button if you want to solo multiple tracks). Ed.: I feel a little differently than Thavius on this one. I like that when you arm one track, you de-arm another. Generally, if I do want to arm multiple tracks, I’d rather hold down the “shift” key when selecting arm – the same for Solo. So consider that an alternative tip 12! -PK)
13. If you haven’t already, stay in that same page of Live’s preferences and turn off Auto-Warp Long Samples. This will prevent Live from putting a million incorrect warp markers on your audio when drag a longer audio file into it and enable Warp.
14. Complex warp mode may sound better than Beats for warping full songs and playing them below their original tempo, but be careful… Complex and Complex Pro are the only two warping algorithms that alter the quality of your audio even when it’s playing at the original tempo. They can also introduce some odd phasing issues when playing song with deep sub bass… Complex Pro is good for acapellas, but I suggest using either mode with a bit of caution before playing a gig…
15. If you change the Global Clip Quantization to NONE, you can scrub through your audio in the Sample Editor by hovering your mouse right below the loop bracket (so it becomes a speaker icon), click and hold, then drag the speaker icon through your audio clip.
16. You can create your own Slice to Midi preset by opening up a blank Drum Rack or Sampler, adjusting the parameters to your liking (you could even add effects to the blank Drum Rack if you like), save your new preset by hitting the disk icon in the upper right corner of the effect (or rack), and then dragging that preset into the following folder in your Live Library: Library/Defaults/Slicing. Next time you Slice to a New Midi track, try out your new preset…
17. Another way to manually “slice” a sample is to drop an Audio Clip into several different empty cells in the Drum Rack, and change the start point on each on so they each play a different part of the sample. The same thing can be done with the Sampler.
18. You can remove the Stop button from a blank clip slot by Right-clicking inside of it and selecting “Remove Stop Button” (or use the shortcut Command/Ctrl-E)
19. You can set the launch tempo of a Scene by Right-clicking inside the scene (next to the scene number) and selecting Edit Launch Tempo, then type in the tempo. You can also just rename the scene and type in the tempo followed by BPM.
20. You can also set the launch time signature of a Scene by Right-clicking inside the scene and selecting Edit Launch Time Signature, and then type in the time signature. You can also just rename the scene and type in the time signature (e.g. 7/8).
21. If you press DELETE while any parameter is selected, it will be returned to its default setting.
22. Double-clicking on any of Live’s Browser shortcut buttons will collapse any unfolded folders.
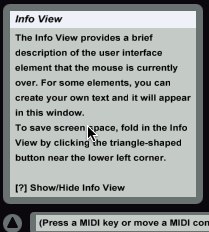
23. You can write your own notes in the Info View of clips by Right-clicking on any audio or midi clip and selecting Edit Info Text
24. You can drag any Groove Pool template into a midi clip slot to see the velocity and timing of the groove.
25. You can change the Launch Quantization of individual clips by enabling the Show Launch Button (the L button under the Clip View) and changing the Quantization from Global to something else.
26. If you want to MIDI or KEY map buttons to let you select or scroll through your Scenes, select with MIDI or KEY map, and you’ll notice buttons that appear above the Master fader and below the Stop Clips button. The first button will play the selected scene, the next two are arrows that can be mapped to buttons to select the next or previous scene, and the final box can be mapped to a rotary knob to scroll through your scenes.
27. You can automate tempo changes in the Arrangement View on the Master channel. On the Master channel in the Arrangement View, select Mixer in the Device chooser box (top chooser box), and then in the Automation control chooser (bottom choose box) you’ll be able to select Song Tempo.
28. If you select a parameter, it will be selected in the Automation chooser box on that track automatically. This is very helpful if you want to automate a parameter but aren’t sure exactly where to find it in the automation chooser box.
29. You can drag and drop a quicktime movie into the arrangement view so you can write music to picture.
30. If you set Locate Points in the arrangement view, you can MIDI or KEY map buttons to the Previous and Next Locator buttons (the left and right arrows above the first track in the arrangement view).
BONUS – Enable Info View to find out about any parameter that your mouse is hovering over. Very helpful if you don’t know all of the areas I refer to in the previous tips. Enjoy!
For more of this kind of knowledge, check out Dubspot’s full 30-lesson course with Thavius free – while you can.
http://www.dubspot.com/ableton3030/
“Did You Know?” Video Series
Very much along the lines of these 30 tips, earlier this year, Thavius also did a series of videos for Dubspot entitled “Did you know?” They focus on topics you perhaps should know about Ableton Live, but that some users – beginning and advanced alike – might have missed. Here’s that complete series.
Previously
Once More, From the Top: Learn Ableton Live in Videos, from the Very Beginning
http://www.dubspot.com/ableton3030/
