It’s not so much how complex or simple an instrument is – it’s how much you can make it feel your own. We covered a series of updates last week to Novation’s Circuit hardware. This week, as part of a collaboration with Novation and their product specialists, we’ve put together an exclusive hands-on guide to how to customize it for your own use.
First, here’s a video overview of how loading your own samples works, and why it’s important:
What you can customize
The “Novation Components” update covers a number of areas. You can…
- Load your own sound samples (60 seconds worth).
- Record external MIDI control and notes. (As mentioned last week, this is also a way of transferring MIDI clips from your computer to the Circuit – sync the two, then record the pattern.)
- Transform the onboard synths with a special editor and MIDI control. (That unlocks a lot of hidden parameters and mappings, then lets you assign them to the onboard controls.)
In short, if you looked at Circuit and said, okay, this is just a bunch of stock sounds with some knobs and a step sequencer – not any more, it isn’t.
What you’ll need
To take advantage of the new stuff, you’ll need some different updates and downloads. It might not be immediately obvious, so let’s cover it one step at a time, in order.
1. Get the Google Chrome or Opera Web browser. You’ll need these browsers because they have full support for browser MIDI. (Don’t laugh at Opera; I actually just switched to it – it’s now based on the Chrome engine.) You can then grab the rest of the files/links at:
https://components.novationmusic.com/
2. If you’re on Windows, install an updated driver.
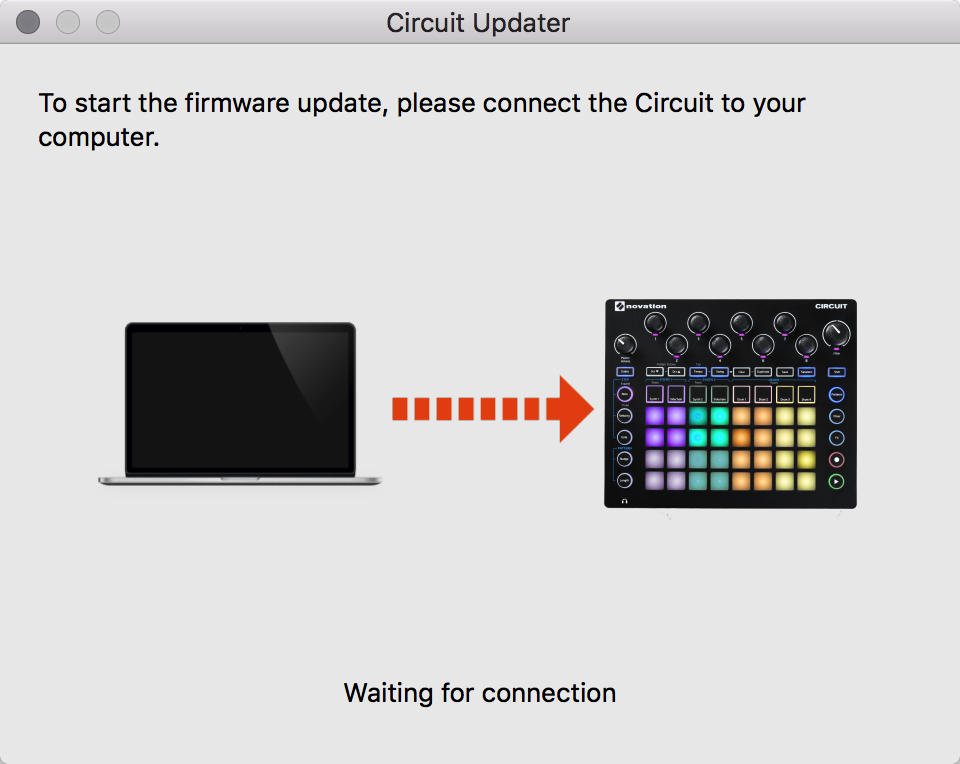
3. Install the updated firmware. Circuit 1.2 firmware (as of this writing) adds all the features you need. Connect your Circuit to your computer, run the updater, and you’re ready to go.
4. Install the editor. Isotonik have built an editor for the Circuit’s synths. You can download two flavors – one standalone, and one for Ableton Max for Live. You’ll register on Isotonik’s site, and then each is a free download. Note that the Max for Live version requires Ableton Live 9.2 and Max for Live 7.0 or later. The Isotonik page is here (scroll down):
http://isotonikstudios.com/novation-x-isotonik/novation-circuit-editor
Now you’re ready to get started.
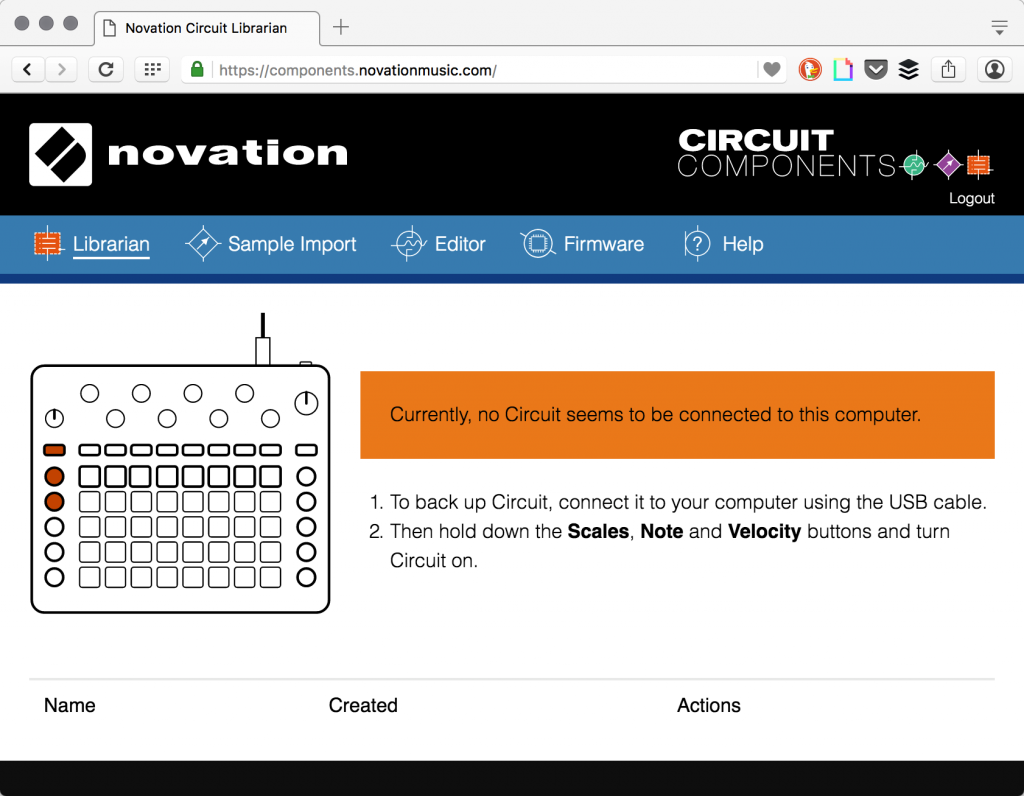
Novation has consolidated most of what you need at components.novationmusic.com. Once you open that site in a supported browser (recent versions of Chrome, Opera), it’ll first check to see if you’ve got a Circuit connected via USB.
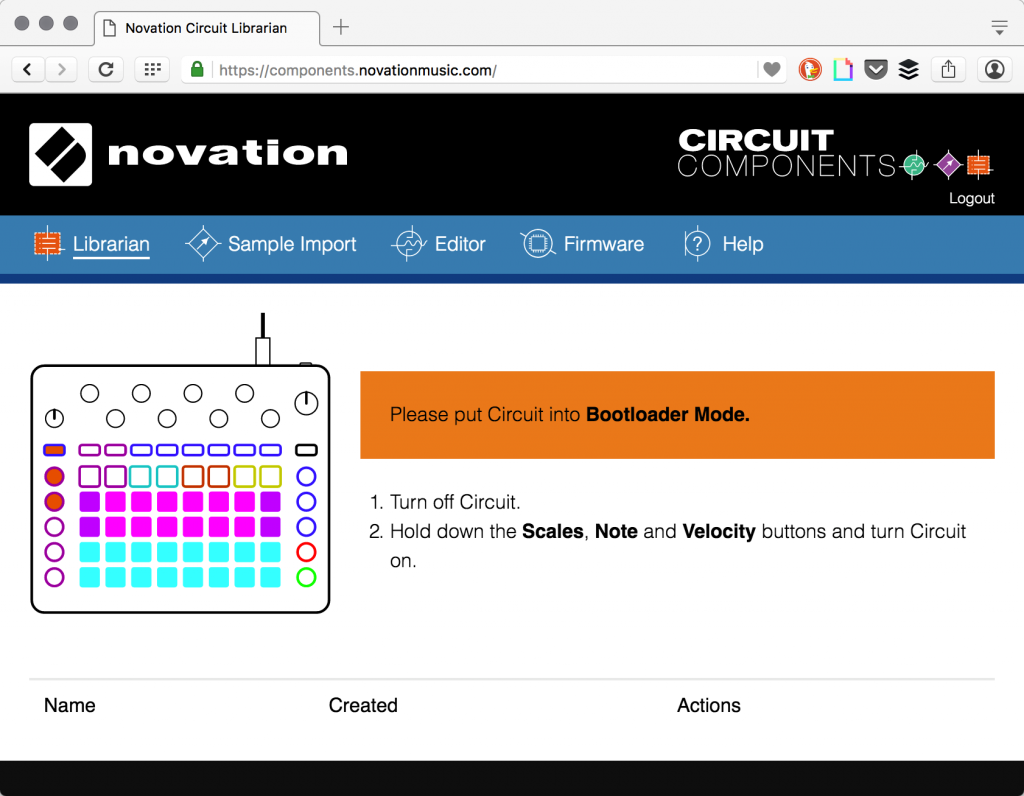
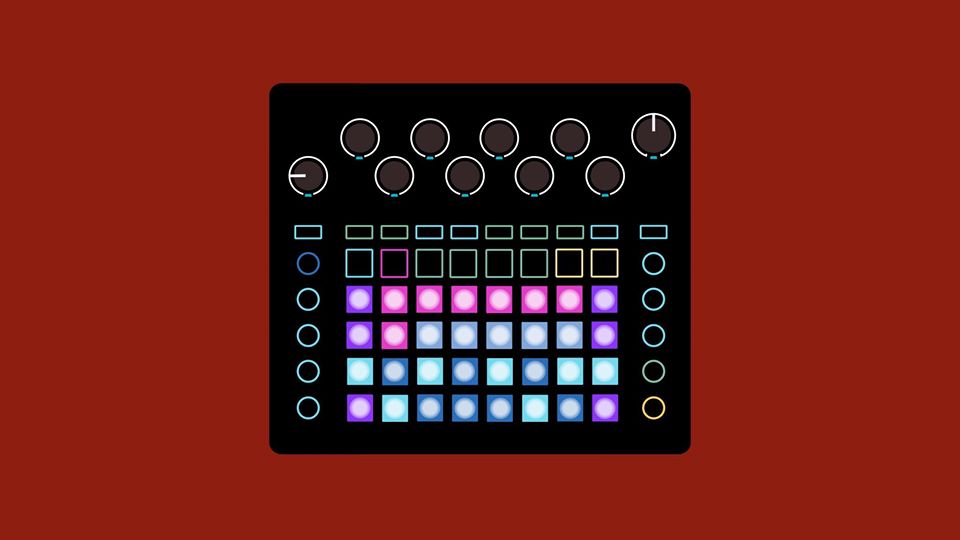
Next, you’re prompted to switch your Circuit to “bootloader” mode.
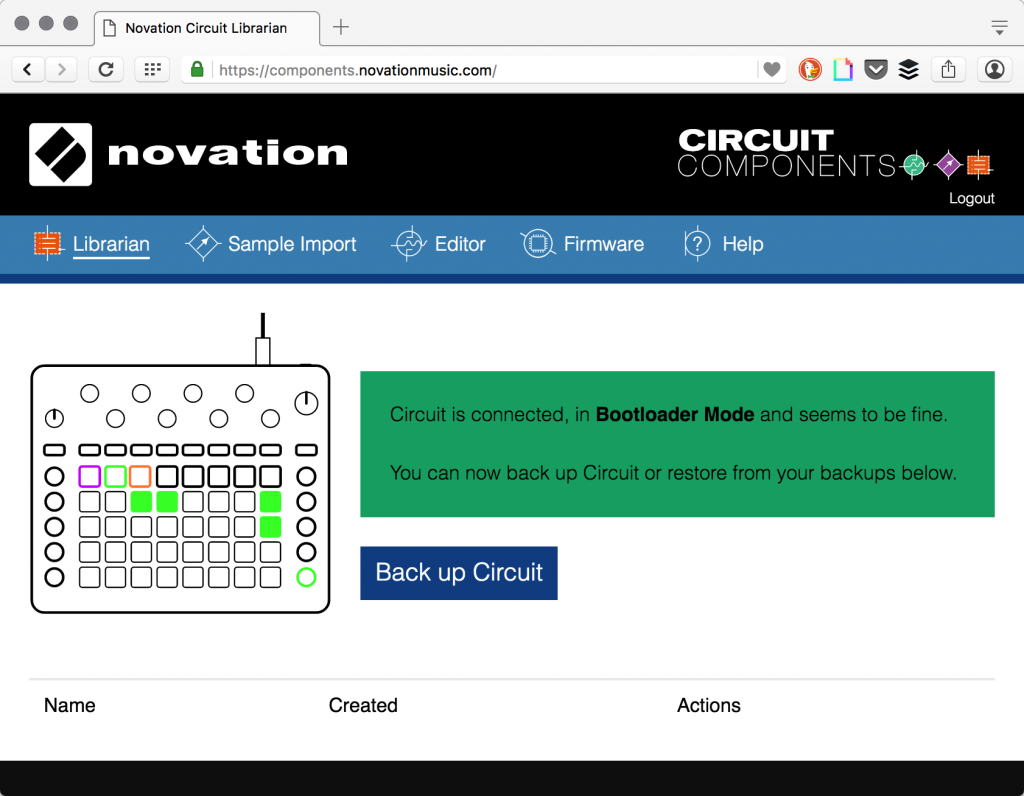
Finally, you’ll see a pattern of green lights indicating you’re in bootloader mode and ready to communicate with the browser tools. (Don’t worry if your pattern of green lights doesn’t match exactly.)
Load your own samples
As seen in the video, one of the big features in the new firmware is the ability to load custom samples. So, for instance, I’m a huge fan of Goldbaby’s grimy, retro drum samples. Any pack of drum sounds can now replace the four drum parts on the Circuit.
You can also load melodic samples (or anything else). Here, you’ll want to chop up those samples in advance. In Logic Pro X, I like to first add transient markers to audio (automatically). Once you’ve done that, and adjusted transients to your liking, you can right-click the audio, and choose Slice at Transient Markers. That creates a bunch of regions which (as of Logic Pro X 10.2.1) you can now batch export – so it’s perfect for this job. (Choose File > Export > [x] Regions as Audio Files.)
In Ableton Live, there’s a bit of extra work to get the actual samples out. If you have a Drum Rack, you can go to each slot, open the Simpler or Sampler instance, right-click, and choose “crop” on the audio file. Then you’ll find the files inside the /Samples/Processed/ folder.
Some other DAWs make this easier, and you can also use tools like the free Audacity editor, Propellerheads’ ReCycle, or a nice dedicated tool like Oscillicious BeatCleaver.
Once you’ve got your files, you’ll want to understand how Circuit organizes them.
Because of the available memory on the Circuit, you can load up to 60 seconds total playing time of 16-bit, 48kHz audio, as uncompressed WAV files. (MP3 files work, too, but not other formats; I recommend WAV.) There are 64 sample slots in total. So, for instance, you could take a 60-second melodic file, and divide it into up to 64 slices.
Circuit access these samples via Drum 1, Drum 2, Drum 3, and Drum 4.
To load the files, open Circuit Components in your Opera or Chrome browser. The first time you load a compatible browser, you’ll see a prompt asking for your permission to use Web MIDI; approve it so your browser can access your hardware.
Next, choose Sample Import. You’ll be prompted to enter bootloader mode if you haven’t already. Hold down Scale, Note, and Velocity with the unit powered off, then hold the power button to power it on. You’ll see a pattern of green lights.
Then, choose New Sample Set.
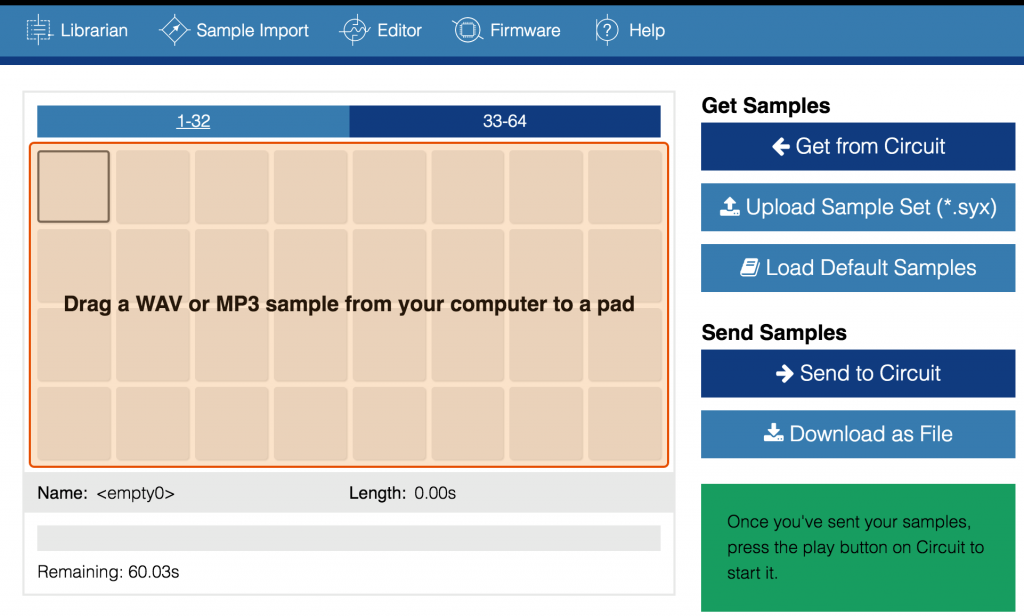
The first time you create a Sample Set, you’ll do so manually. You drag one file at a time to one pad slot at a time. (Hopefully we see a future update that allows multiple file drag-and-drop – browsers support that possibility.)
Don’t panic about the “bootloader mode.” You can always go back to the defaults by choosing “Load Default Samples,” so you won’t do any harm!
Once you’ve loaded all your samples, choose Send to Circuit to load them onto the hardware. After they’re loaded, you can also try them out by hitting the Play button.
You can only have one sample set loaded on your Circuit at a time. So, once you have a sample set you like, choose Download as File. Now you can upload different sample sets as .syx files, without any more drag-and-drop.
You can also use the Librarian in Circuit Components to save everything in the cloud.
Play with sample sets
There are some limitations to how you can use your custom samples. Since they’re loaded to Drum 1-4, you have just four simultaneous sample parts. You can swap any one of those parts between samples, via one of two methods:
1. Switch samples via the pads. Hold down Shift and tap the Drum part you want. Now, you can change samples on-the-fly by tapping one of the 32 pads. Drum 1 and Drum 2 default to slots 1-32 first, and Drum 3 and Drum 4 default to 33-64; to get to the other 32, use the octave up/down buttons.
2. Switch samples via MIDI. You can’t automate sample changes on the Circuit itself, but you can via MIDI. Control Change messages sent on channel 10 will switch samples: CC 8 (Drum 1), 18 (Drum 2), 44 (Drum 3), and 50 (Drum 4). That means you can have some fun creating clips in, say, Ableton Live, while you play, or map to a controller and switch samples live. (Check out the Peavey faderbox in our artist video, for instance.)
You can also control parameters of the samples, just as with the drum parts, via Circuit’s encoders.
Unauthorized tip: I’m fairly certain Novation don’t want me to say this, but it’s a bit cool. I discovered by accident – as you probably will – that an empty sample slot makes a little “click.” That click you can even re-pitch and distort and sequence. So, as a big fan of music like the stuff on raster-noton, I’ve actually taken to making some sequences with this. Have fun with it before they decide to “fix” it.
Play chords (not just melodies)
Synth parts can be polyphonic as well as monophonic. That means you can enter chords into the sequencer. There are a few tips for making some unique use of this feature.
First, enter your chord progression. Hold down the step you want on the bottom half of the pads, then either play a chord on an external MIDI controller, or on the keyboard on the top half of the pads. Now that chord is stored in that step. (You can add up to six notes per step, for six-note chords.)
Normally, these chords will play along with the step sequencer. To stop that from happening, mute the Synth part. Press Mixer to switch to Mixer mode, and then mute the associated part by tapping the pad underneath Synth 1 or Synth 2. “Mute” is something of a misnomer – you’ll still hear the part, but it won’t play in the sequencer, meaning you can trigger chords manually.
Now, with the sequencer playing or not, you can tap the step to trigger the associated chord.
Here’s the fun bit: with the Circuit as a controller, you can use those chords to trigger another synth. So, for example, Olly at Novation has built a whole Ableton Live set in which he uses the Circuit to trigger custom synths and arpeggiators using these chords.
Stay in the flow while playing
Two new features in the firmware update can be a big boon to keeping your flow going as you play – that’s really essential if you use hardware live, as I do.
First, you can now write automation for just the part of the sequence you want, rather than overwriting the whole sequence. (Boy oh boy do I wish I could do this with some of my other gear.)
Hold down record as you turn one of the encoders, and “momentary record” writes automation data only as the record button is depressed.
You can also add and remove automation to just a particular step, when the sequencer isn’t running. To add automation to a step, stop, make sure recording is armed (with the record button), press red to select it for editing (it’s highlighted red), then move the encoder.
To remove from the same step, also with the sequencer stopped and record is armed, tap the step you want, hold down clear, and then twist the knob you want to clear just that automation.
You can also review these techniques with the 1.2 firmware video from Novation:
Tinker with synths
So, you can transform Drum 1-4 by changing samples. But you can also get much deeper with Synth 1 and Synth 2 – if you don’t like the stock, preset sounds, you really can make Circuit sound like just about anything you want. A lot of the character of the instrument isn’t so much the engine as those preset sounds; you can push it in very different directions. There are three ways you might about this.
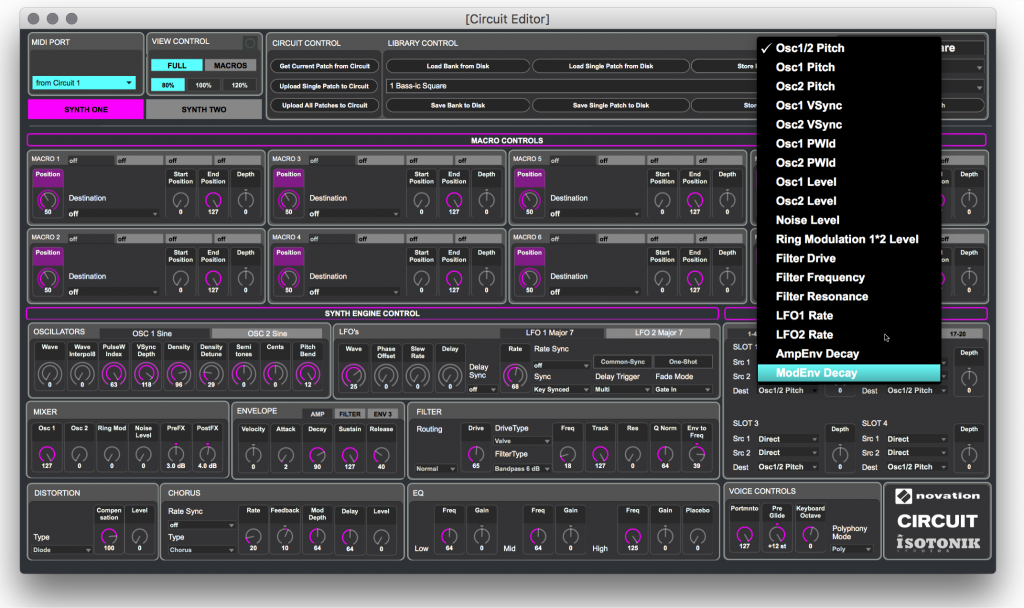
Modulation routing along can do some crazy things to your instrument patches. And it’s far deeper than you might suspect looking at the Circuit front panel.
The software editor. Isotonik’s Circuit editor, built in Max, is kind of amazing. You’ll see that hidden behind the Circuit’s eight encoders is an entire synth engine waiting to be customized. One good way to start is by re-assigning the Macro knobs so you can control what you like with those encoders. If you want to dive down the rabbit hole, try the modulation section in the bottom right-hand side. We could practically do a feature just on this editor, but that’ll get you going.
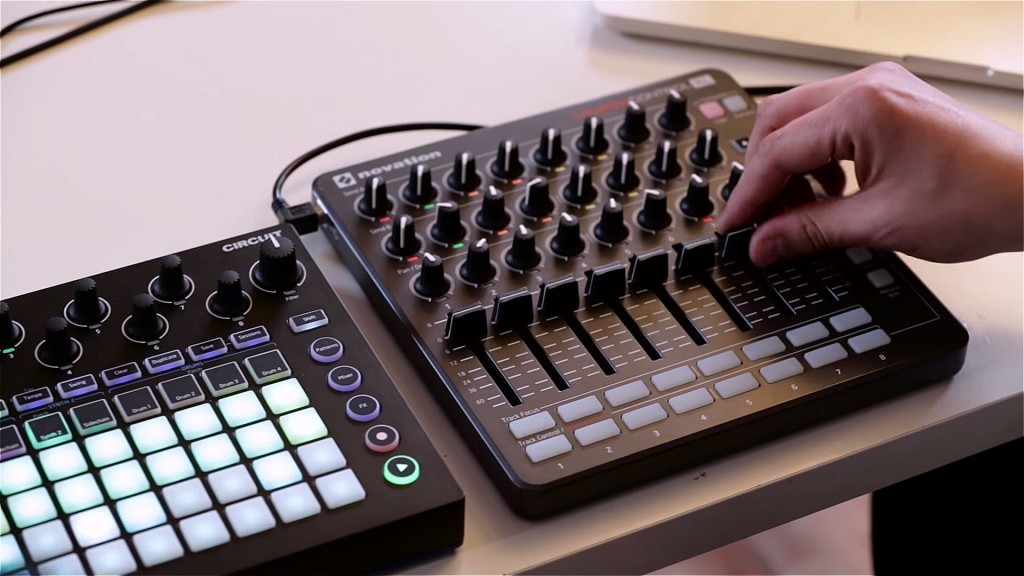
External MIDI control – including the LaunchControl XL. The editor works because all these parameters are accessible via MIDI. But then the editor isn’t the only way to get at them. You can also use an external MIDI controller, as My Panda Shall Fly did with his Peavey. If you don’t feel like manually assigning those, Novation has built a set of layouts for its LaunchControl XL control surface. The Mixer alone is huge, plus there are pages for controlling each synth and drum part. And because the LaunchControl XL works in standalone mode, you can even do this without a computer. (Since the LaunchControl XL lacks MIDI DIN ports, you’ll need a hardware USB MIDI host like the Kenton USB host.)
Check out the layouts here:
Using Launch Control XL With Circuit
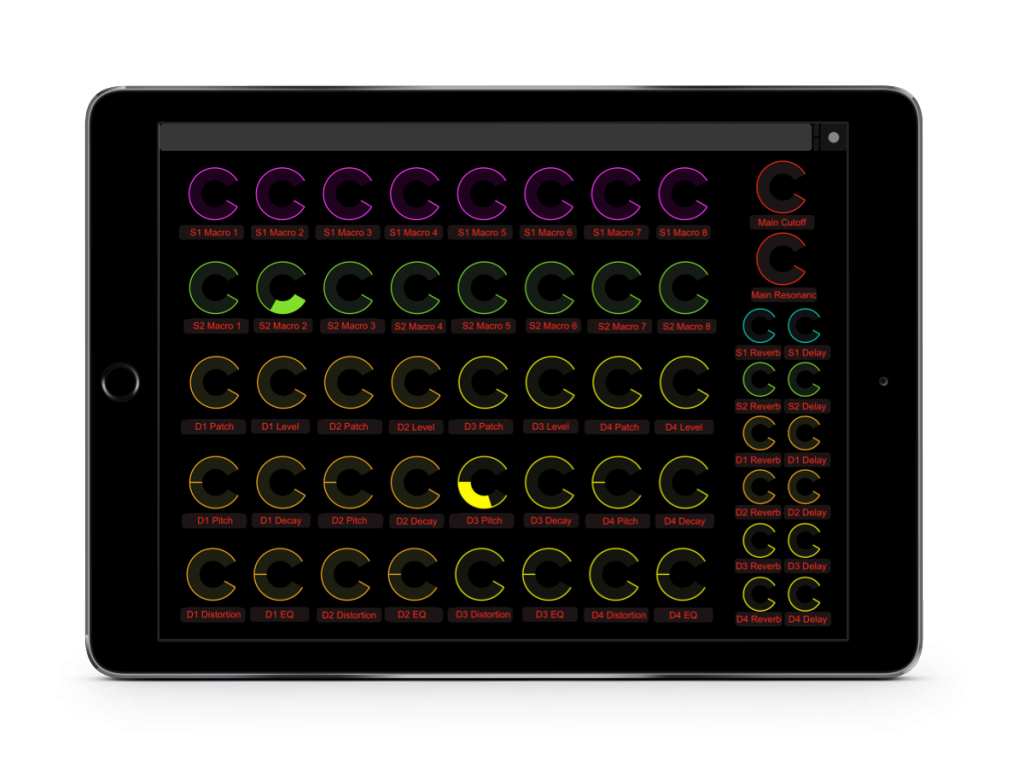
iOS and TouchOSC. If you have an iPad, you can send MIDI from that. Again, Novation has built one solution for you out of the box, in the form of an iPad-only (sorry, no iPhone) layout for TouchOSC. Because it’s a TouchOSC layout, though, you can open it with the TouchOSC editor and modify it – as some CDM readers have already done. For instance, you might want to make an X/Y pad for controlling parameters with sweeping gestures of your finger.
Get it here: What is the TouchOSC Circuit template? [also the Jeopardy answer to the clue: “This download lets you control the Circuit with your iPad,” in “Novation downloads for $200”]
Capture ideas with MIDI
If the onboard step sequencer seems limiting on the Circuit, you can also record external MIDI.
For example, let’s say you’ve got a MIDI clip you like in Ableton Live (or any other program that sends MIDI from clips).
1. Sync. Make sure your computer and Circuit are synced via MIDI clock.
2. Set length. Set the length of the clip to the length of the Circuit step sequence. That pattern/clip can be anywhere from one to eight bars in length. Choose Patterns on Circuit, and then set the length (for instance, for a full eight-bar length, press pads for pattern 1 and 8 at the same time.)
3. Capture. Then, simply hit record on the Circuit whilst your MIDI clip is playing. Now the MIDI sequence on your computer is on your Circuit.
You can also use an external MIDI input to play in a sequence from any other controller.
More
Got more tips? Other things you want to know? Let us know.
For more information, see the other parts of this series:
Artists share Novation Circuit tips, with Shawn Rudiman and My Panda Shall Fly
Make Novation Circuit your own, with updates, browser tools
And you can see these techniques in action in our artist video:
Vector art of the Novation Circuit provided by the wonderful Vector Fun with Synths.
Disclosure: This guide was produced with support from and collaboration with Novation.