Pick up a pen and draw a sketch. There, that was easy – however crude, you can get out an idea. Sketching with paper is still the fastest way for most of us to imagine something. But between that immediacy and the end result, you need prototypes.
The Processing language has long been one of the easiest ways to sketch an idea in code – best after you’ve first put pen to paper, but as an immediate next step (and for ideas you just can’t draw). Built in Java, the creation of Ben Fry and Casey Reas and a broad community of free software makers, it runs on Mac, Windows, and Linux. Via Processing.js, the same API works in a browser via JavaScript. It has inspired the OpenFrameworks project, which uses nearly the same API. Those tools let you intermingle Java, JavaScript, and C++, as they’re written natively in those languages.
Processing now runs just as easily on a mobile platform with Android. You can try it with the free SDK and emulator, but it’s most fun with a device. Using all free software, you can sketch easily on mobile and desktop from one environment, and with only minor modifications, run the same code on a desktop, a browser, and a mobile device.
Translation: with one, elegant API, you can “sketch” visual ideas on screens from an Android phone to a browser to a projection or installation. As a prototyping tool, or for finished projects, that makes it an exceptional, expressive tool for making interactive visuals for screens.
This is a first-draft tutorial, as I make the same presentation in Stockholm at the info-rich Android Only conference. I’m eager to put it out there and find out that people have problems, as I can then improve the documentation. So do give it a try – especially if you’ve got (or can borrow) an Android phone.
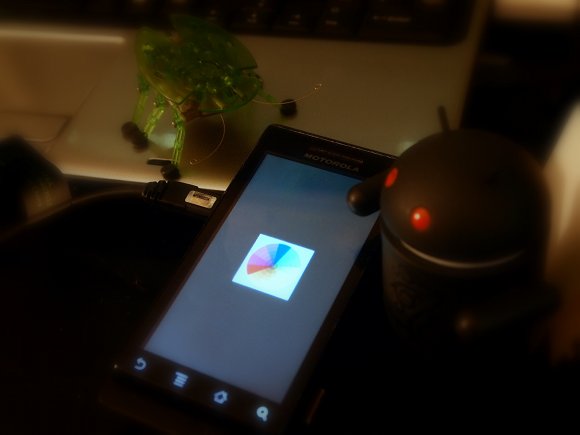
Processing on Android performs all of the core functions of Processing on desktop – 2D and 3D visuals, data manipulation, images, and type – and you can mix in Android code using the standard Android APIs, right in the same project. Processing controls the screen on which it’s drawing, for now, but you can mix and match everything else, to support multi-touch, sensors, and even NDK code. (I’m using it with Pd for Android, with Pd doing sound and Processing doing visuals.)
I’m assuming basic familiarity with Processing, so if you haven’t tried it out yet, check out the excellent tutorials available online to get rolling.
Install Processing and the Android SDK
Definitely read the latest official instructions:
http://wiki.processing.org/w/Android
1. Download the latest pre-release version of Processing. Eventually, the standard Processing download will support Android automatically out of the box – very cool. The current stable version doesn’t yet have Android support, however, so for now, you’ll need the latest pre-release build, which includes all the code for the testing release of Processing for desktop and Android. I tested with 0190.
2. Download the Android SDK. For now, you do need to download the SDK for Android separately, which is an extra step – but at least it’s completely free, and runs on any OS. See:
developer.android.com (This step will eventually go away.)
You can put the SDK anywhere you want; just make a note of where you’ve installed it, as you’ll need to point Processing to that location later. Follow the instructions carefully on Google’s site. On Windows, you’ll need to download the USB driver. On Linux, you’ll want to read the complete Developing on a Device instructions, as there are a few short commands you have to enter at the command line because of the way Linux talks to USB devices.
Lastly, even though that SDK is a big download, you’re not done until you download additional components from Google. This allows a single recent version of the SDK – like the 2.2 SDK I tested – to support a variety of older versions for backwards compatibility.
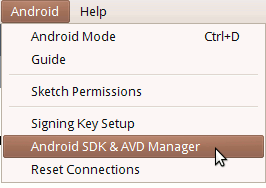
I have Eclipse installed, because it’s a handy tool for developing Processing for desktop and Processing for Android on any OS. Once you’ve installed the Eclipse plug-in for the Android SDK, you can add components from inside Eclipse. Inside that IDE, choose Window > Android SDK and AVD Manager Manager and you’ll get a graphical interface for adding these components (pictured).
You can now also access the same interface from within Processing. Choose Android > Android SDK and AVD Manager.
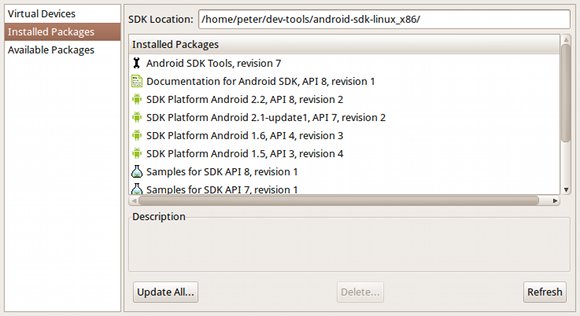
For Processing 0190, you need the SDK Platform 2.1, API 7 and Google APIs by Google, Android API 7. (If you’re an Android developer, you’ll probably also select some other components here, as well.) Components are available under the Available Packages.
If for some reason you prefer to use the command line, head to the Windows, Mac, or Linux command line, and follow the commands in the Quick Start under the Android SDK download instructions.
3. Run Processing, and switch to Android Mode. Load the Processing IDE you just installed, and switch to Android Mode.
The first time you do this, you’ll need to direct Processing to your Android SDK. Choose the root directory of the SDK – the directory that contains “add-ons,” “docs,” “platforms,” “tools,” and the like.
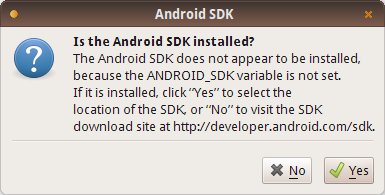

4. Try running a sketch on the emulator. I’m compiling a set of simple sketches you can use with Android, but even many of the basic examples will work out of the box. For fun, you can try sketches like those found in the Examples > Basics folder and some of the other included Processing Examples. They don’t take into account varying screen resolutions, which is a cool feature of Processing for Android, but it’s still fun to watch them run.
It’s simple to run a sketch. Open the sketch you want, go to Android > Android Mode to enable Android Mode for the sketch, and then hit Run. Instead of opening in a window as desktop Processing sketches do, you’ll see an Android emulator appear.
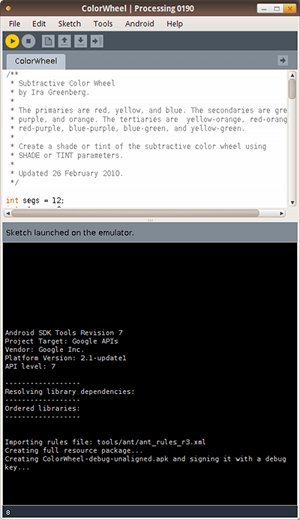
Be prepared for the emulator to take … some … time. You’ll spend a long time looking at the load screen. When it does finally load and install, there may still be a delay as you stare at the main screen. You may have to hit run again. You may see error messages saying an application has become unresponsive – don’t worry about that; Android has a low threshold for applications timing out, so while the emulator is loading, just choose “wait.” And because the emulator defaults to a large screen size, it’ll also take up some room on-screen.
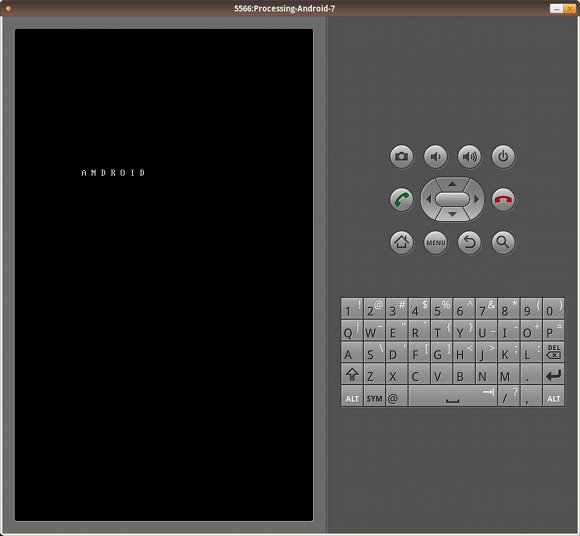
It’s just slow, painful, slow, and unreliable. Fortunately, running on the device is near-instantaneous and speedy, so beg or borrow access to one and try the next step.
5. Try running a sketch on a device (if you’ve got one). Running on the emulator is a pain, but running on a device is very quick – even quicker than you might imagine if you’ve come from a background on iOS. (Remember, you’re working with Java, not native code.)
In a clever design feature, to run on the device instead of the emulator, simply choose Present instead of Run. (The quickest way is simply to shift-click the play button.)
So long as you have a device connected with USB, and USB debugging is switched on, and you’ve done the setup correctly above, you’ll see your sketch appear on the device.
Now, that’s more like it.
“But, wait,” you say. “Android devices have all different screen sizes. Augh, fragmentation, fragmentation!”
Fret not: computers have different screen sizes. Projectors have different screen sizes. And Processing on Android can easily adapt to the size of the screen. We won’t need much Android-specific code, but let’s get started with our own Processing sketch and see how it works when you’re preparing for mobile.

Try Writing Some Code
Okay, so what does a Processing sketch for Android look like? Here’s a really simple example, just to show off basic drawing, managing different screen sizes, and simple (single) touch. (I’ll leave density for another day; multitouch and other touch events are also possible.)
[java]float sw, sh, touchX, touchY;
void setup() {
size(screenWidth, screenHeight, A2D);
println(screenWidth);
println(screenHeight);
sw = screenWidth;
sh = screenHeight;
}
void draw() {
background(0);
smooth();
fill(255);
noStroke();
ellipse(sw/2, sh/2, sw/4, sw/4);
noFill();
stroke(255,0,0);
strokeWeight(2);
ellipse(touchX, touchY, sw/4, sw/4);
}
void mouseDragged() {
touchX = mouseX;
touchY = mouseY;
}[/java]
Two things to note, in particular:
[java]size(screenWidth, screenHeight, A2D);[/java]
(Warning: don’t put variables in that size() command.)
Processing for Android will map the desktop renderer names to either A2D (for 2D graphics) or A3D (for 3D). (I’m using the Android names here, but the other names will work just fine.)
Also, since static pixel sizes don’t make sense on mobile platforms with different screens, you can substitute “screenWidth” or “screenHeight” and get dimensions from the device on which you’re running. (I just used “sw” and “sh” because they’e shorter, and then I can make everything else relative.)
[java]void mouseDragged() {
touchX = mouseX;
touchY = mouseY;
}[/java]
Here’s the really cool part — touch input works exactly the same way as it does on Processing on a desktop, for relevant mouse commands (nothing involving these strange “buttons” of which you speak). mousePressed, mouseDragged, and mouseX and mouseY all work as expected, so long as you’re satisfied with simple, single touch and don’t need gestures, multitouch, and the like. Don’t be confused by my touchX and touchY variables — those are just to demonstrate that my circle only moves when it’s “dragged” — or your finger slides across the screen. What we have is the beginnings of a drawing app, which I’ll be expanding over coming tutorials.
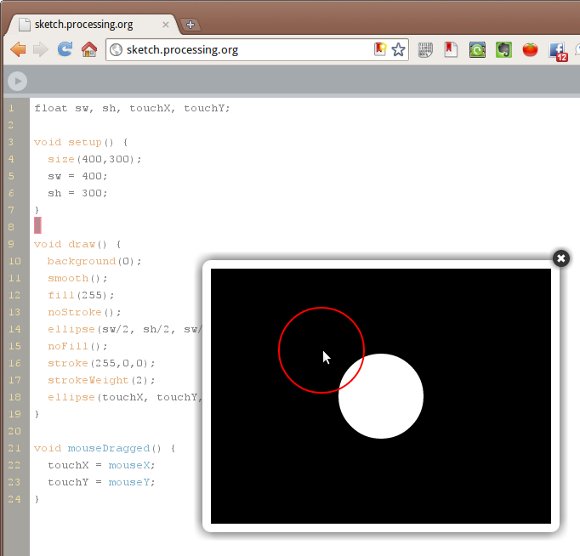
Here’s the other cool thing: modifying only the references to screenWidth and screenHeight, and the renderer, I can run exactly the same code in Processing on the desktop, or even in Processing.js on a browser.

Tune in Next Time…
This is not a replacement for the official wiki documentation, so do read that, please.
In coming installments, I’ll share:
1. How to get Processing for Android working inside Eclipse. In short – it works. That makes adding Processing to an existing Android app easy. (Hoping to follow that up with gedit and Ant)
2. More advanced tricks for dealing with screen dimensions and touch.
3. Android-native snippets for connecting sensors.
4. How you can combine sound and visuals with Pd and Processing, both running on Pd.
Other things that are possible to do with Processing for Android (which I’ll cover):
- Use install custom or installed fonts
- Data visualization (just as on the desktop version – making this much easier on mobile than in the past)
- Touch events, relative motion, and key events
- Force a specific orientation
- Add security requirements to the manifest (for things like sensors), right from the PDE app – no need to edit a file or go to Eclipse
I also hope to take some notes on what happens here at Android Only.
Processing for Android is still in development, and this is pre-release software. So be prepared to encounter issues. That said, I want to refine this documentation, so please let me know if you encounter issues with my instructions.
Presentation slides
Here’s my presentation from Stockholm:
Share what you’re doing…
Noisepages registration is open again as we finish the site. Share what you’re doing, devices you’re testing, or other thoughts:
http://noisepages.com/groups/processing/forum/
