It’s been a week now since Adobe Lightroom Beta 3 for Windows was released. In that time I’ve had some a bit of confusion, some fun, productive times, a couple of epiphanies, plenty of crashes, and have eventually developed a bit of a geek crush on this new software from Adobe.

A little background: I’m not a professional photographer. I’d probably place myself in the “committed amateur” category. I have a a Sony Point and Shoot and a Pentax Digital SLR with a couple of lenses, and have shot close to 20,000 images in the last 3 years. I use photography for stop motion, gig and press photos for bands, general happy snaps and to capture source material for visuals. Lightroom may not be targeted primarily at visualists, but you definitely don’t need to be a professional photographer to see where it could be useful.
What Does It Do?
If you start out your Lightroom journey with the following piece of information everything will make sense to you much faster: Lightroom is a non-destructive editor. All of your actions – crop, colour balance, rotate, sharpen, scale – are saved as metadata in the Lightroom database. The image files themselves are untouched until you export them. This is a great workflow choice for photographers – and will be familiar to users of programs such as iPhoto – but it caused me a little of that aforementioned confusion until I figured out what was happening.
Aside from photo tweaking (Develop module) Lightroom also carries out some Digital Asset Management, taking care of keywords, ratings, IPTC data etc. (Library Module), Printing images and contact sheets (Print module), and Slideshow display (Slideshow module). The Mac version also contains a Web module which outputs flash and html gallery pages and apparently has an FTP client for seamless upload action. I’ve seen a Describe module mentioned as well, so it’s quite possible that the Beta 3 feature set could change drastically before the commercial release.
What Doesn’t It Do?
Lightroom doesn’t do masks, “airbrushing”, pixel editing, cartoon captions, emboss, plastic wrap, posterize, drop shadow, bevel, glow, twirl, or any other effects that newbies want to see in an “image editing” application. This is designed for people who shoot a large numbers of frames and want to work effectively with them en masse before they hit a raster editing program such as Photoshop. This isn’t to say that it’s only for professional photographers. The developers have managed to put together an extremely friendly, intuitive application that I would definitely consider purchasing for my parents so they can organize, edit and print out their prodigious collection of grandson photos.
What Does It Do Well?
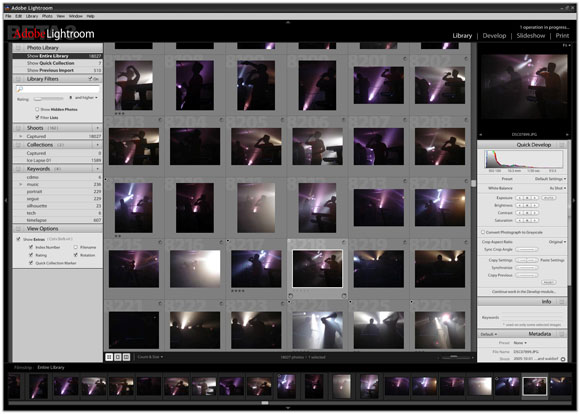
Importing is currently a bit unstable: I stopped counting at 10 crashes and gave up importing at 18,027 images, several thousand short of my full library. Beta Software though, so I don’t expect the crashing to be a feature of the final release. The import process is smooth but powerful, allowing you to set filename masks, IPTC and keyword data, and even pick a default Develop setting, so you can have Lightroom automatically fix levels or white balance for all imported images. Auto Import can be set up to monitor a folder for images and apply a set of import settings, so the import process goes like this: Plug in digital camera, start Lightroom, and your new images are all imported and waiting.
For those who don’t have an orientation sensor in their camera, the addition of rotate buttons when you mouse-over a thumbnail in the library is welcome. Fixing image orientation is one of those things that almost everyone does a lot of, so it’s a surprise that most programs don’t put this function right under your mouse.
Still on rotation: I thought that all of the innovation in crop and rotate tools had already happened, I mean, they’ve introduced the “darken cropped area” feature. That’s got to be the cropping pinnacle, right?
Lightroom’s crop and rotate is a thing of stunning beauty. When cropping, the aspect ratio can be chosen from a list of common formats or left arbitrary. “Rule of Thirds” markers show up to help you get those crop proportions right, which is handy, but hardly revolutionary. It’s when you rotate the image that the magic happens. When rotating, the crop box remains stationary and the image is rotated behind it, allowing you to see what the end result will be rather than having to rotate your head and pretend there’s not an ugly aliased box around your image. This is such a simple “Why didn’t anyone think of that before” change, but it improves the humble crop experience hugely (Peter informs me that users of iPhoto and Motion will be familiar with this style of tool). I’ve seen quite a bit of grumbling about this online, and I can understand that it’s jarring at first if you’re used to Photoshop. For me the image rotation seems flipped, but It doesn’t take long to adjust to this way of working, and when you have it will feel like the only logical way to crop digital images. Expect to see this in future versions of Photoshop. Holding down CTRL while in crop mode brings up a tool similar to Photoshop’s Ruler, allowing you to draw along the horizon line or another feature and have the program automatically rotate and crop the image accordingly.

Setting of ratings and keywords is quick and easy: Ratings are set using numbers 1-5, and keywords can be typed comma-seperated into the Info panel or can be dragged from the sidebar onto the desired image or group of images. A pleasant surprise was that images rated within Adobe Bridge retained their ratings in Lightroom. I haven’t tested further, but I hope this means that the programs will keep metadata changes in sync.
The UI is generally great; modern enough to make you feel slightly excited, but muted so as to not take focus from the images you’re working on. There are plenty of keyboard shortcuts to toggle toolbars and edit panes to minimize distraction and maximize screen real estate. There are plenty of clever UI tweaks and hidden shortcuts to be found. A couple of nice things I’ve discovered:
While in Grid mode, Click and hold on the currently selected image preview (top right) to bring up a “fit to window” preview (Loupe mode). Double click on the image preview to switch to Loupe mode, click and drag on the preview to view full 100% magnification, then click the “back” arrow in the top left of the preview to return to Grid mode.
When in Develop mode, mouse-over a preset in the left sidebar and you get a thumbnail preview of what this applied preset will look like.
There’s so much more to this program, but really I’d prefer to spend more time playing with it rather than writing about it, so I’m going to stop. If you’d like a more in depth look here are some great articles:
PhotoshopNews has a detailed article with plenty of screenshots.
Computer Darkroom’s analysis of changes between Beta 1 and Beta 3.
George Mann’s Adobe Lightroom Workflow has some useful tips, and real world advice for Lightroom and other Adobe products.