For all the many soft synths out there, maturity and depth matter – and few tools offer those quite like the almighty Serum. Whether you’re just getting around to trying it – or you already think you know all there is to know – sound maven Francis Preve is the perfect guide.
The timing is great, too – Francis has just turned out an extraordinary ambient album-cum-sound library with Tonepaper. The sounds run in Ableton Live, too, but the adapted Serum library goes even further thanks to the instrument’s architecture. You can put that on if you need to focus – or for added incentive to check out Serum.
So let’s start this weekend properly with one of the planet’s best synth sound designers – and some serious secrets that start with just a global preference for how double-clicks work. (really!)
In just a few years, Serum’s feature set has evolved so much that even long-time power users can have a hard time keeping up with all the goodies. Creator Steve Duda is routinely sneaking in amazing tools in each free upgrade, and unless you’re actively following the Xfer Forums and keeping up with upgrades, it’s hard to catch them all.
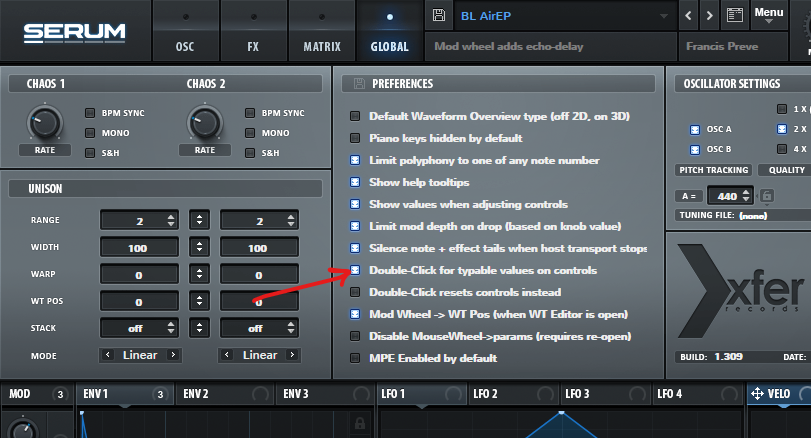
For a while now, the “Double-Click for typable values” option has been enabled by default on the Global page. Many people just use this to directly enter values for cutoff frequency, LFO rates, and such—but there’s far more power available than simple numeric entry.
Below are six features you may have missed in the years of updates (it’s at version 1.3x now). Even if you’re fully immersed in Serum’s universe, these design tools are worth a revisit.

1. Perfect equal-tempered intervals for modulation depth in Serum’s matrix
For dialing in pitch sequences, you can set mod depths to semitones, like 7 chromatic steps for a fifth or 24 semitones for two octaves, by adding ST after your numeric value. For example, with an LFO assigned to Osc A’s Coarse Pitch, you can set up a 12-tone octave by double-clicking and entering 12ST (Adding the “ST” is crucial, or it’s just a numeric value).
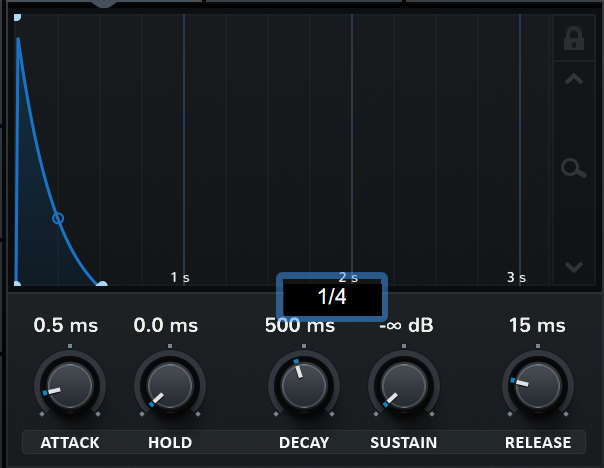
2. Tempo-synced envelopes
If you double click on a time-based envelope parameter, you can directly enter its value in milliseconds. But lo and behold, if you type in fraction like 1/8 or 1/2, that segment will lock a note value to your current DAW tempo. Just remember to repeat the process if you alter the tempo.
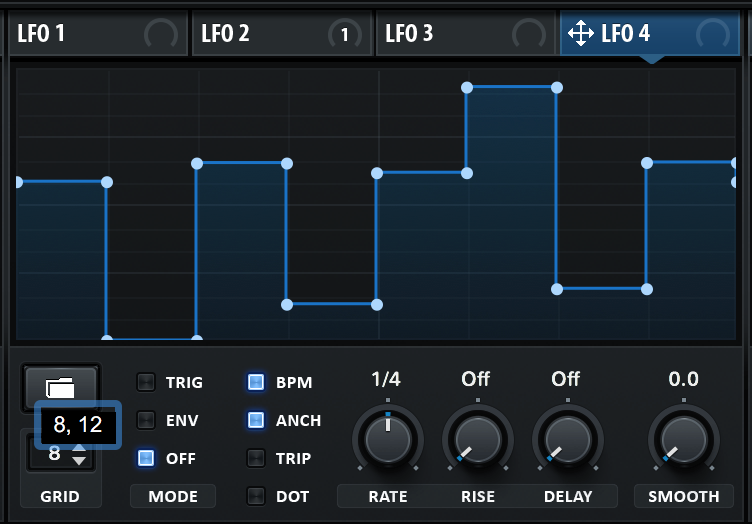
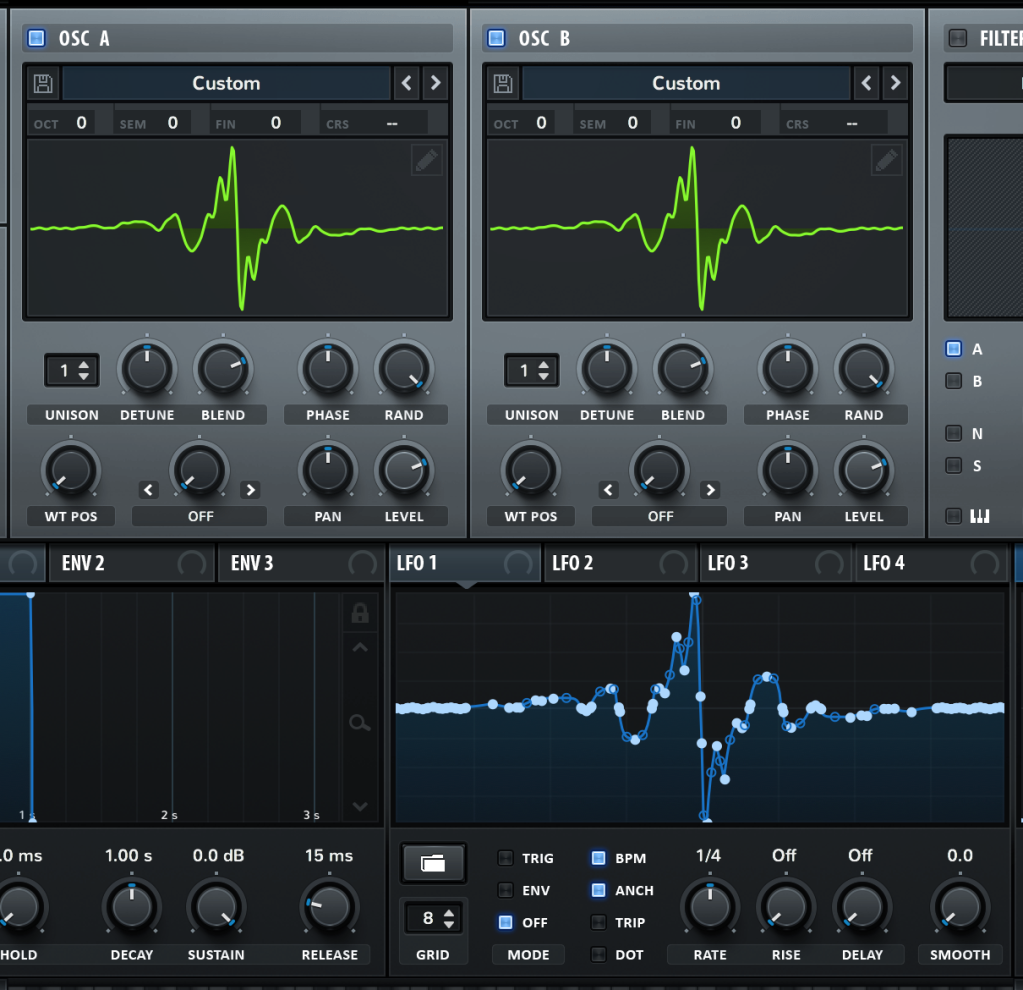
3. Setting the LFO grid to notes and semitones for step-sequences
Most users understand that holding down shift and drawing in the LFO window lets you create step-sequences that snap to the horizontal time grid—a bit like using the pencil tool on clip envelopes in Ableton. But holding down Shift+Alt together adds quantization to the Y-axis, so your step parameter values are also locked to the grid vertically as you draw.
With “Double-Click for typable” active, you can customize this LFO grid just by typing two numbers—separated by a comma—into the “Grid” parameter window. For example: 8,12 gives you an 8-step sequence with12 equal vertical values, while 16,24 will give you a 16-step sequence over 24 values (i.e two octaves, when applied to pitch). From there, you can set the modulation depth in multiples of 12 (described in #1) to create chromatic pitch sequences. After that, you can further refine the pattern by deleting points and changing curves to create 303 or electro effects.
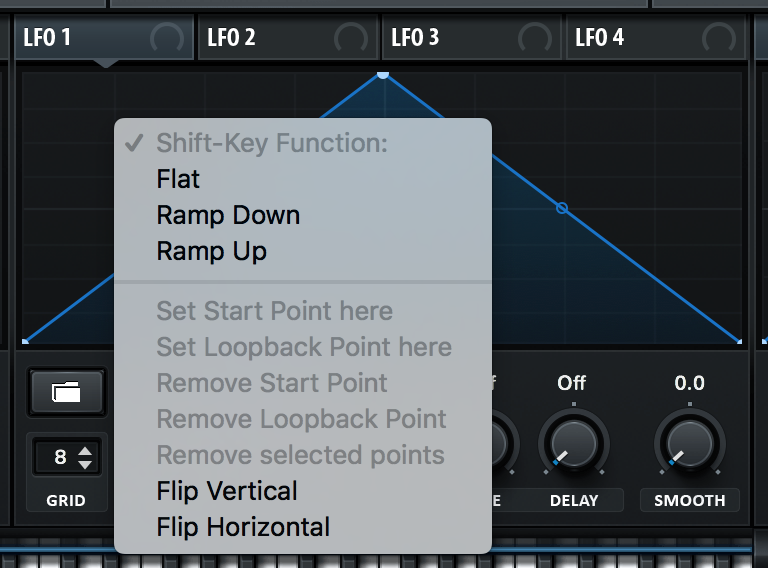
4. Control-click on LFO to select alternate drawing shapes
Going beyond the above step sequence techniques, there’s even more available if you control+click in the LFO window itself. In this menu, you can change the shape from “flat” (steps) to saw down – or saw up – for pew-pew (or woop-woop) effects. This menu also includes options for inverting the phase or reversing the LFO pattern, as well as several other exotic tricks for individual LFO point modulation.
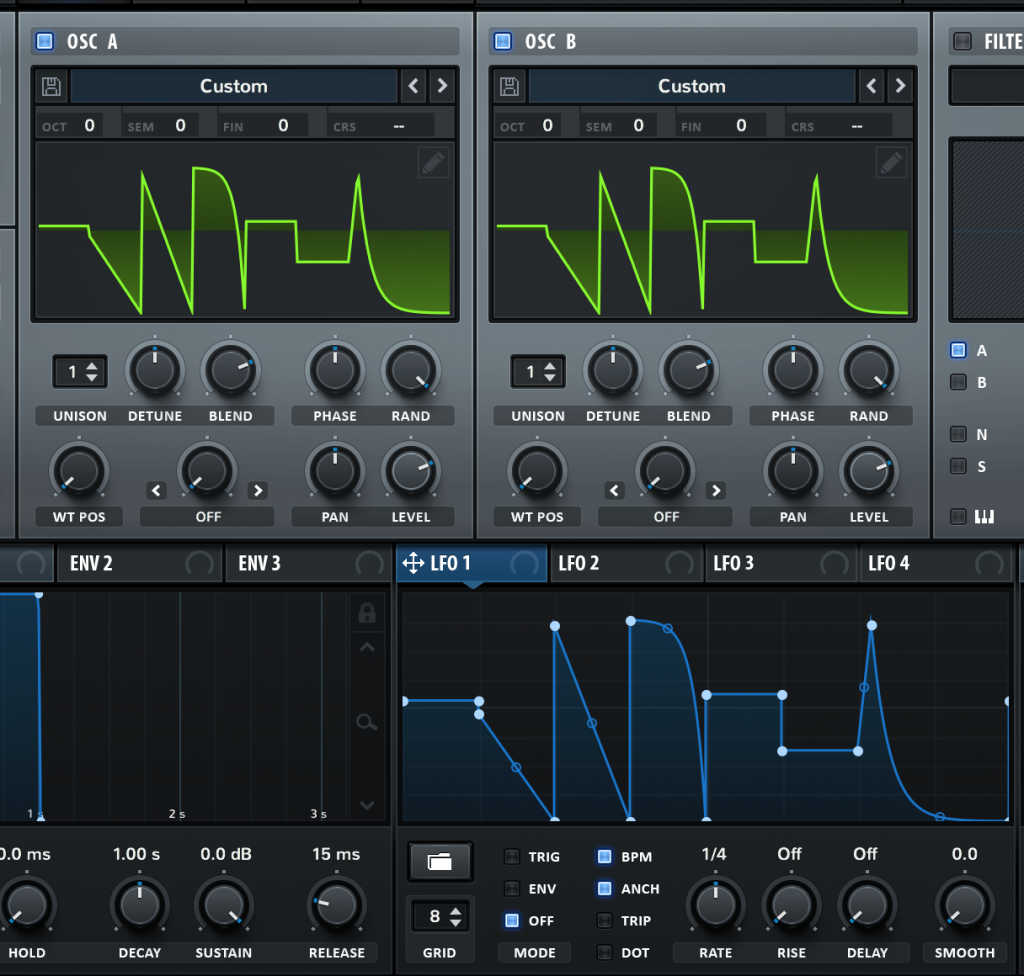
5. Alt-drag an LFO to an Oscillator to generate original waveforms
Once you’ve dialed in a complex LFO shape, you can actually grab the LFO “handle” and drag it into an oscillator window to produce your own original waveforms. These are single cycles (not complete wavetables) but if you repeat the process on a few frames while incrementing the index parameter (WT Pos), you can then crossfade the new table indices to construct a proper wavetable.
6. Coming soon: Convert Wavetable to LFO
In the next version of Serum (coming later this month) this LFO<>OSC waveform exchange will be bi-directional. By clicking on the LFO preset folder, there’s now a “Wavetable to LFO” option, so if you want weird wiggly LFO shapes based on harmonic structures, it’s almost here.
Well, hot damn. Sold. On that wavetable to LFO thing alone.
Stay tuned for more tips like this soon, in a special series we like to call “No One Wants To Hear Damned YouTube Ads While They’re Trying To Make Stuff Happen In The Studio Reading Is Actually Way Faster And More Effective.” Okay, shorter names welcome.
Find more Francis Preve:
And his sound boutique: