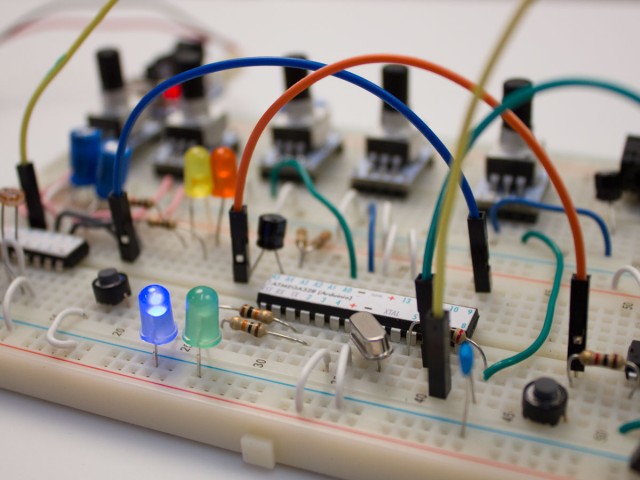
How much freedom do you want when building things? You want the ability to experiment and make choices, but you also want the process of making to be easy enough that you can play.
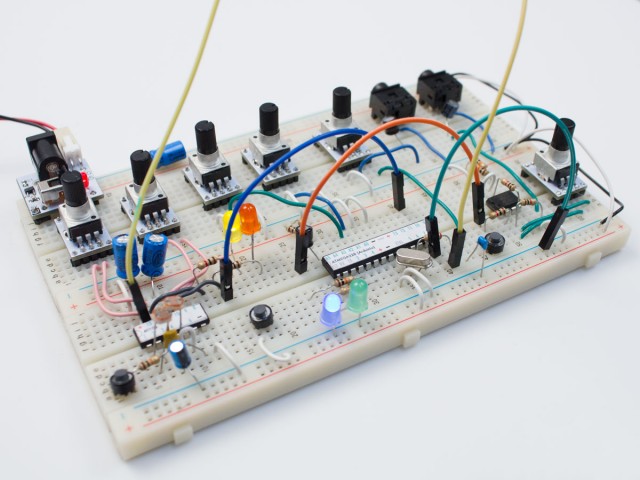
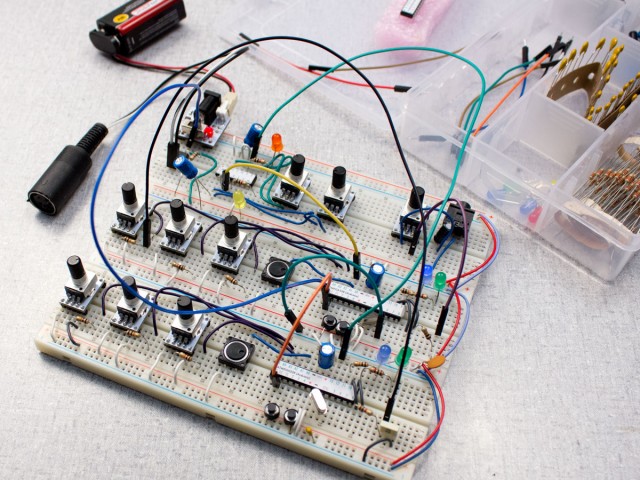
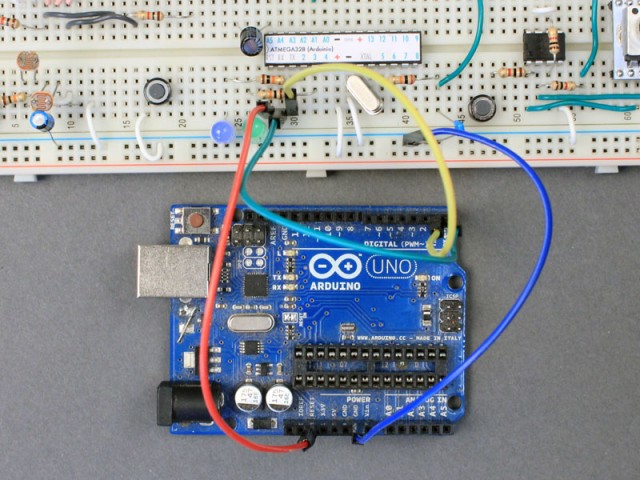
Bleep Labs last week introduced the first two kits in a series they’re calling Rad-Fi. The idea is, follow the instructions, and you can build a synth and an effect quickly by connecting parts on a breadboard. That makes kit assembly stunningly easy, because there’s no soldering involved. It also means it’s very possible to make modifications by snapping in additional parts, or, if you want to get fancy, reprogramming or adding intelligence with the aid of an Arduino.
The concept is not to be a kit on a single board – there are other options for this. Fueled by experience teaching workshops and helping people learn about electronics and sound quickly, this is best understood as a set of parts and techniques that rapidly puts an idea together, for later modification if desired.
Rad-Fi a collaboration between Bleep’s John-Mike and Pete Edwards (the latter, of Casper Electronics fame, is an American now based in the Netherlands – in case you’re in Europe and looking to book a great synth-building workshop). When I was in Amsterdam last year at STEIM, Pete showed me some of his projects – rich-sounding instruments capable of terrific sounds, all assembled from standard parts on a breadboard. Rad-Fi here are an outgrowth of some of those ideas, merged with efforts by John-Mike Reed in a similar direction.
Think of solder as glue. Once you’ve glued something together, it becomes tougher to modify. (As John-Mike told me, “don’t glue your LEGOs together” if you want to be able to change what you’ve built.) Here, by keeping parts free on a breadboard, you can see in practice how swapping individual parts can transform a sound, one step at a time. With those analog modifications, plus digital modifications to the chip, you have a synth or effect you can also modify, “bend” (circuit bending style), hack, or remake. (Uh, okay, those are words for the same thing, but in varying degrees.)
Rad-Fi is for now largely limited to breadboard existence, which raises some concerns for, say, carrying this to a gig (though it’ll look edgy). Then again, you could also design a PCB and housing around your finished creation. And such are the invariable dilemmas of instrument building and hacking – there will never be a perfect tradeoff. And like the LEGO example, the simplicity and modification does mean some sacrifice in what you can build and how well it holds up – but the gain is in ease and speed.
What you get:
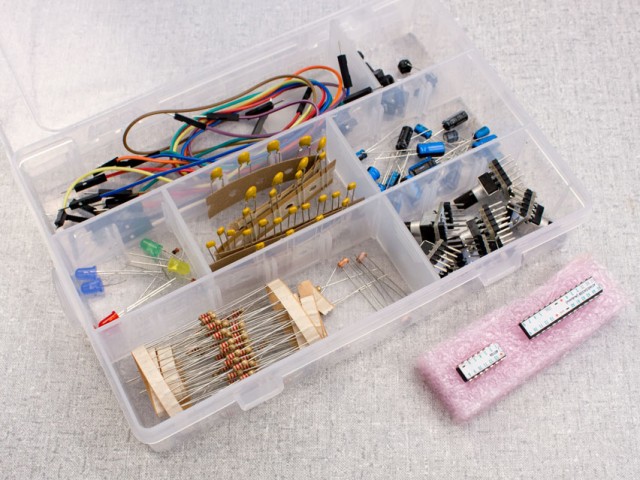
Rad-Fi can be understood as a combination of parts and knowledge. In the package (shipped or online):
- A big box with all the parts you need. (Now I’m thinking even more of LEGO kits.)
- (Base kit) A bread board.
- (Base kit) A power supply.
- Labeled parts – no hunting around working out what stuff is (especially if you’re new to this).
- Pre-programmed chips.
- “Wiggle-free” pots you can connect so you get some control.
- Schematics
- Code (you can modify this with an Arduino)
- The beginner guides teach you all the basics of how to work – even if you’ve never touched a breadboard or a circuit before.
- The advanced guides teach you how to make analog and digital modifications.
What the two kits do:
To the base kit with breadboard and power supply, you add other components to perform some inexpensive, cheery little projects.
Rad-Fi Patchable Synth BLR03
First, the synth, which is really two synths in one kit.
- MIDI control of pitch, amplitude and waveshape
- Analog control of pitch, amplitude/”fold”, and waveshape
- Analog oscillator chip (for LFOs)
- One pulse output, one triangular output
Glitch Delay BLR02
The “glitch delay” starts as a fairly stock delay circuit – but you can go places from here.
- Analog square wave on a chip
- Audio input + amp
- A digital delay based on Arduino (adjustable sample rate, freeze, reverse, feedback)
- The fun part – a light sensor that modulates the effect
Possible Mods
Now you’ve got a fun toy on a breadboard. But it makes sense that it’s on a breadboard once you start actually modifying it. And that’s the fun bit. Some of the possibilities:
- Try using the chips in other projects – as “modular” oscillators, etc. (Guides get you started here, and it seems more will come.
- Change or invert the photocell on the delay
- Use the photocell to create an oscillator for a synth (for example)
- Change the pulse width of the synth’s pulse wave
- Add triangular waves
- Modify the code on the chips to change their behavior
And so on.
This goes well beyond the littleBits Synth Kit project. The problem with the Synth Kit is, there’s just not a whole lot you can do with it. Functionality is pretty much pre-baked on the components, and there are limited ways you’d want to combine them. It’s fun to play with, but it really teaches you about routing, not so much about making or electronics. (The same can be said of modulars, generally.) By giving you access to each individual component, Rad-Fi is genuinely open-ended.
It’s clearly early days. The “modification guide” is pretty sparse – especially for a series that begins at the absolute beginning. You’re more or less given a few lines of basic information, some links, and then dropped in at the deep end. So I hope that if the preorder is successful, John-Mike and Pete go in and make some more comprehensive guides.
In fact, I think that sort of educational gap is not just a problem for this particular projects, but open/DIY projects in general. We have a huge gulf between basic, 101 information and the advanced stuff. It’s hard to cover the range in the middle, but I suspect a big part of the issue is time and market. (Speaking of which: no, MeeBlip haven’t forgotten our promises to create beginner programming guides for our digital synth chip and a new MeeBlip DIY project board. I think you’ll be glad you were patient with us, though, as DIY as we’re now developing it will be a better product than what we originally envisioned, and — that’s all I’ll say for now.)
Rad-Fi is a nice attempt to begin to fill that gap. John-Mike tells CDM that the whole system is a “platform” on which they can build. From there, they can add additional lessons and materials. Because everything – circuits and learning materials – is designed around the same 5-9V power supply, each detail is accessible. Unlike the module in a Eurorack, in other words, you can rework the inner circuitry and not just connect cables to the outside.
On the other hand, I think that Bleep Labs has a real challenge on their hands. What they’re describing — a learning the combination of a breadboard, common circuits, and off-the-shelf components — would also describe a book. Now, having parts already bought for you, labels applied, a box, and so on, is all pretty useful. But it does mean the burden remains on Bleep Labs to provide enough documentation that this is meaningful, and they’ll need to keep kit costs low enough that people can rationalize buying the kits from them and not sourcing parts directly. I think there’s promise there, and this could be cool, so we’ll watch to see how that unfolds.
And in the meantime, if you’re ready to be an early adopter, there’s a great sale on for preorders through the 28th. I do think it’ll be a lot of fun if you take the leap.
US$60 for the delay, $70 for the synths, plus $35 “base system.” Or, get the lot for $185.
http://bleeplabs.com/store/the-rad-fi-system/
