In part 1 of this guide, we learned how Ableton DSP can help you build custom Max for Live devices quickly, even for first-time patchers. Let’s take that further in part 2, mixing Ableton DSP with Max objects and producing some custom effects. It opens doors for building just what you need — and creating unique combinations of sound processing.
Part 2 of a series… Part 1 | Part 3
No Max for Live/Suite? Ableton has you covered via upgrades or rent-to-own.
Go Your Own Way
Ableton and Cycling ’74 did such a good job recreating the behavior of Live’s DSP and devices that they may have inadvertently created some confusion about what these are for — why not just use the Ableton devices, if these do the same thing? On the Max standalone side, that’s clearer — you can drop in some DSP blocks from Ableton while patching. There’s also the additional free ABL Effect Modules package, which, while it doesn’t make much sense for Max for Live users, can be really useful in Max, by providing convenient pre-built UIs — more on that another time.
But these are really useful for Max for Live, too, both for beginners and more experienced users. Here’s why:
- They’re more customizable than you might think, via the attribute system. No, you can’t open these up as patchers, but a lot of customization is available by tweaking parameters. (The help patchers often don’t show every single parameter, so you can do a little bit of hacking!)
- You can mix and match Max objects and Ableton DSP. In part one, we mainly used Ableton’s DSP objects exclusively. As you add Max objects, you can expand beyond Live’s possibilities.
- You can learn about Max in the process. Even if you do recreate some of what’s in Live, this is a great way to transition into Max patching. We’ll dabble a little here, and it might pique your interest to take the next steps.
We did some pretty, shimmering things last time; this time, let’s produce some distortion. We did nice; let’s do something wicked.
Distorted Devices
A reminder that there are two levels of tools in the Ableton DSP library. abl.dsp.* gives you individual building blocks. abl.device.* recreates the functionality of full Devices from Live — minus the UI.
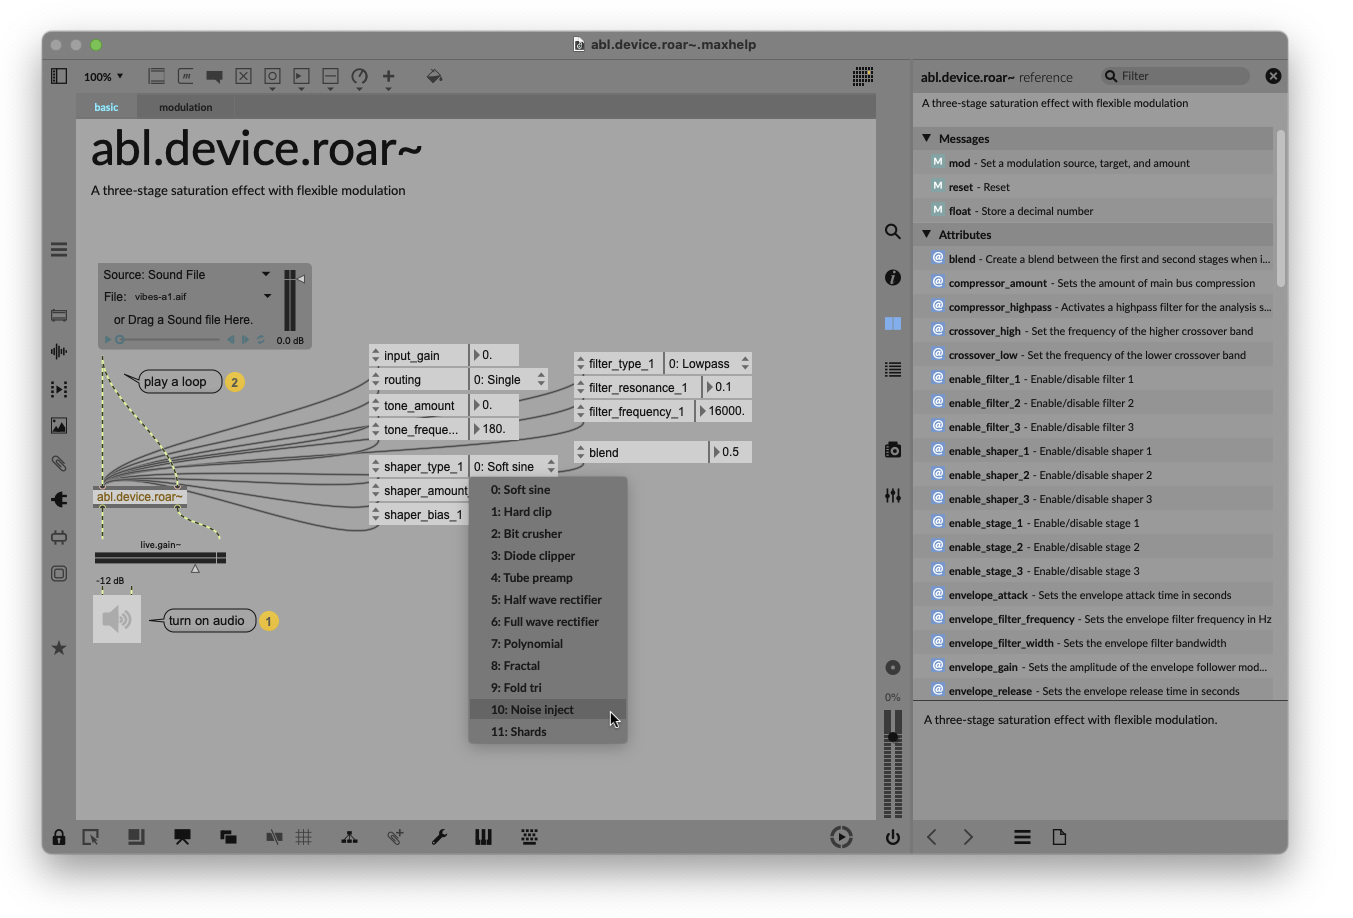
There is a complete version of Roar in this package — abl.dsp.roar~ — which is worth taking a look at first. You could even build a lot of the guts of the full Roar device into an effect with your own desired functionality and UI. And if you add that object in Max for Live and look at the help, you’ll get a glimpse of what it can do. Notice you can even specify shaper types (soft sine, hard clip, bit crusher, fractal, polynomial, etc.):
For reference, the equivalent Device back in Live (which is still a superset of the abl.device.roar~ above:

Going one level deeper, to abl.dsp.*, means you can determine signal flow and shaping. You can even add feedback taps wherever and however you want.
To keep things simple, I’ll focus on how to navigate those extra shapers and manage controls outside of the default Max for Live controls. We’ll set up a crossover to split the signal, then add some different shaping options that aren’t in Roar.
Keep the crossover
Crossover filters combine a lowpass and highpass filter, splitting your signal into low and high components. That’s important to this application because we can preserve some of our low-end frequencies below that adjustable crossover frequency.
abl.dsp.distortion~ and abl.dsp.overdrive~ both have their own built-in bass/mid/treble bands as part of the object, but abl.dsp.waveshaper~ and abl.dsp.saturator~ don’t. Plus, we’ll have more control by making our own split. I also find a single crossover is often more intuitive to work with than three bands for this use case. (And with these skills, you can make as many bands as you want by combining more filters later.)
Max has an internal object for the task: cross~.
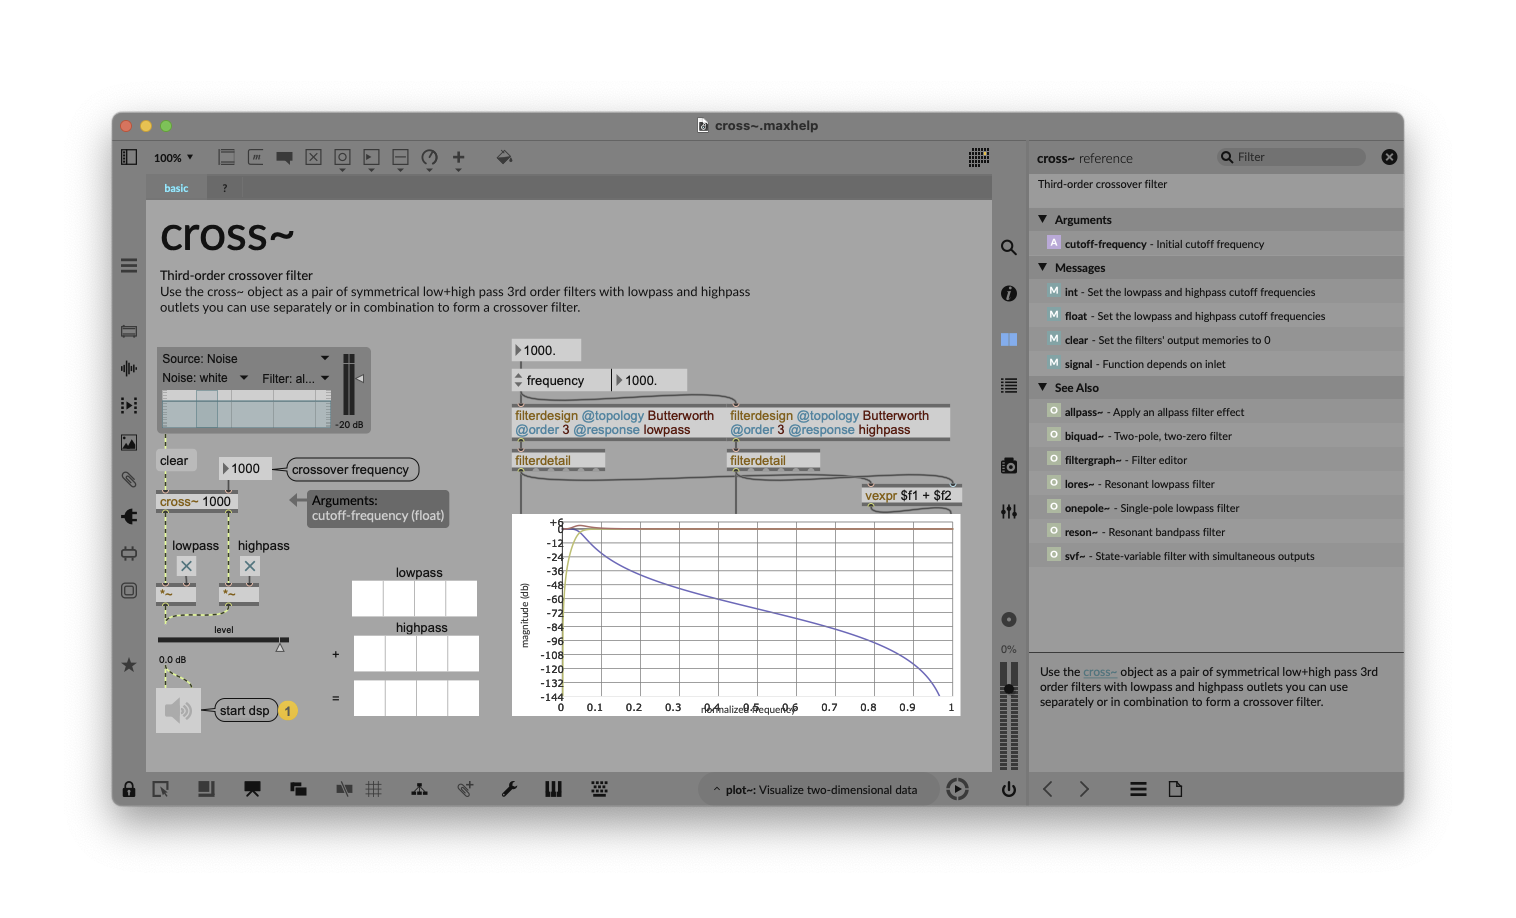
cross~ is mono, so we’ll need two of them for stereo. You don’t need to duplicate every object, though — patch just one number box to the frequency value in Hz, for instance, to link left and right channels.
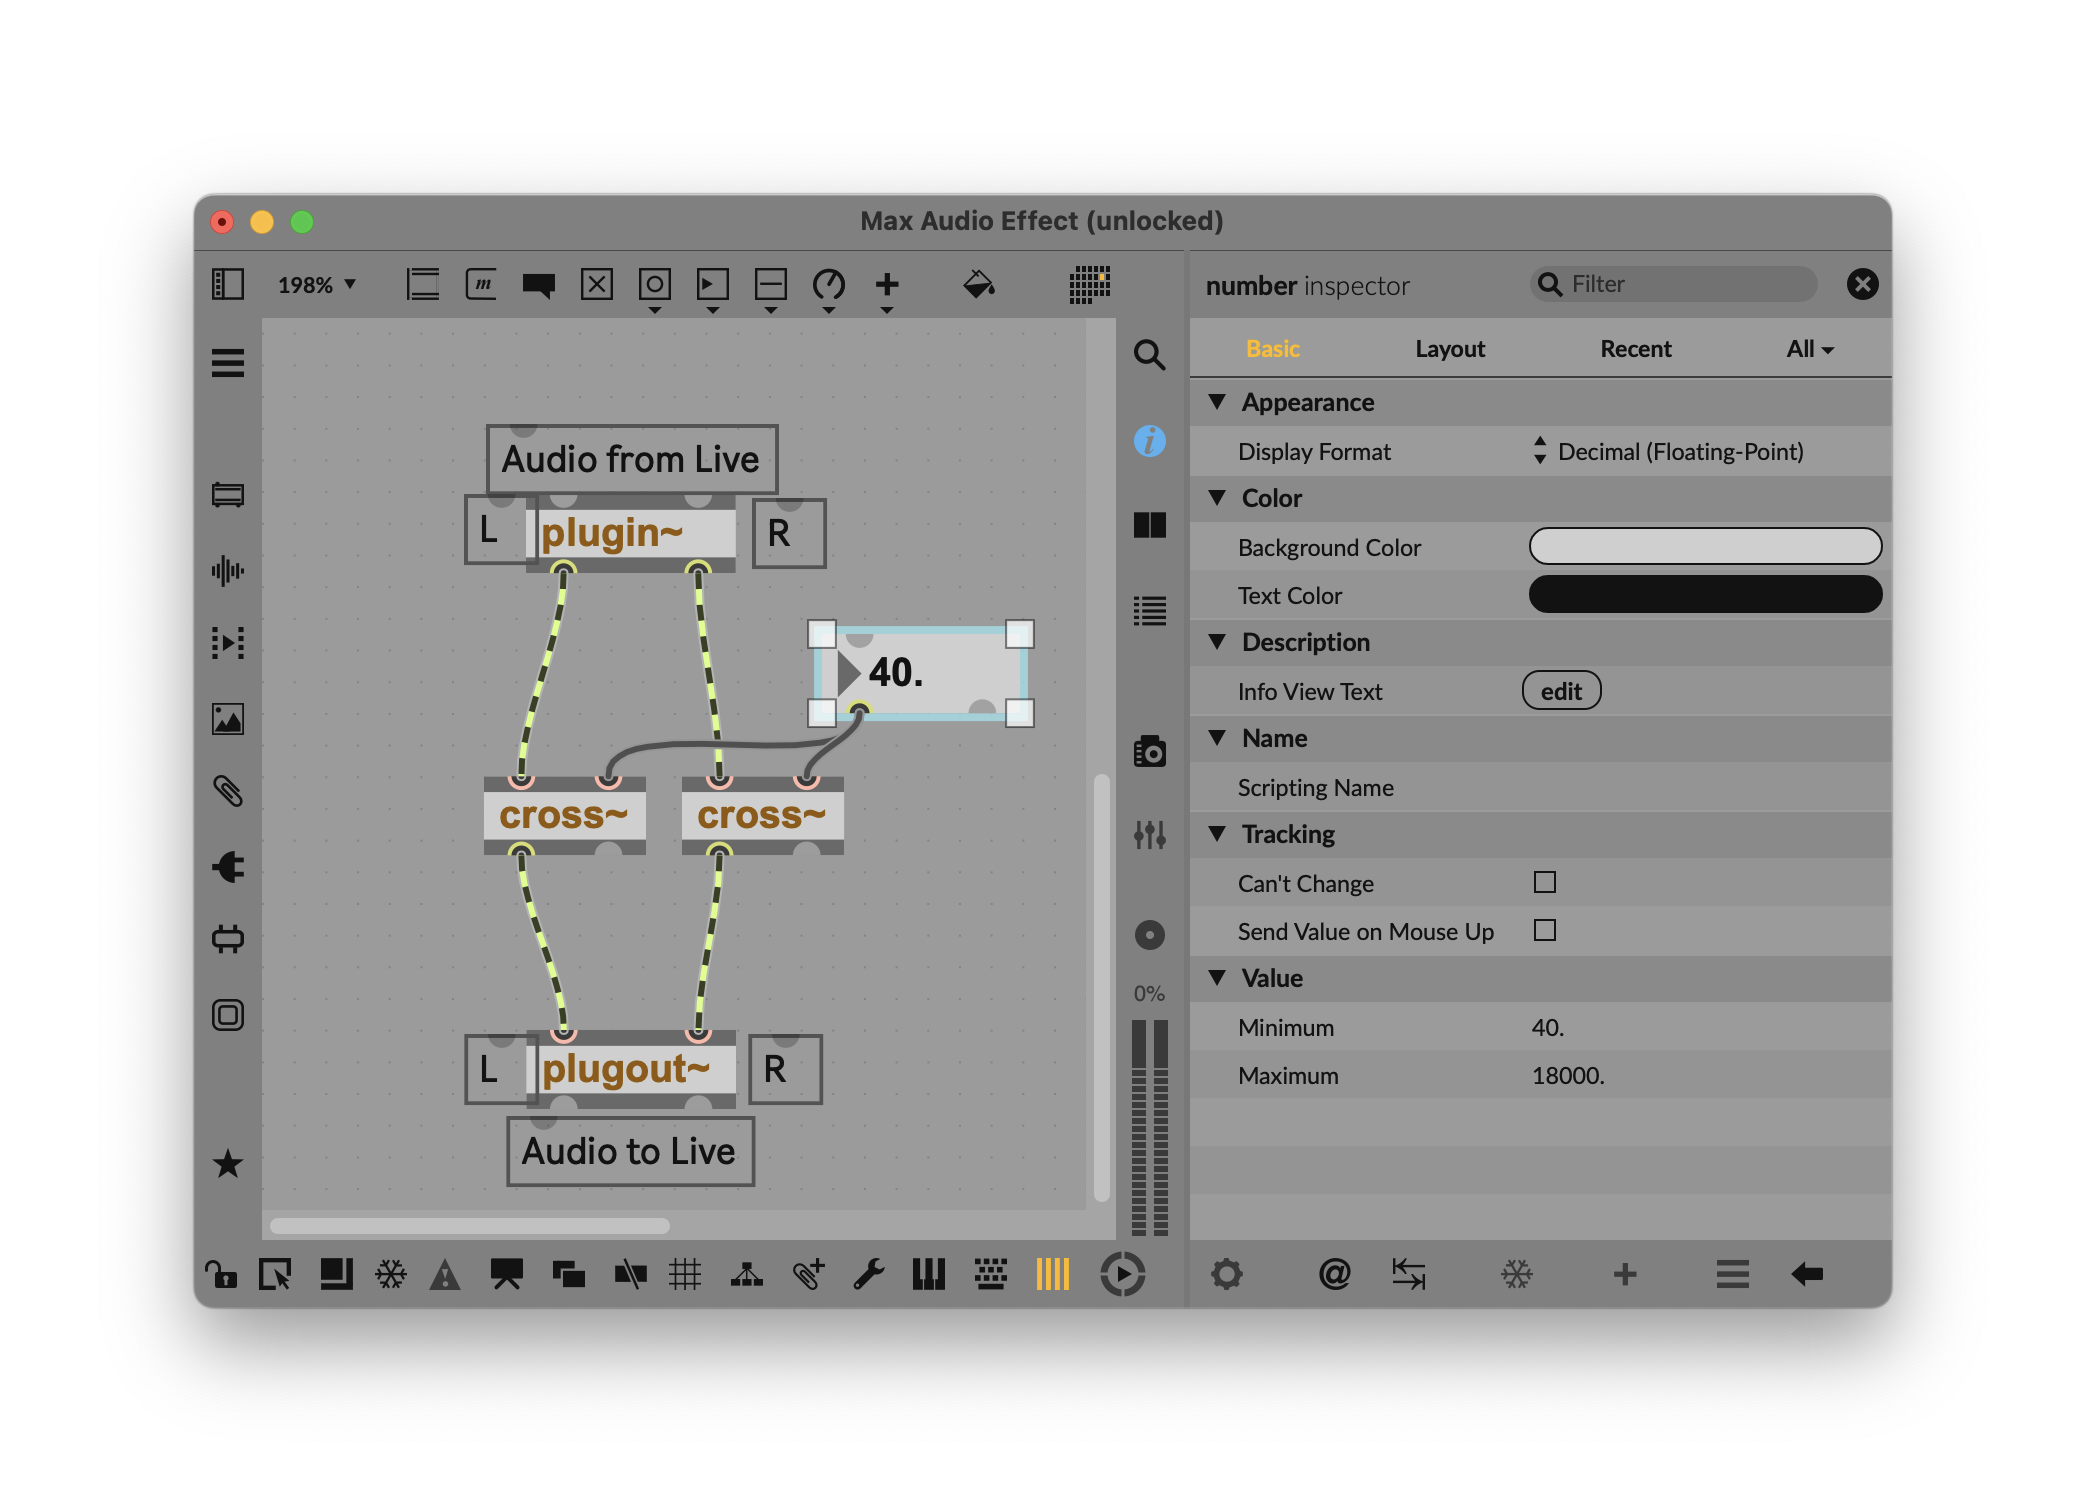
You’ll want to set a minimum crossover value, or you’ll get some unpleasant distortion — 40 Hz is what I chose, with a maximum of 18,000 Hz (see the Inspector).
Ableton DSP objects have internal interpolation, meaning they smooth out signal-rate changes. If you find that changing parameters produces “zippering” (glitchy sound artifacts), you can add some ramping between values. For instance, you can add a line~ ramp generator that takes the input value ($1) and ramp time in milliseconds (here, 50 ms, though you can try adjusting that value):

Shape and fold
Let’s go ahead and connect some distortion and feed it some signal (like some drums). Now you’ve got choices, from both Max and Ableton DSP for Max:
- overdrive~: soft-clipping distortion (Max)
- pong~: wavefolder (Max)
- abl.dsp.distortion~: “pedal-style” distortion
- abl.dsp.saturator~: waveshaping saturation
- abl.dsp.waveshaper~: waveshaping distortion
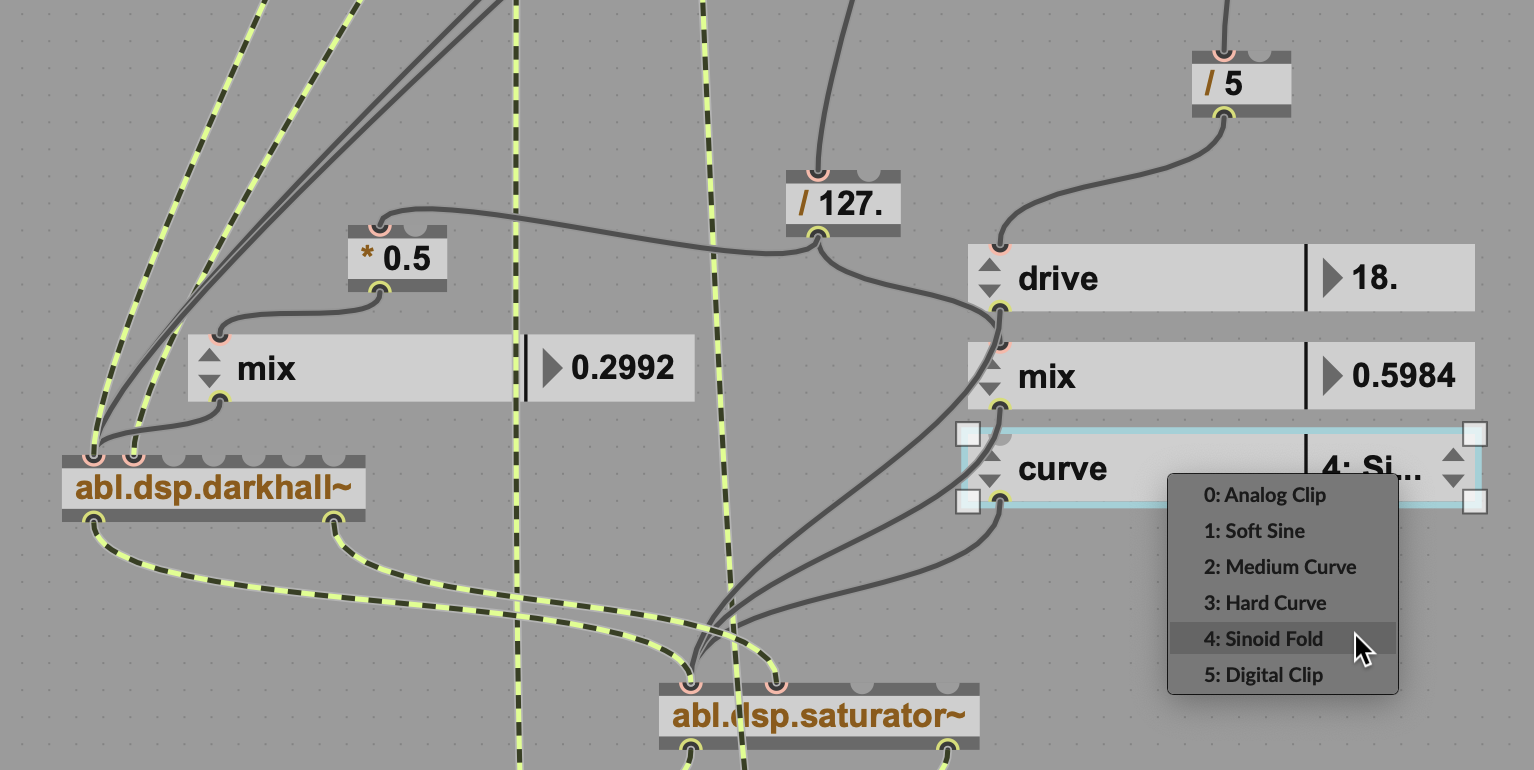
Saturator also has multiple curves. Let’s try that one — and open up the help to see its parameters and those curve options:

Attributes
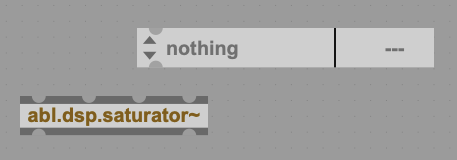
Last time, we cheated a bit by copying and pasting parameter controls from the help file into our patcher. This time, let’s learn a trick — the magic of attrui. Create a new object (n) and type attrui, and you’ll see the hint “Inspects attributes.” It will automatically generate a dropdown and a value. While it’s disconnected, you get this nihilistic-looking display. (Ah, the Nothingness of it all…)
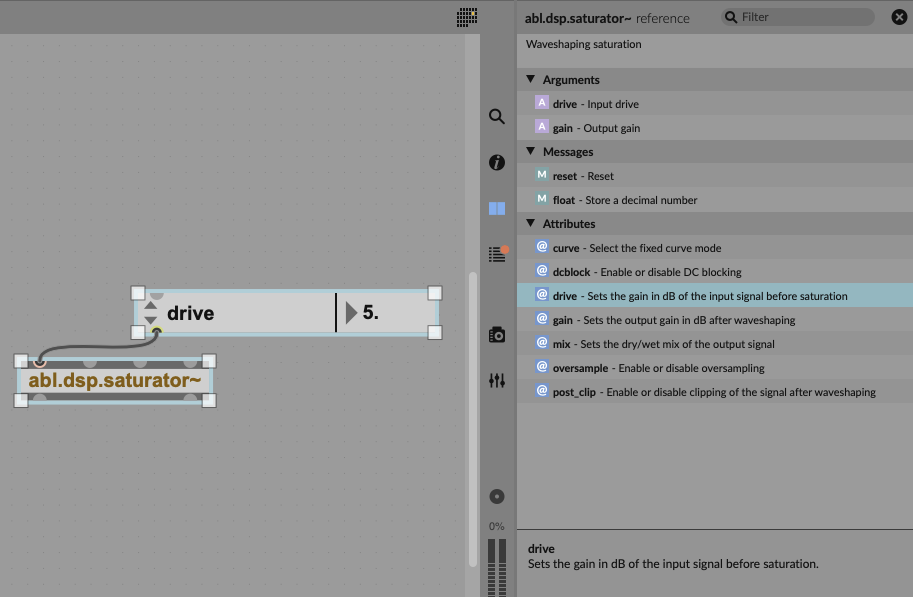
But connect the left-most outlet of the attrui object to the left-most inlet of abl.dsp.saturator~, click on the dropdown, and you’ll see a list of saturator parameters you can control:

Now you can choose which you want to use with your Device — for me, that’s Curve type (as seen above), Input drive, and Dry/wet. I’ll make three attrui objects, connect them, and assign them accordingly. Watch the number box, too, as it’ll populate with an initial setting (which clues you in on the range.) Now is also a good time to open the Reference pane to make sure you understand each Attribute and how it’s measured — for instance, to know that the input drive is in dB.
Add a Max UI control: sliders!
Controlling drive and mix at once — wouldn’t it be handy to have an X/Y control? Ableton Live has had these widgets since version 1.0, but you won’t find one in the Max for Live Objects dropdown — only different dials, menu items, and triggers:

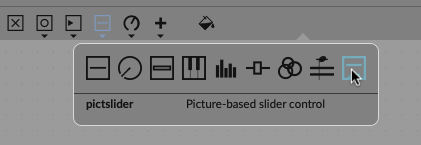
So let’s look to the Max side. Max has some UI elements of its own, and you may have noticed they do render and work interactively in the Max for Live Device once you place them inside the Device limit or in Presentation Mode. Under the Sliders item on the toolbar, you’ll find something called pictslider:
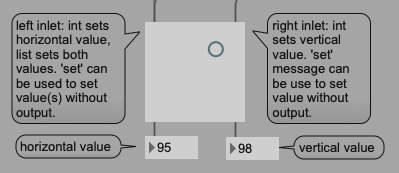
And pictslider gives us a KAOSS Pad-style X/Y control. If you open the Inspector, you’ll see that this object outputs a range 0 to 127. That’s more typical of the “legacy” Max UI widgets; they’re scaled with the same precision and range of standard 7-bit MIDI messages. From pictslider’s help:
We can do some simple math to scale these the way we want so we can output a range that works with our intended parameters. Wet/dry mix scales from 0 to 1, so divide the output of the y position by 127. (Be sure to include the decimal place after the 127. — that instructs Max to use floating point precision so it outputs the values between 0 and 1; otherwise you’ll accidentally create a toggle switch.) I decided to have a drive of about +12 dB; you might opt for something else, but then you’d divide the x position by 10.58.
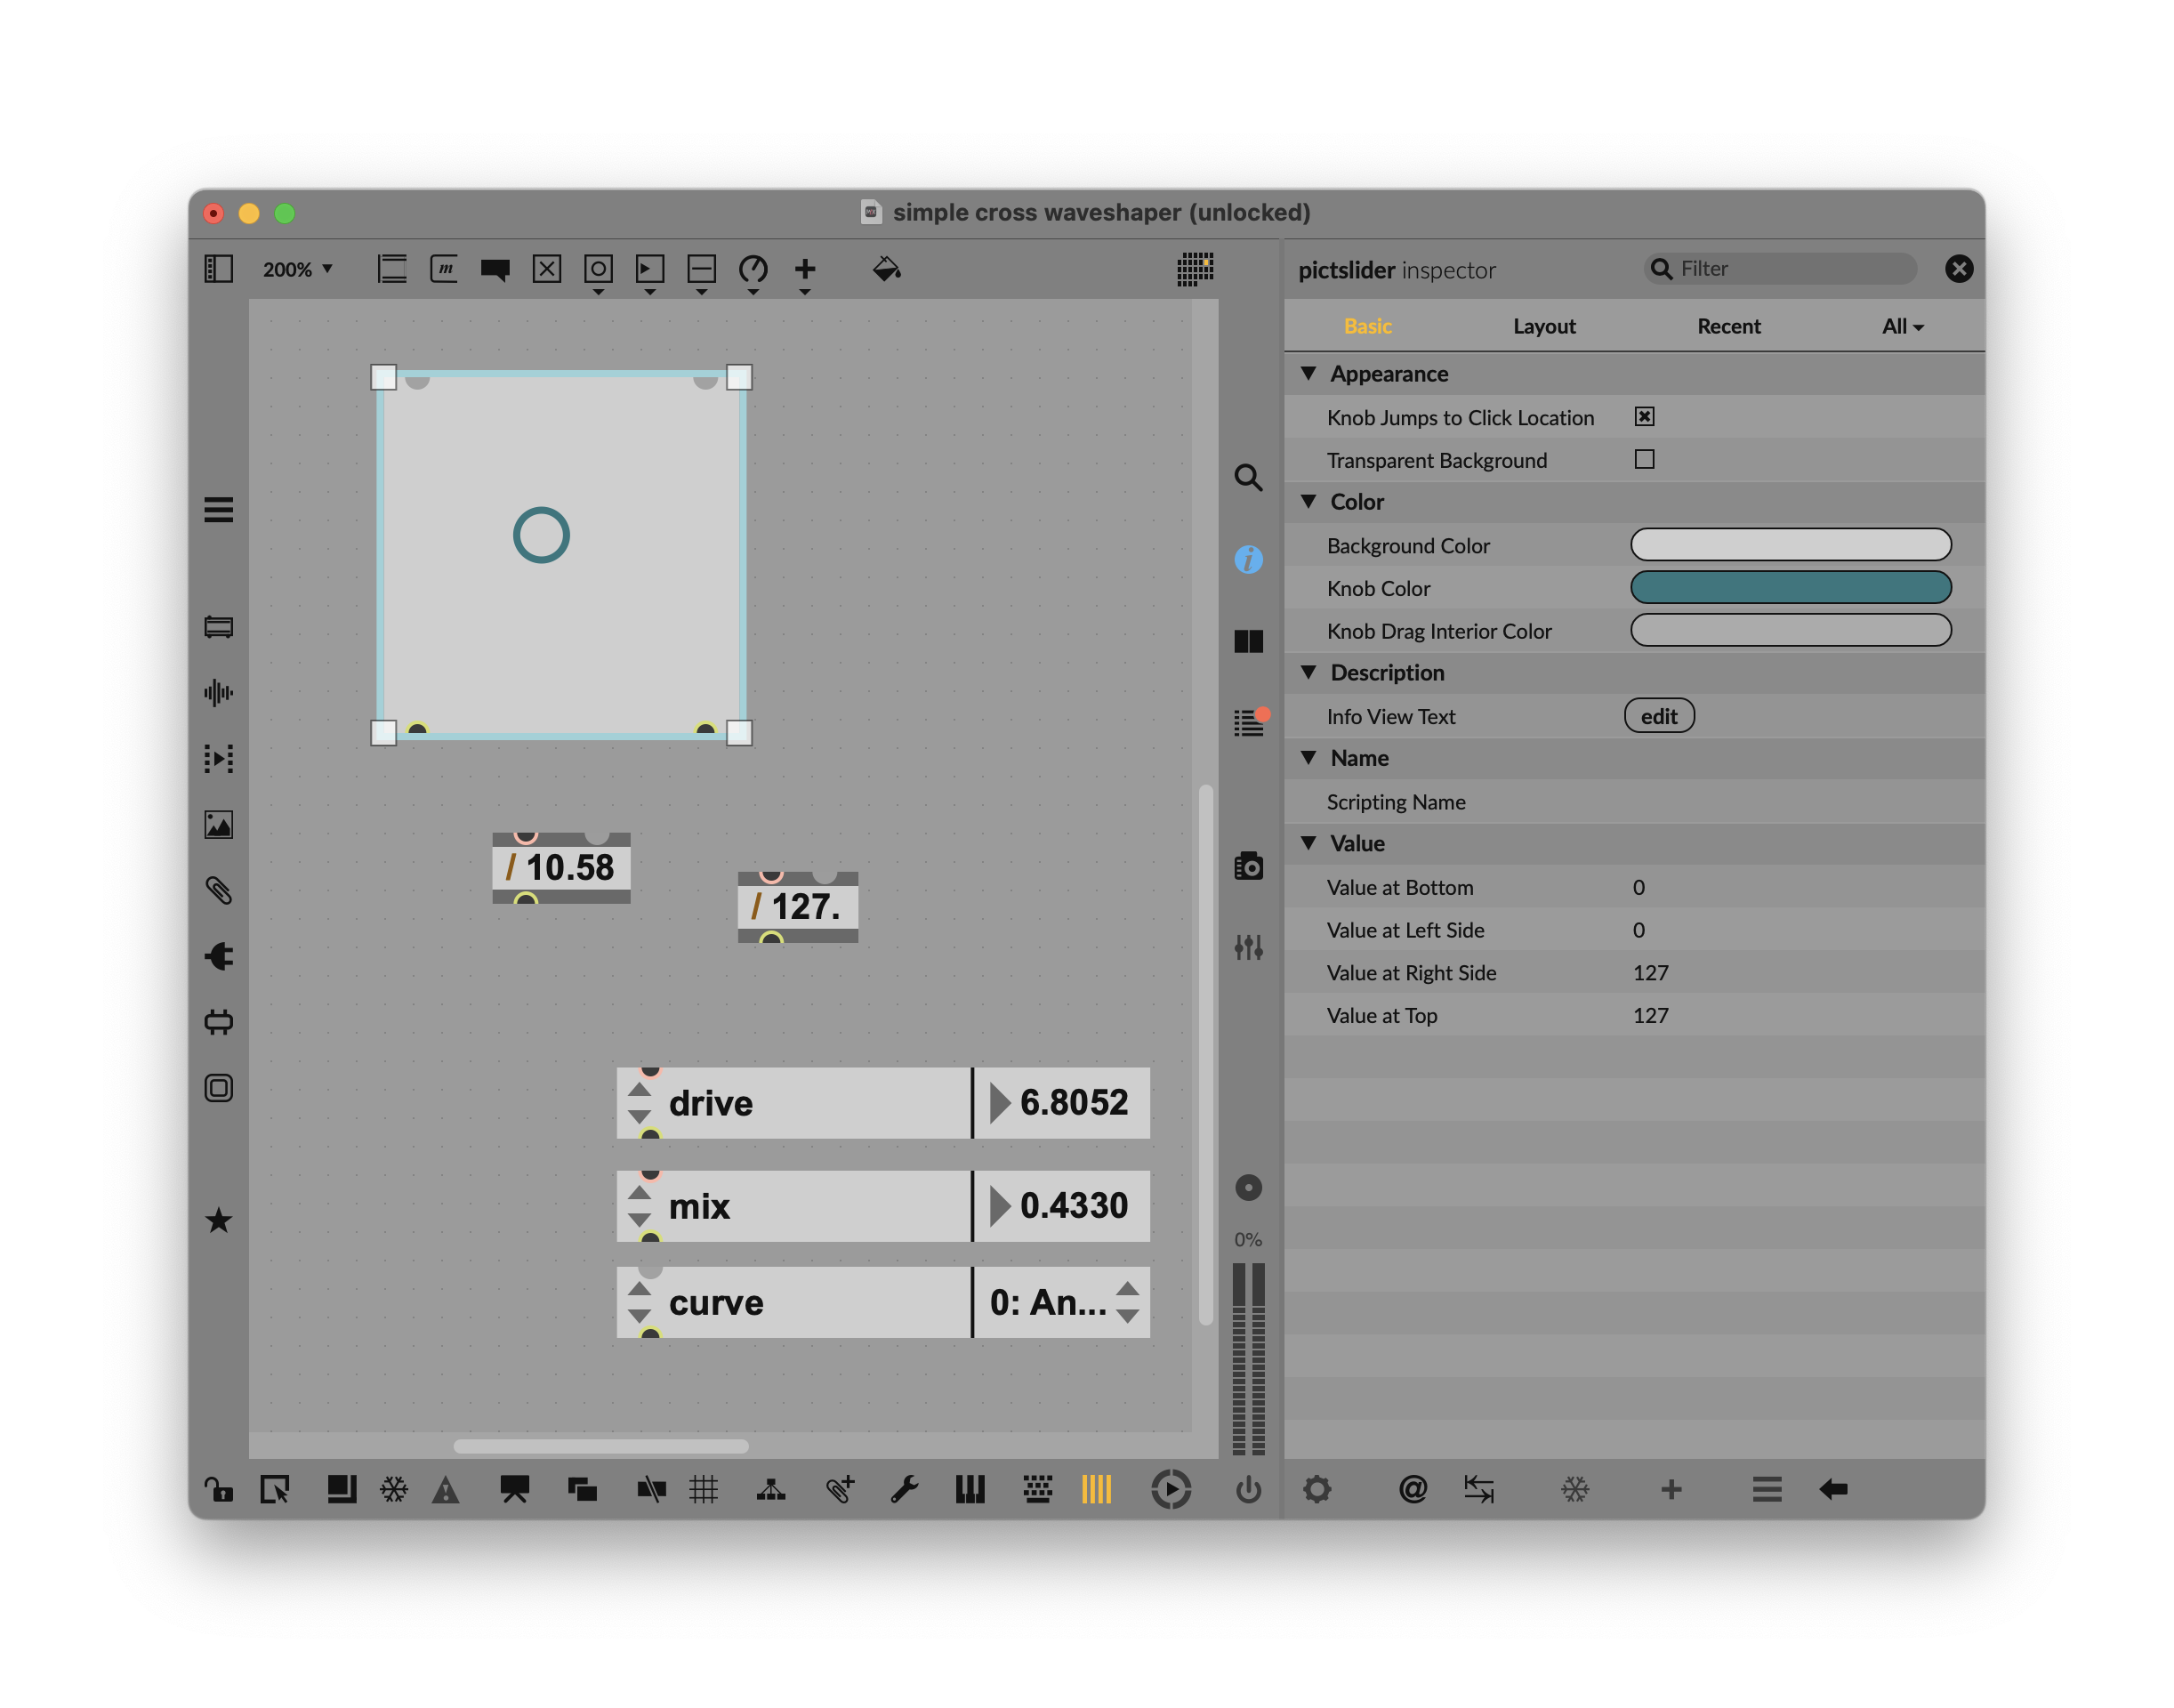
Again, you just have one small step to make this Max UI object play nice with Max for Live. Click the pictslider and choose Inspector > All > Parameter (scroll down) > Parameter Mode Enable.
Remember: any time you use a non-Max for Live UI element, tick that Parameter Mode Enable box.
We’ll look at parameter mapping, recall, and control more detail when we build an instrument, as it’s relevant to working with Push and other controllers, too.

This pitchslider is already more flexible than the stock X/Y pad you see in Live’s own devices — and you can customize not only details of its behavior, but also the image of the puck and the background. If that isn’t enough, you can always turn to jsui for more advanced custom widgets.
Combining reverb, waveshaping, and wavefolding
Now here’s the fun part. We already have a crossover filter to help us fine-tune which components of the signal we want to distort. We have a wet/dry and drive value we can control with the X/Y pad. We can add two more features: a pre-distortion reverb (for maximum mayhem) and a wavefolder (just in case any signal is getting through unscathed).
Remember our reverb from last time? Sure, Live has a multi-stage, multi-band distortion (Roar) and serial/parallel dual reverb (Hybrid Reverb). What it doesn’t have is a combined distortion/reverb, as seen in effects like Eventide’s MangledVerb. Building the Ableton DSP reverb and distortion components into one custom device means you can fine-tune exactly how the signal is routed and gain-staged, and control parameters in both devices at once.
abl.dsp.darkhall~ works well as a reverb. You can adjust the size and (especially) decay parameters; the more the reverb tail before the distortion, the more pronounced the sonic destruction. Here’s your chance to play around with other parameters to see what you like.
I experimented with having a separate wet/dry control for the reverb, but I decided on making a fixed ratio. Take the wet/dry value for the saturator, and use half of it for the reverb’s mix value.
Selecting the curve for saturator is also useful, and probably worth elevating to Presentation Mode and the UI (I did).
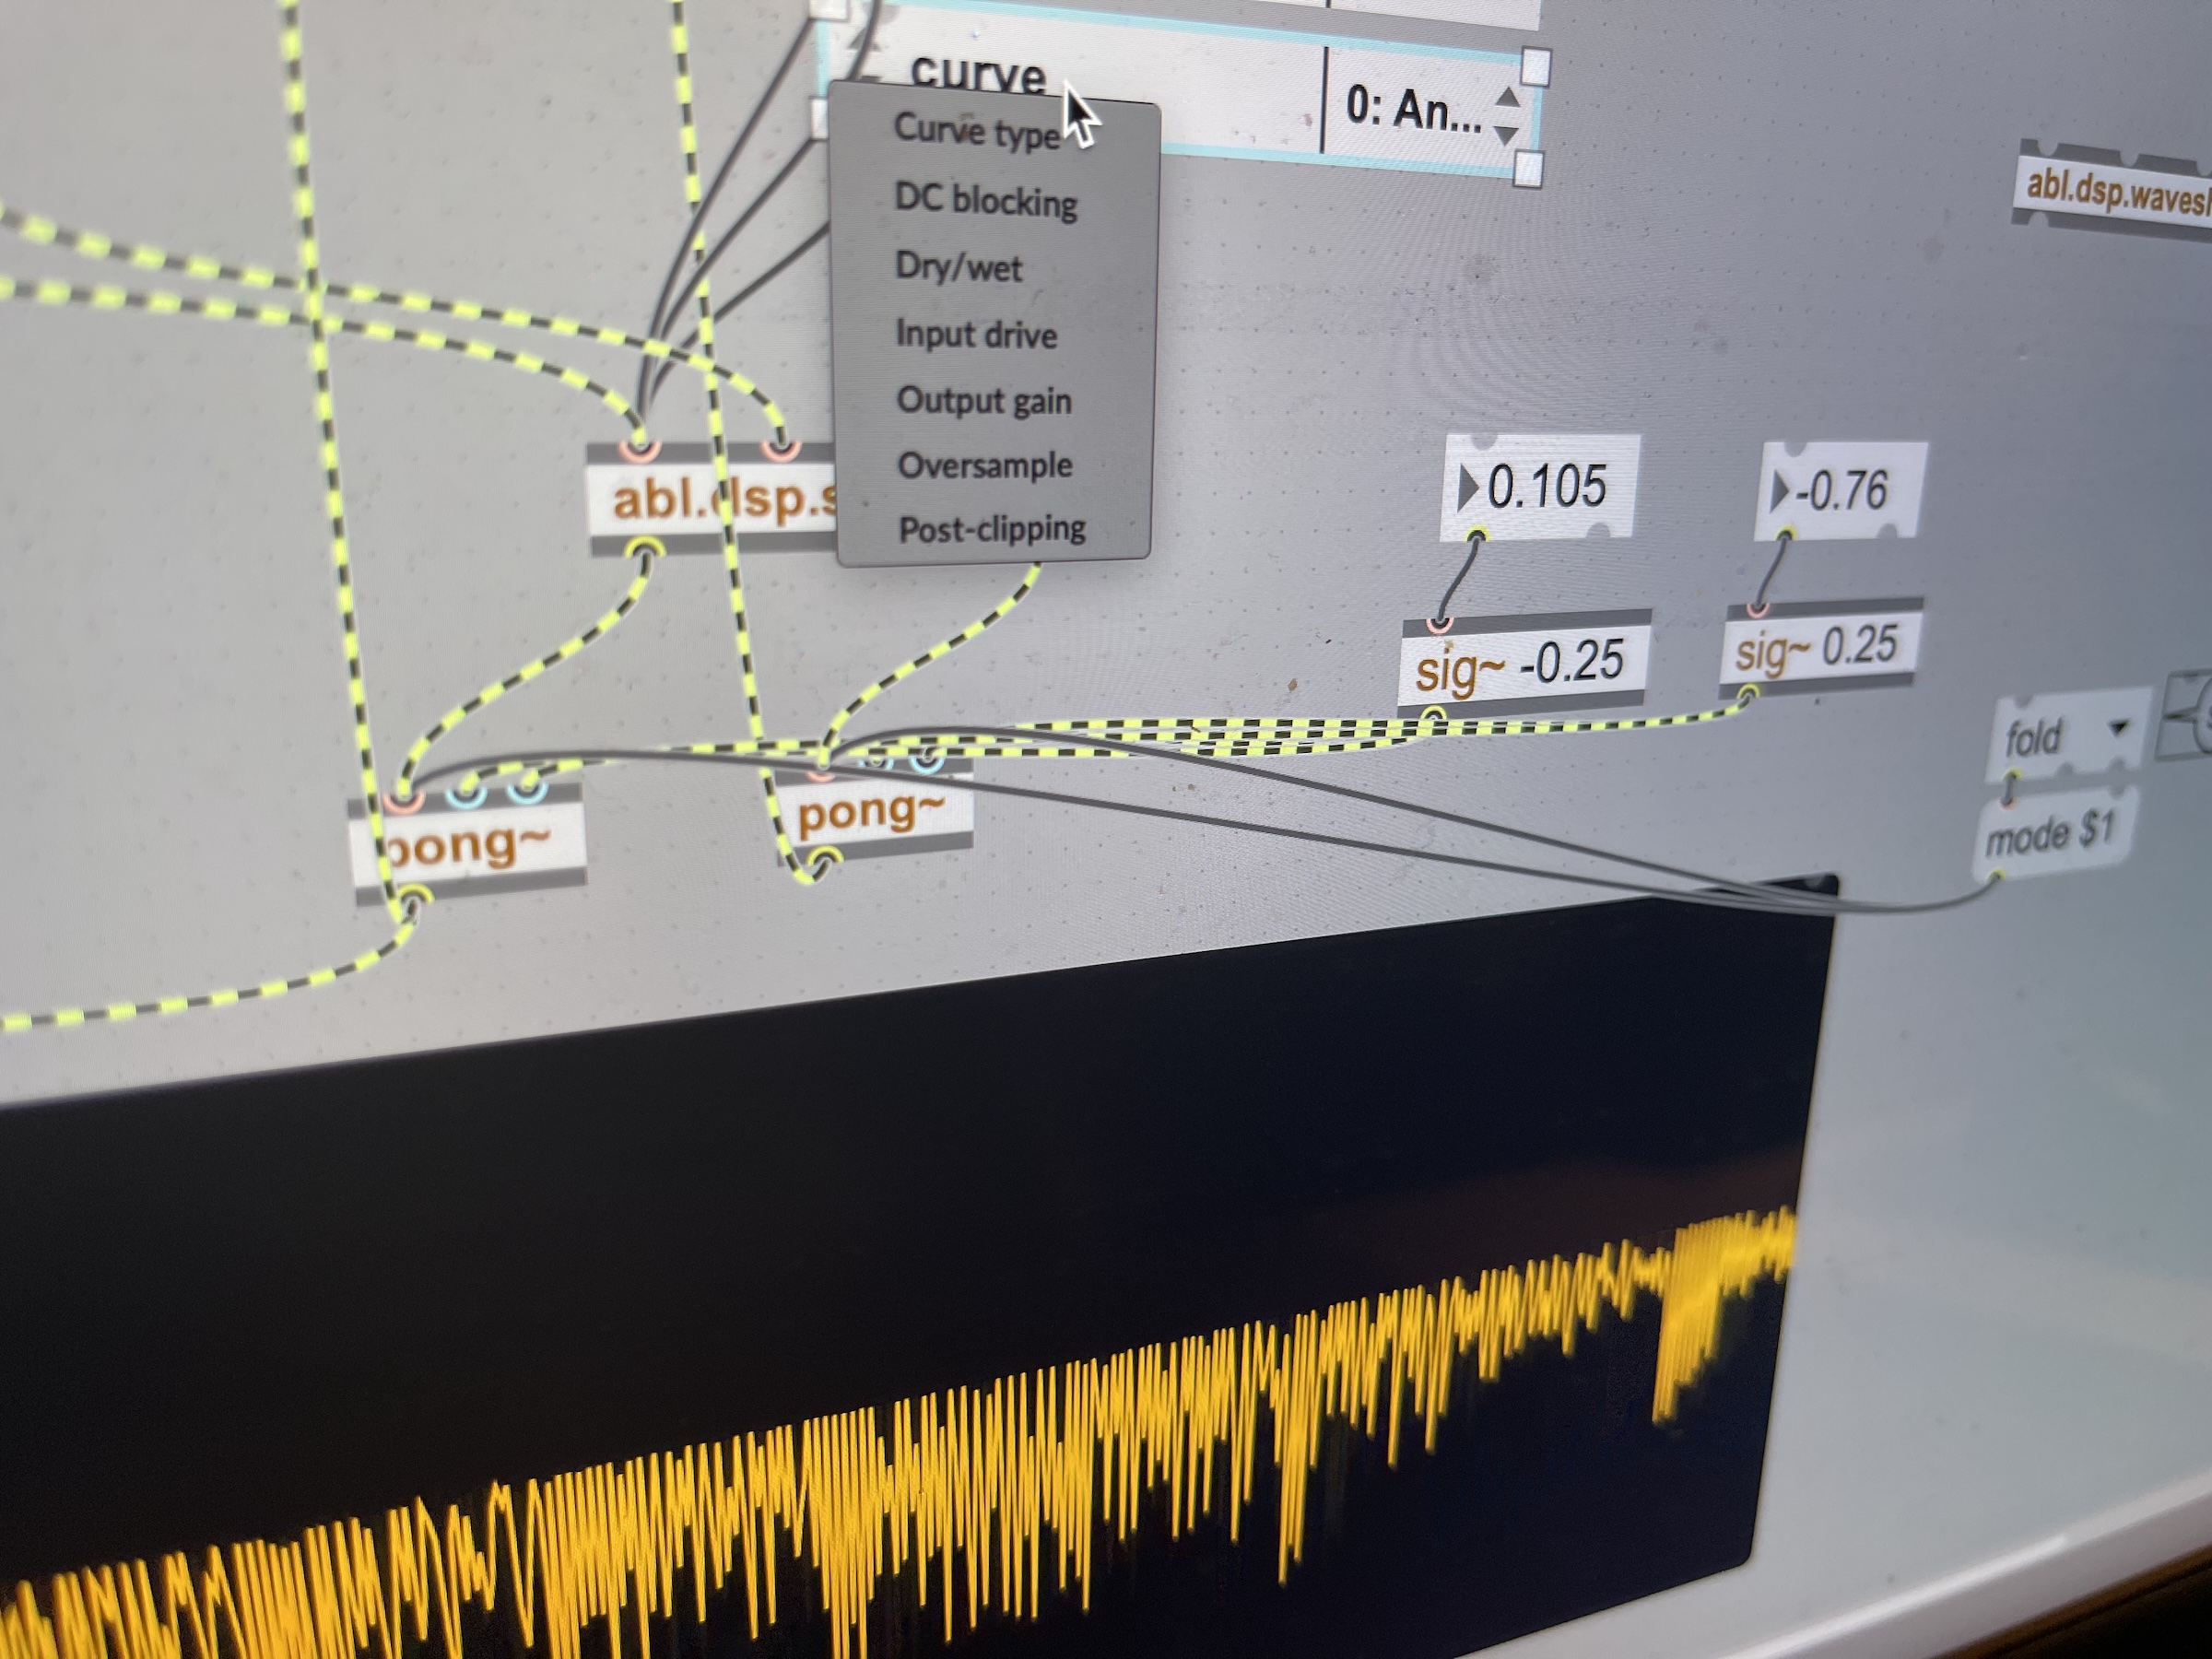
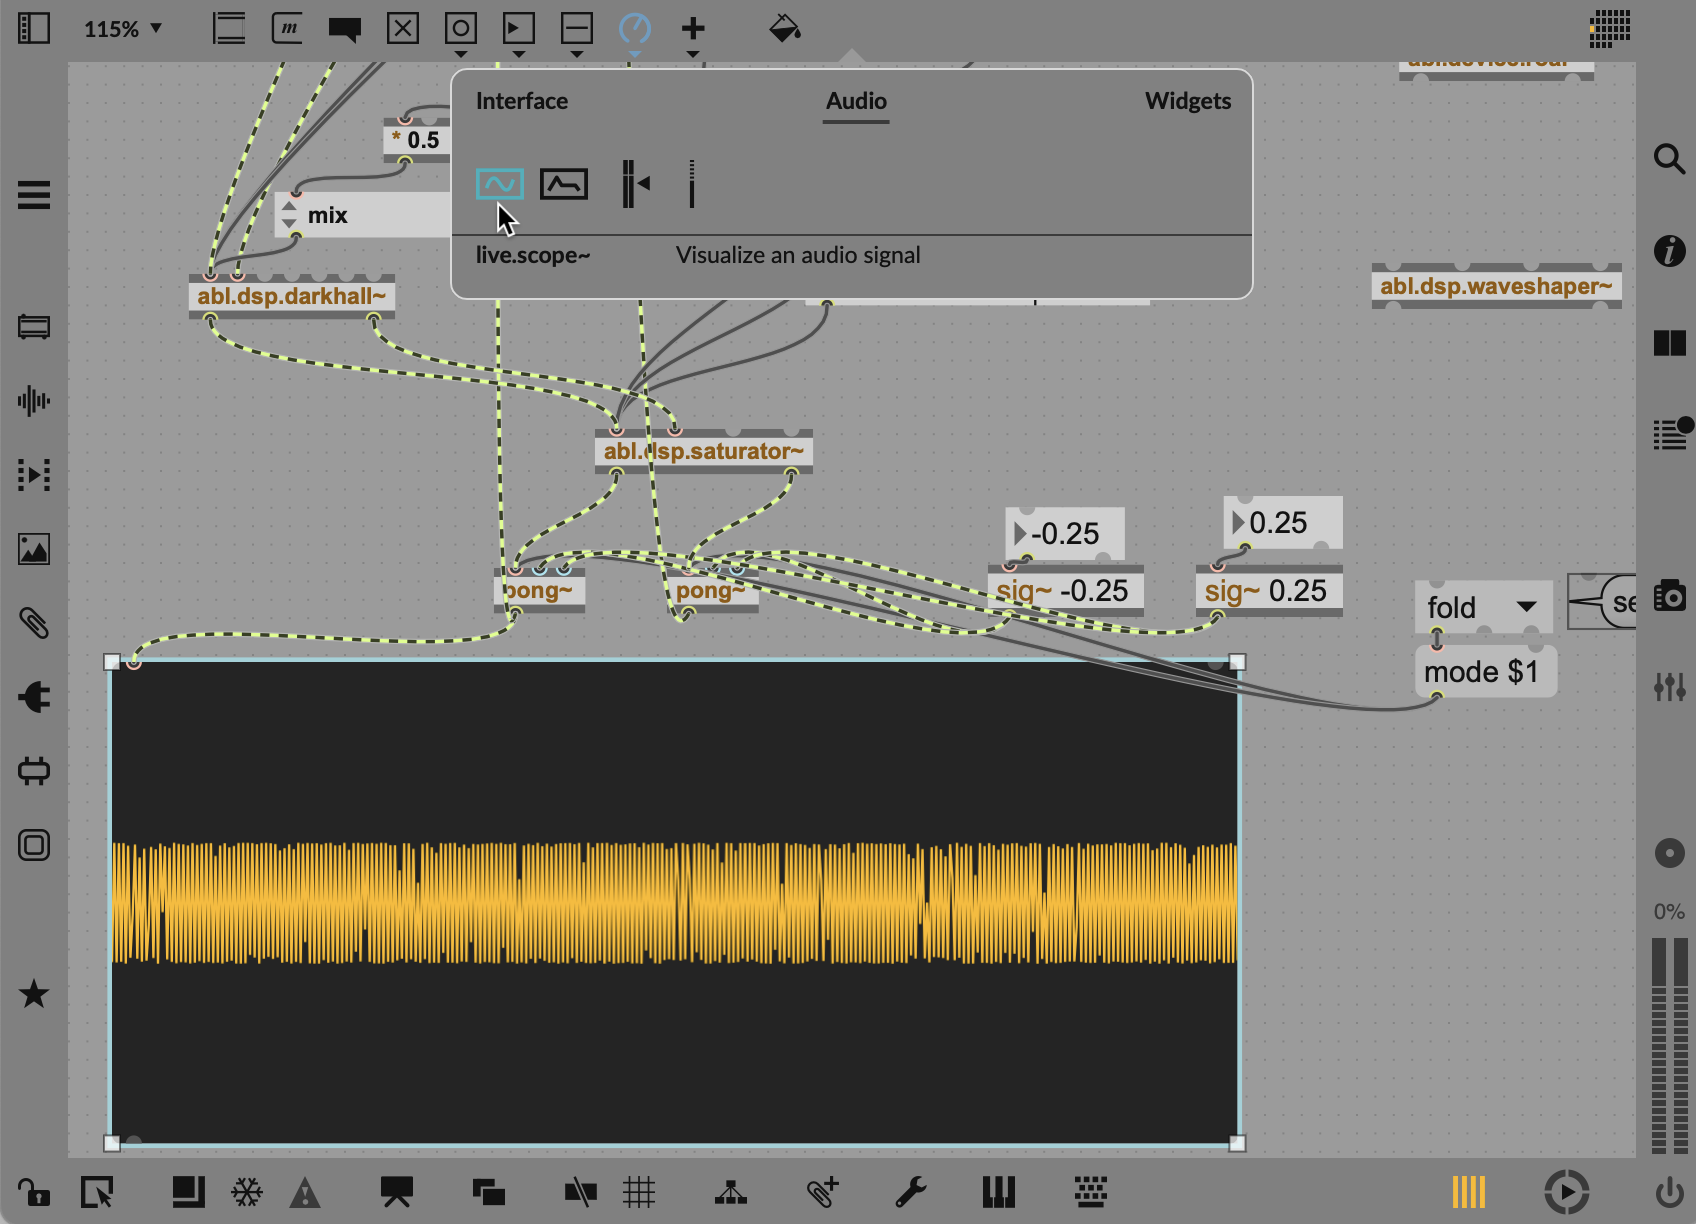
This sounded good, but even wilder if you add a wavefolding stage. I took advantage of the built-in Max object pong~, which performs variable range signal folding. That wavefolder on top of the waveshaper opens up some gnarly possibilities. The help file is really useful here, in that it visualizes the effect with a simple sawtooth wave, as it’s easier to see than it is to describe.
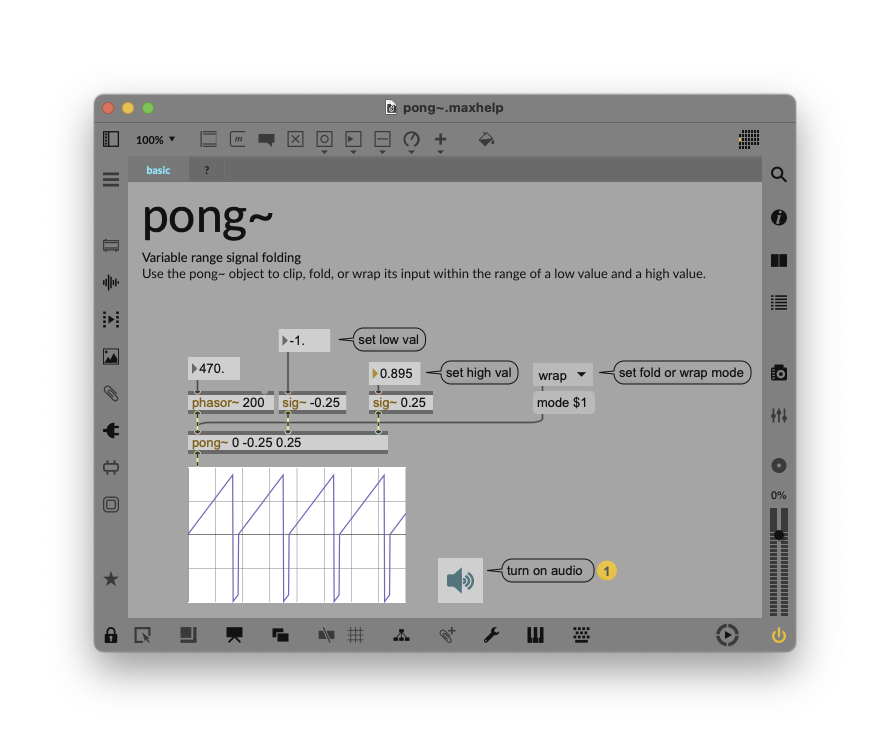
Note that pong~ solves the interpolation issue in a slightly different way, which I’ll reproduce. Instead of using the line~ object to ramp the value, you can use the sig~ object to directly translate to a signal value. You don’t get the ramp time in milliseconds as an option, but this is useful for turning a number into a signal. The important thing for our purposes is, the default range of low: -0.25 / high: (+)0.25 works pretty well. If you want to get adventurous, though, you can mess around with other values.
Now I have controls I can fine-tune, even in relation to one another.
Here’s what it sounds like. Using low decay times for the reverb turns out to sound really nice on drums, and longer decay times sound truly brutal as you mix in the waveshaping and wavefolding.
Here’s how it all sounds together:
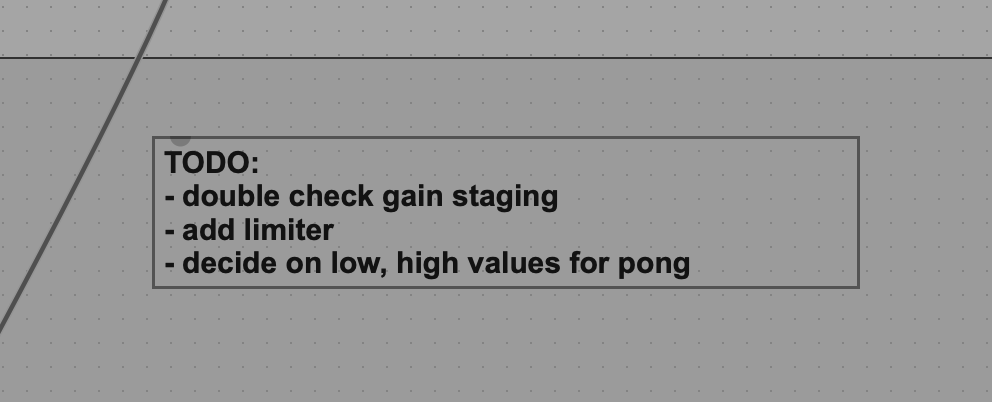
Tip: Use comments for TODO lists. I’m always thinking of things I need to do in a patch that I want to remember when I step away and come back to it. Comments (the ‘c’ shortcut) are an easy way to do that, with the convention TODO: at the start as a clear reminder.
Add a waveform view
One last trick: we can add a waveform view to see the processing inside our UI. That’s also useful if you’re messing around with the upper and lower limits of the pong~ wavefolder/wrapper, because the visual feedback on what’s causing the sounds you hear makes things easier to understand.
In the Max for Live Objects, click Audio, and then find the live.scope~ object. You can then resize this and add it to your UI, too. It’ll refresh together with the rest of Ableton Live, just like any native waveform view would.
Next steps (intermediate/advanced): adding feedback
Now that you do have a custom device, you can easily create feedback like in Roar — and even sync the delay. You can experiment with adding those feedback taps somewhere that Roar doesn’t have them, and with different filter types (versus Roar’s fixed bandpass filter).
Cycling ’74 has some good tutorials on that, so it’s a good idea to start there:
MSP Delay Tutorial 2: Delay Lines with Feedback (read the first delay tutorial before you begin)
and Controlling Feedback is a good idea, too
Roar also has just a main bus compressor, so checking out multiband compression gets interesting, too.
Patching polyglot! The delay and feedback patching in Max is almost identical to the one in Pure Data (Pd.) Learn one, and you’ve learned the other, for maximum skills in every situation. Pd and Max communities often collaborate on events. And these skills will even give you a leg up in environments like SuperCollider, which use a textual interface but have a lot of the same basic signal routing concepts. Sometimes seeing the same concept in different contexts can also help reinforce what you’re learning.
Next time on This Max for Live Tutorial…
Ableton DSP isn’t just about effects processing. It’s about oscillators, too. We’ll use that as a jumping off point to build our own instrument and play it with Push and MPE (or your controller of choice). Plus I’ll pull together the series and provide some cleaned-up patches to play with, so feel free to send requests and feedback for that final wrap! See you!
I’m still tweaking my Verbstortion, so let’s see if I can polish that into a device, too! (Race you!)
Previously: