Hello CDMo! Long time no post!
Apologies for my extended reclusion. In between buying a house and changing full time jobs from Web Guy to Video Guy, it’s been an exciting time to be a Jaymis. Happily, I now find myself in an ideal situation: Working as part of a small team, on interesting and varied projects, at Graetzmedia. Rather than trying to find time for video in between website builds, my daily grind is all about visuals, installations, creative programming and production.
Of course, having time to create is much more fun if there’s gear to use, and the kit here is exemplary! Two Red One MXs, (with an Epic-M on the way), CamBLOCK motion control, Teradek wireless modules, lovely DSLR shooting rigs and monitors, solar powered Timelapse housings, bulb-rampers, oh my! I also have the latitude to blog on “company time”, so I’ll be able to bring you thoughts about all these great toys from the perspective of a visualist.
To start things off I have a recent project of my own, which I think integrates art and technology in a way which is very CDM. I’ll start with the video, which I think should be viewed without spoilers, and then give you the geeky background details.
[vimeo width=”640″ height=”360″]http://vimeo.com/24570350[/vimeo]
Both video and audio were recorded in a single session, in the Graetzmedia studio, which was destroyed in January by the Queensland Floods.
Like many single-shot videos, it’s built on a simple concept: Rowley Cowper doesn’t blink as often as a human should. We were discussing this very mild superpower, decided that it might be worthy of showcasing in a video, and minutes later were shooting a test in my home studio. Despite being lit by little halogen lights, shot with an HDV camera on a tripod, and featuring some decidedly dodgy zooms, if Rowley hadn’t smiled when he thought he blinked half way through (he didn’t, it was just an eye twitch), we probably would have called it finished, cleaned up the camerawork in After Effects, and released immediately.
[vimeo width=”640″ height=”360″]http://vimeo.com/19686090[/vimeo]
I’m glad we didn’t, because a couple of days later I started working on teaching our motion control rig to pull focus.
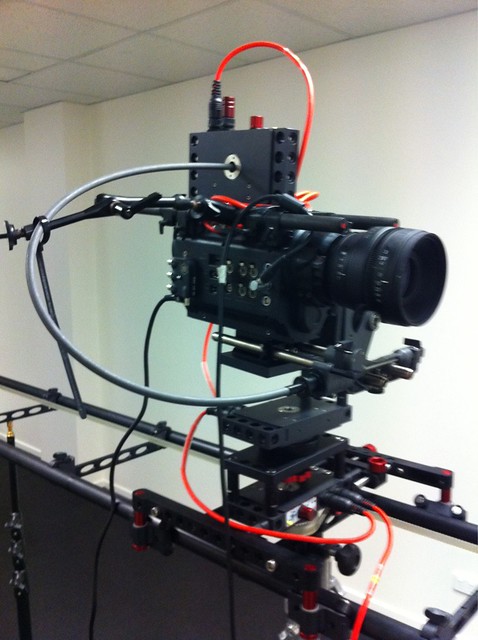
The Motion Control rig
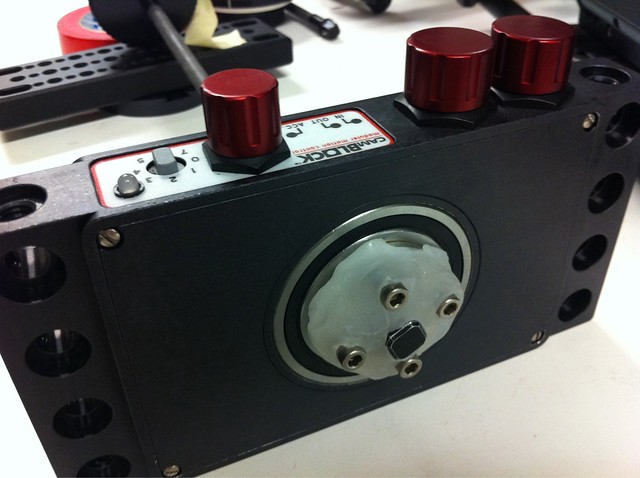
Prototyping a robotic focus puller using polycaprolactone (Friendly Plastic) on a Cam Block Motion control rig
CamBLOCK is a great, modular MoCo system. At US$16,000 it’s hardly an impulse buy, but this is rather cheap for the functionality, and it enables some truly magical results which can’t be achieved without pretty serious technology.
The system uses a Pocket PC to set keyframes on a timeline for each axis, so it allows you to produce some rather complex moves. I’ll go into more detail about this in a subsequent post, because it’s definitely the kind of gear which could be hired to great effect on specific shoots or projects.
Sadly it doesn’t currently include focus motors, but Graetzmedia did purchase an additional module as a model-mover for product photography shoots. With a liberal application of Polycaprolactone, (a.k.a. Friendly Plastic, which I mentioned on CDMu back in 2006!) and a follow focus whip, I was able to connect the additional module to our focus unit, and have a robot pull sharps for me. Dream come true!
Because the whip is flexible, there was quite a lot of “play” with this setup, and it wasn’t precise enough to keep sharp during a 50cm-3m dolly move at F1.4. It took a couple of prototype iterations to get a tight, responsive system, which we ended up attaching directly to the side of the follow focus. I replaced the whip with a short rod of molded Friendly Plastic, which is considerably more precise, but still flexes enough to drift out of focus during faster continuous moves – as you can see at the end of the final video.
Motion Tracking on Red
I won’t lie, I’m still a little giddy about cohabiting with a couple of Red cameras. Yes, they’re prohibitively expensive for independent artists, and DSLR video gives you 80% of the functionality at 5% the price and weight. Could I have completed this project on something cheaper and smaller? Absolutely! But serious digital cinema gear gives you something which can’t easily be faked. Something that every visualist wants: More resolution.
Red One’s “4K” maximum resolution gives us 4096×2304 pixels to play with. At around 2GB per minute of footage, it’s not exactly light on hard drive or processor requirements, but after exporting a JPEG sequence for After Effects (which was replaced with the original .R3D files for final export), it was the easiest, smoothest motion tracking I’ve ever done. Obviously good lighting and photography plays a big part in getting clean tracks, but when it comes down to it, more pixels gives you more precision, and means that automated trackers will be more accurate and require less human intervention!
The clip starts at a 100% shot and slowly scales out to 55% at 1:50, when the dolly takes over. For the later section of the clip, this allowed me to do some pretty drastic rotation-tracking without losing resolution. After that, we did some color grading, added titles, and were done.
I’ll definitely have more to post about working with Red. There’s enough of them in the wild now that it’s not ridiculously difficult or expensive to hire them for a day shoot, and that extra resolution is invaluable for multi-screen and high-res content.
Even with the crazy gear involved, I feel like this is a natural progression of the “cheap, single-shot” video. Hopefully you don’t think I’ve sold out! I’ll still have plenty to say about cheap, fun, DIY stuff, and will be able to give you visualist-centric information on the more expensive stuff, so you can make an informed decision when the big-budget projects come along!