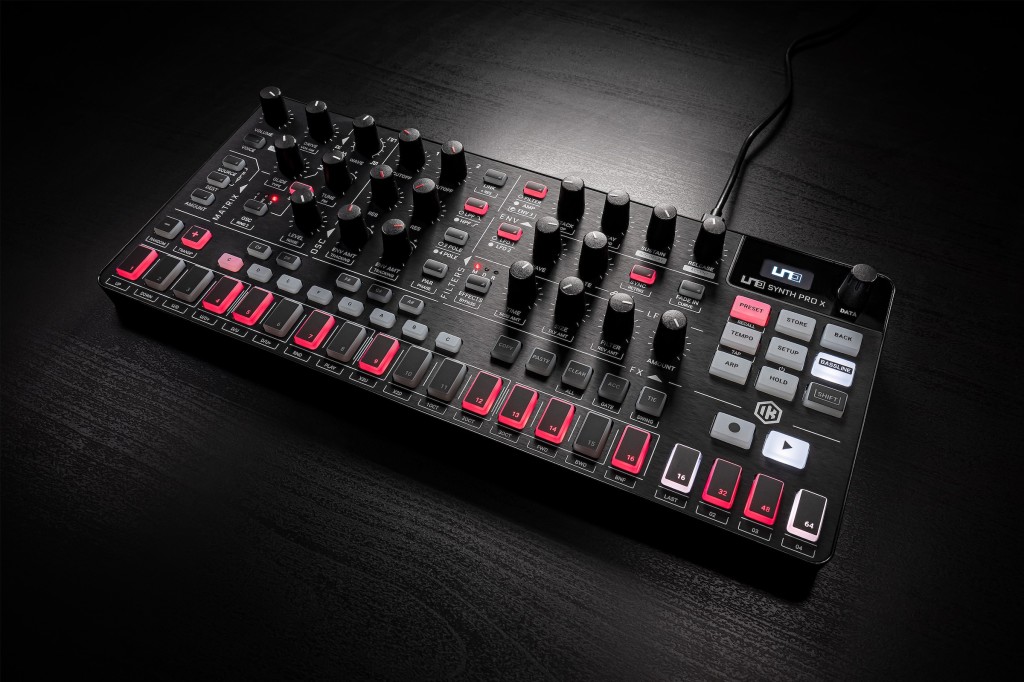
Meet UNO Synth Pro X. It’s a fully upgraded version of the UNO Synth Pro with enhanced sound and effects and a lot more hands-on control. That means it’s time for a sequel on our side, too – with an all-new exclusive follow-up to our deep dive for the original, this time with more ideas for creating sounds and playing live.
Disclosure: This guide was created in collaboration with IK Multimedia. Thanks for their support.
X Factor: What’s new
UNO Synth Pro X is about as much analog synth as you can squeeze into this price class and size. As before, it’s an all-in-one Italian-built analog instrument, with dual filters, lots of digital control, modulation with matrix, and integrated arpeggiator and step sequencer.
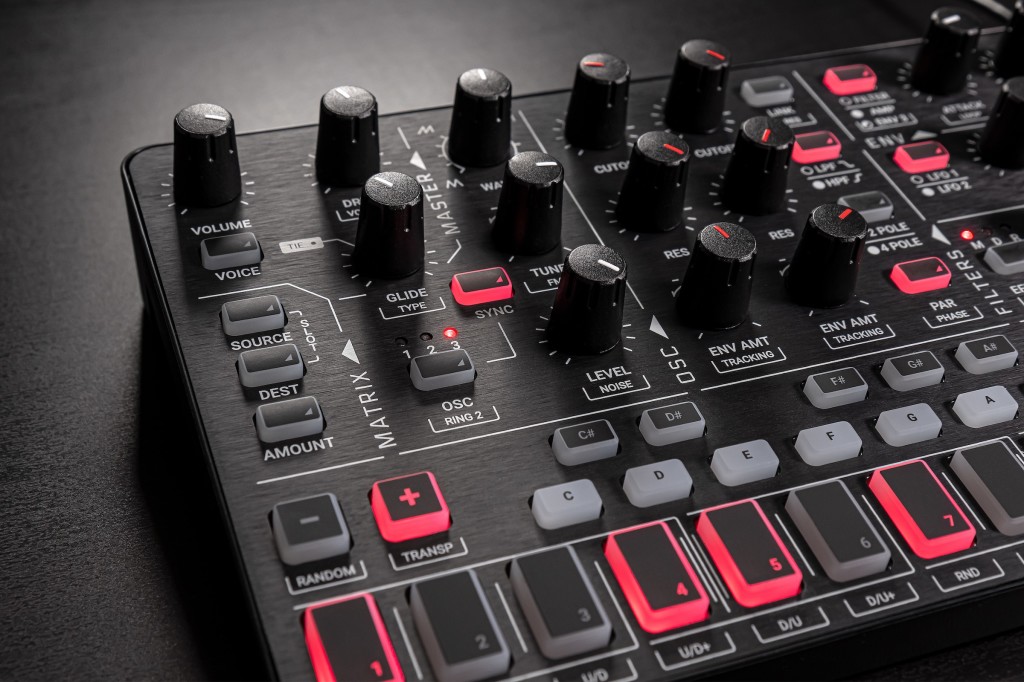
UNO Synth Pro X builds on what was my favorite variant of the original – the ultra-compact standalone unit. This time, the big change is obvious: you’ve got a ton more knobs. So you get hands-on control of more features, including all three oscillators, the two filters, filter and amplitude envelopes, LFOs, and now dedicated effects. It’s also easier to get at the matrix. There’s more here, too, though:
A new envelope. There’s now a third, fully assignable ADSR envelope (with loop and retrigger), on top of the filter and amplitude envelopes (and their optional routings).
Bassline mode. This is almost like squeezing an additional 303-style synth into the instrument. Hit BASSLINE, and filter and envelope behaviors change to give you some squelchy acid bass, in a way that is both very 303-like and also unique to the USPX architecture. (I will stand by the notion that “acid” is a vibe, not just literally the TB-303 – particularly as a number of tracks in the genre did later use other synths from Roland and even Korg and others.)
Sequencer enhancements. A lot of this is under the hood, but details like how the accents behave have been tweaked.
Shimmer reverb. There’s a big, lush new shimmer reverb – which you can also use for various special effects, especially with extreme use of time and pre-delay.
Uni-vibe – chorus and vibrato. In addition to the typical Roland-y complement of choruses (I, II, ensemble), you now get an additional UNI-V mode with its own MXR-style chorus and vibrato effect.
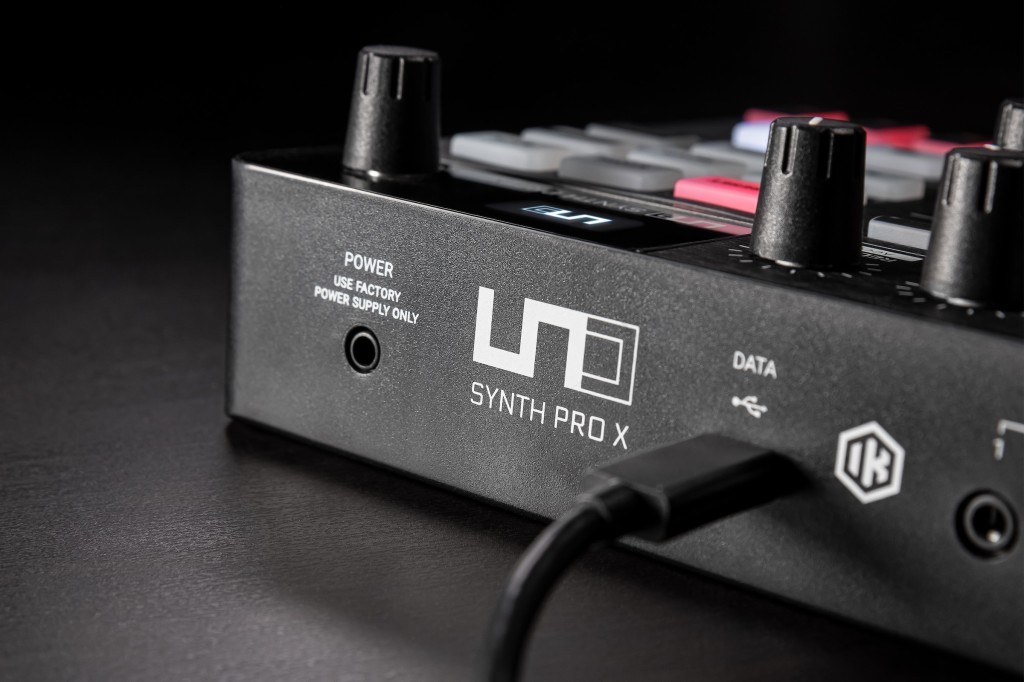
USB-C, included power supply. So this is important, too. There’s now an included power supply. (That’s true of the UNO Synth Pro keyboard but not the Desktop version, which was restricted to USB.) That’s worth using as USB can be prone to interference/noise on any synth. Using balanced connections and a separate power connection is a good bet for reducing that interference. You still have USB for data and power, too, though, and in my testing it also worked in a pinch (like when I was on the go, finishing some patches at my desk). Note that the USB connection is not an audio interface, but provides MIDI in and out and allows connection to the software editor/librarian. And there is now a USB-C jack in place of microUSB.
VCA Amount control. Send in the drones – as you turn VCA up, you have a consistent held sound without opening the amplitude envelope.
Sequence randomizer. Because sometimes you just need to roll the dice.
Mix and match sound and sequence. One advantage of the UNO Synth Pro’s sequencer was always the ability to store sequences with sounds – which also is a nice way to store ideas for later. But now you can opt to just load the preset without the sequence, so you can easily hear the same sequence with a different sound.
Restore onboard factory presets. It’s now easy to go back to the factory presets if you need to, even directly from the device.
More settings. Control the backlight level – a must. (SETUP > Backlight. Note that can illuminate dark keys up to 100%.) Also, now you can set behavior settings for the controls – something I wrote about in my hands-on of the previous generation. This means since these are knobs, not encoders, you can choose whether a parameter jumps to a setting or waits for you to pass through it as you turn the knob, or makes a relative partial adjustment. See SETUP > KNOB and then absolute, relative, and pick-up.
Product Manager Enrico Dell’Aversana tells CDM that there are also significant under-the-hood changes to gain staging and voicing. In my experience, while this had a lot of the character I appreciate from the previous synth, the overall sound is really transformed.
IK is compiling all the tests, sounds, and jam sessions into a playlist, which gives us a range of takes on this instrument:
UNO Synth Pro X [IK Multimedia]
UNO Synth Pro X is available to preorder:
If you buy something from a CDM link, we may earn a commission.
IK Multimedia UNO Synth Pro X Paraphonic Analog Synthesizer @ Sweetwater
Sound ideas, feature by feature
With all these additional knobs, you can now get a feel for the architecture just by tweaking knobs. Let’s walk through one at a time.
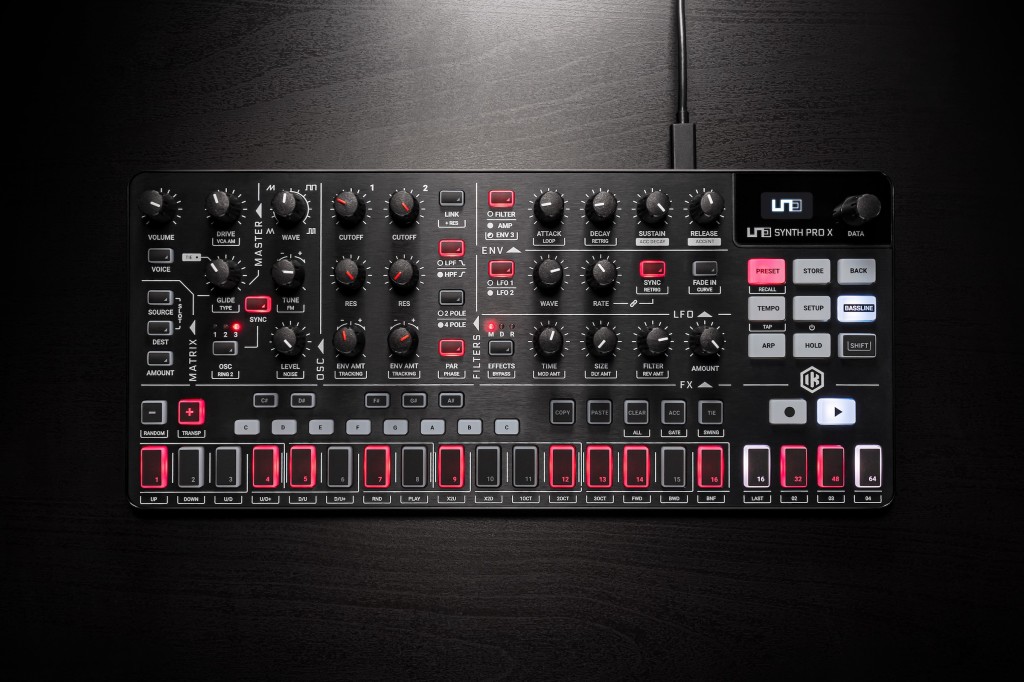
Tap PRESET and you can dial up any EMPTY slot to start from scratch.
VOICE (just under the volume knob) switches between mono, paraphonic, and legato modes.
First, to free up your hands, it’s useful to get a sequence going. Hit REC, then hold down some steps and tap one of the notes on the mini-keyboard above to set pitch. 16 steps is boring, so let’s set the sequence length to 15 – hold SHIFT + 16, then dial in the length with the DATA knob.
Now we can tour each section of the architecture.
Oscillators
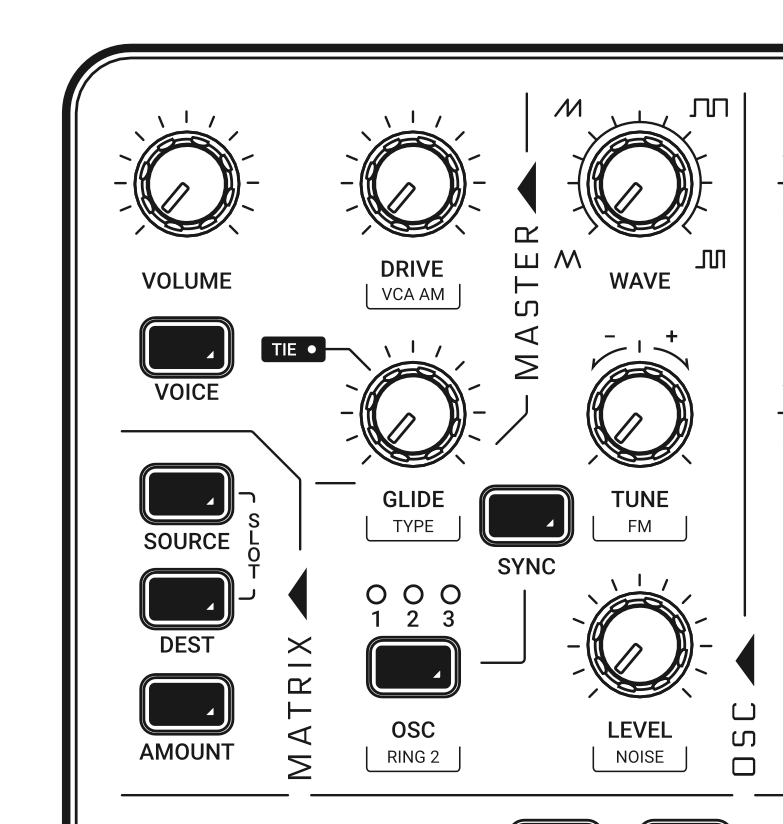
OSC select choose oscillator 1, 2, or 3.
Try adjusting WAVE of oscillator 1.
Select oscillator 2. Turn up LEVEL. Adjust WAVE and TUNE. The TUNE knob combines fine and coarse tuning. From just above 9 o’clock to just below 3 o’clock, it’s fine-tuning in cents; beyond those values, it’s coarse tuning in semitones. Try toggling on and off RING MOD with oscillator 2 and then adjust TUNE – you’ll get timbral shaping out of the same control.
What does ring mod sound like? Here’s a (definitely unmusical) example, just scrolling through the waveform’s tuning with ring mod engaged:
Select oscillator 3. Turn up LEVEL and adjust TUNE and WAVE.
Frequency modulation: with either oscillator 2 or oscillator 3 selected, and their LEVEL turned up, you can use SHIFT + TUNE to adjust FM amount. This gives you the option of FM on one or both of those oscillators. It’s also worth trying this with short envelopes to produce percussive sounds.
Try SHIFT + LEVEL to add a noise source – again useful with percussion.
FM and/or noise with the dual resonant filters in various modes can provide a bunch of varieties of pitched and unpitched percussion – and percussive-sounding leads and melodies. So let’s get onto the filter section to look at how to combine them.
Here’s a quick example of a single sequenced percussive patch, using short envelopes and FM and adding or removing noise (though a lot of this is just FM):
Filters
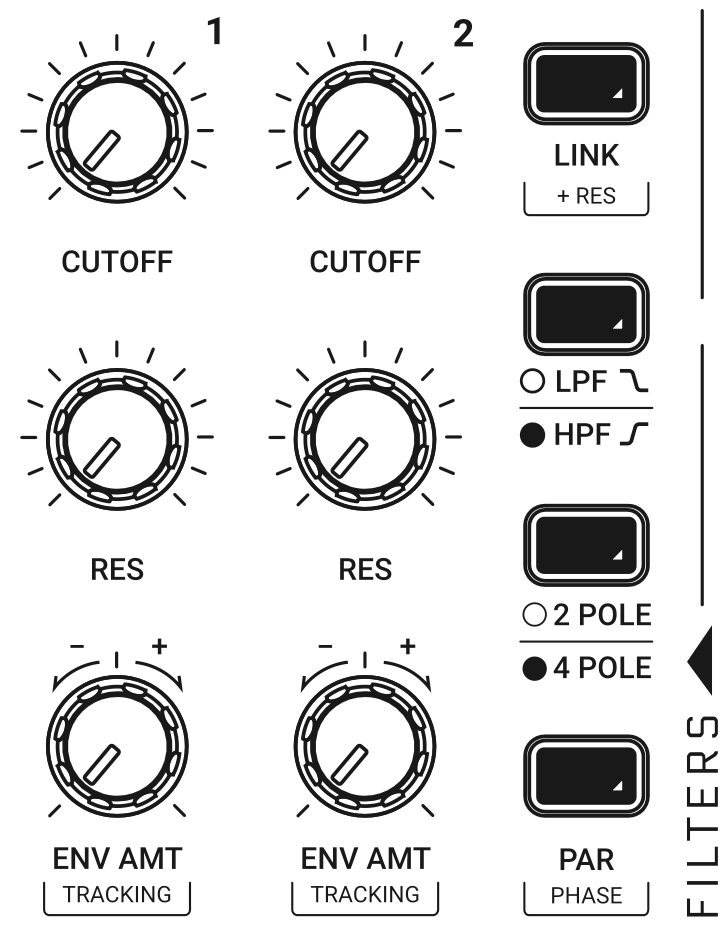
As its predecessor did, the UNO Synth Pro X has two filters, routable in series or parallel. Filter 1 is a two-pole OTA filter – think of the KORG MS-20, most famously. Filter 2 is a lowpass filter based on the SSI2164 chip – the same vendor who makes filters for Sequential, and with that very Prophet-y sound. If you just did a search on that chip, you’ll say – wait, that’s a VCA, a quad amplifier, not a filter. But you can use the amplifier silicon for filter design; SSI even has a technical note on the topic.
Okay, but enough. The bottom line is – you’ve got two cutoff knobs to tweak, two resonance knobs, and dedicated envelope amount knobs. The two buttons also each correspond to a particular filter. Filter 1: the LPF / HPF switch toggles between low-pass and high-pass modes. Filter 2: the 2-pole/4-pole switch toggles the two filter slopes.
This also means you can create dual resonant peaks with two lowpass filters, or combine lowpass (filter 2) with highpass (filter 1 in HP mode), and so on.
And unlike on previous models, those filter controls are all dedicated, making these some of the go-to knobs in live performance jams, too.
LINK lets you link cutoff values for both filters – useful especially in parallel mode – and SHIFT + LINK adds resonance. (Routing is below, under PRESET / edit preset.)
And don’t forget DRIVE. The dedicated DRIVE control in the upper left-hand corner determines the amount of signal fed post-filter two a two-diode overdrive circuit. And it can sound very, very dirty (as you’ll hear in the “acid” example in the Bassline section below).
Envelopes
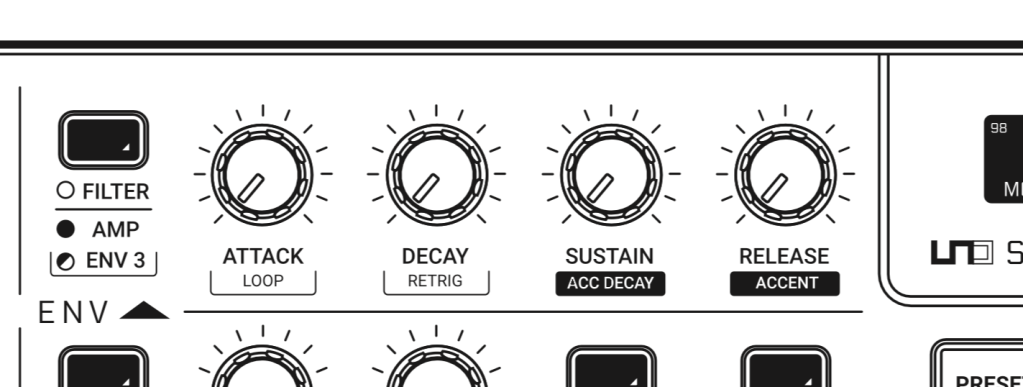
You now have three envelopes at your disposal. Don’t forget to enable the AMP envelope – the button will light red if it’s active, which I tend to activate first while designing sounds. Envelope 3
All three envelopes have LOOP and RETRIG controls, also accessible from the main panel (using SHIFT). The easiest way to hear this is with the AMP envelope, so try that first – set LOOP to on (SHIFT + ATTACK and look at the screen), and hold down a note, shortening the DECAY and SUSTAIN values.
Switch AMP looping back off, and crank up the amplitude envelope so you have some sustained notes. The FILTER envelope can reshape the sound – almost like having an additional LFO. Enable looping on the FILTER envelope, and try adjusting its envelope parameters while tweaking filter cutoff and resonance controls. The nice thing about this setup even versus the LFO is that you can use the dedicated ENV AMT knobs for each of the two filters to determine how much you modulate the filter with the envelope, plus reshape the filter envelope’s ADSR. It’s a bit like having a modular patch, all with just a quick parameter change and some knob twists.
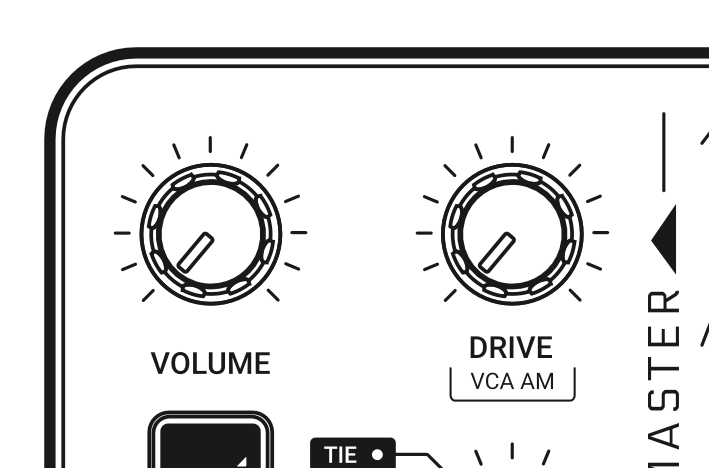
VCA AM. While we’re looking at envelopes, it’s a good time to consider the VCA AM parameter (SHIFT + DRIVE), which determines how much the amplitude envelope modulates the amplitude. Normally, you’ll have this turned all the way up. As you turn it toward 0, though, part or all of the VCA will remain open, useful for drones. (it’s nice to leave it a little above zero, as then you can still create note events above your drone.)
This note in the manual by the way sounds like an open invitation to me: “When the VCA remains fully open for a long period of time, the synth auto-calibration will stop and the synth will be prone to tuning drift.” Drift me, baby!
Envelope 3 doesn’t have any normaled routing, so let’s go ahead and enter the matrix.
Matrix and LFOs
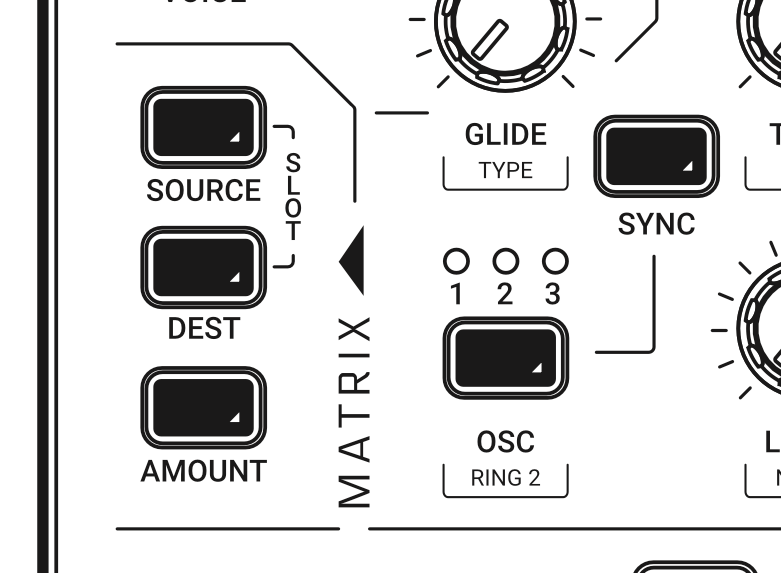
The Modulation Matrix on the UNO SYNTH PRO X is a revelation to me. I really expected I’d be digging into the software editor to do anything sophisticated (see below for that), but the new shortcuts for matrix assignments I found made it perfectly comfortable to do everything on the unit.
An easy way to start is with Envelope 3, since it has no routing by default. Hit SOURCE, choose ENV 3, then DEST – let’s choose OSC 3 WAVE. (Don’t forget to turn up OSC 3 LEVEL so you can hear.) Lastly, choose AMOUNT and turn up the value. (It’s at 0 by default, so don’t forget this, either!) Select ENV 3 (SHIFT + ENV 3) and adjust the controls.

Obviously, we can assign the LFOs the same way – and we have two of them. You can free-run them or sync them to tempo – which includes your DAW tempo if you’re using USB as the external sync source. Sync is set to musical note subdivisions. (Effects work the same way.) There’s a fade control for each. And you can set curves to linear, logarithmic, and exponential.
Note that you can reset LFO phase with each key or not, just as with the envelopes – set RETRIG to on. It’s off by default, and the setting is patch-specific, so you’ll need to remember to set it for each patch you want.
Effects
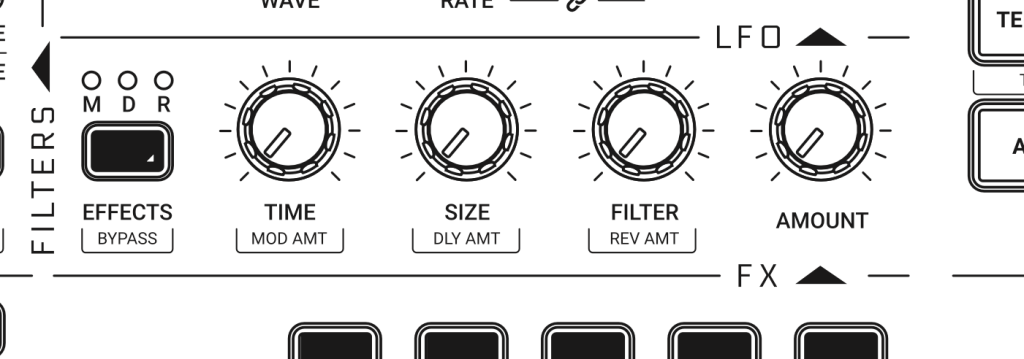
Apart from all these new knobs, the biggest overhaul on the UNO Synth Pro X comes in the effects section. That was arguably a weaker point on the original – I liked the effects, but they were nothing to write home about. Here, the effects are really a big part of the whole story, with the addition of UNI-V with an additional chorus or vibrato and the new reverb. And since you can route external gear in (see below), the USPX doubles as a multi-effects unit in your rig.
There are a lot of effects hidden there, just thanks to what’s possible in different modes. It’s not labeled on the silkscreen, but SHIFT+AMOUNT switches modes.
Modulations. CHORUS and UNI-V. The CHORUS mode gives you the familiar Roland-style chorus effects. IK can’t use the Roland names, but I can. FILTER here corresponds to MODE – SYNTH I or SYNTH II (JUNO-60/106 I and II), plus STRING (DIMENSION-D ensemble).
UNI-V – think MXR UNI-VIBE. There are two modes, just like on that pedal, VIBRATO or an additional CHORUS mode, selected again with the FILTER knob. (So yeah, while it’s not immediately obvious, there are actually four different choruses in total on the USPX.)
Delays. Again, SHIFT+AMOUNT for modes: MONO, STEREO, DOUBLER, PING PONG, and LCR. Delay up to 1s, or 500 ms for stereo delays and 350 ms for the LCR. LCR is LEFT CENTER RIGHT.
You can set these to SYNC or free-run by using the PRESET edit menu – PRESET > FX > DELAY > SYNC.
Reverbs. SHIFT+AMOUNT for HALL, PLATE, and SHIMMER-S.
The shimmer reverb is a huge new addition. Try in particular the diffusion parameter (TIME), and turn up AMOUNT, then adjust filter. Extreme settings here give you instant ambient, of course, and you get some lush possibilities in conjunction with the double filters. You can also turn *down* diffusion (TIME) and turn up other settings for a kind of unreal delay effect, which a number of the presets exploit.
Just how deep can it go? Well, just a single ambient patch with the shimmer reverb turned up can be pretty wild:
Don’t overlook the other reverb models, too, though, including for those huge ambient effects – the plate, for instance, has delay times up to 30 seconds. (Combining small size with long delays or extreme diffusion settings comes up with unique sounds.)
You’ll also note some different sounds in various combinations of the two analog filters with the digital filter in the reverb algorithm.
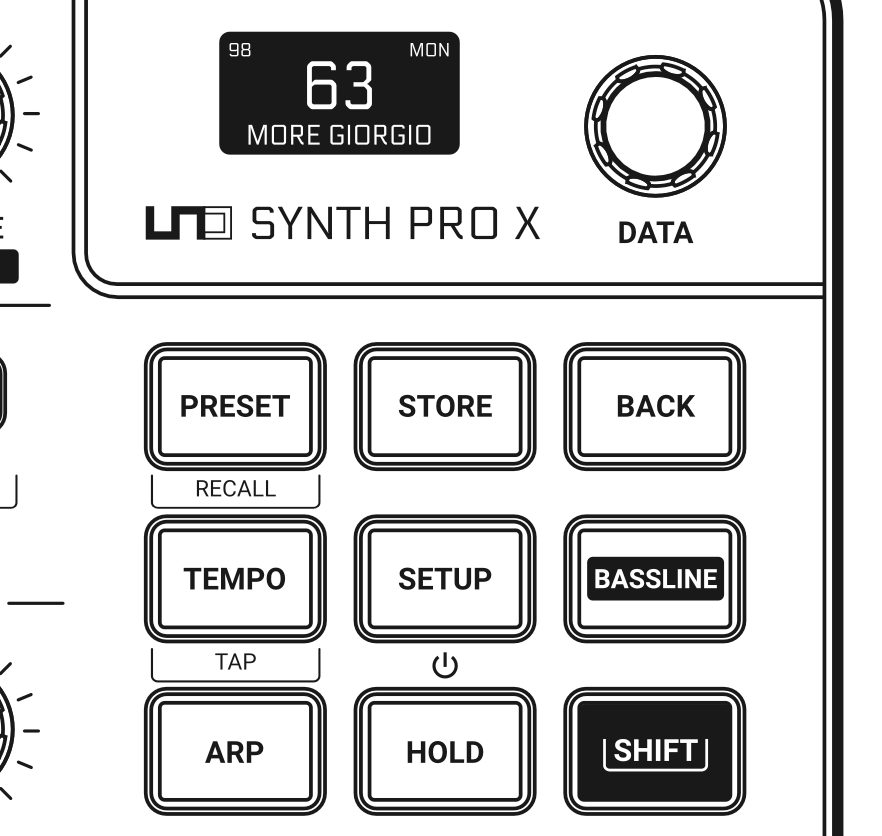
More options for presets, setup
Without cracking the graphical editor on your computer, you can edit all parameters directly from the panel, in two locations:
SETUP: Master tune, MIDI settings, sync, keyboard, backlight, calibration, etc.
PRESET: All voice parameters.
Tap PRESET to edit presets. Many of these are duplicates of values accessible via the knobs and buttons, but there are a few hidden away to be aware of. First choose PRESET to enter PRESET EDIT mode, then:
MIXER > EXT IN ROUTE chooses pre/post mixing of the external audio input.
FILTERS > CONFIGURATION is where you’ll find serial / parallel routing options for the two filters.
PRESET > FX > REVERB, DELAY, MODULATION gives you additional controls for the effects, including a number of parameters not available on the front panel.
EDIT PRESET also gives you a list view on all parameters, which can be useful if you don’t have the editor handy – and offers an alternative way to edit the modulation matrix.
Bassline mode
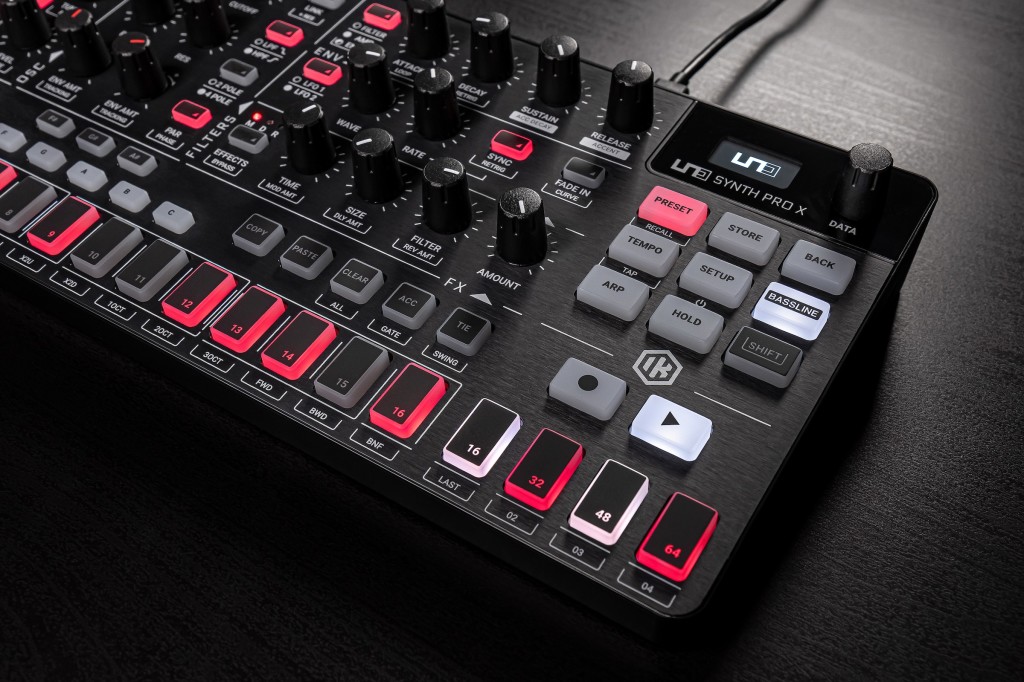
Bassline mode makes the USPX more 303-ish, without directly referencing a 303. Here’s what changes:
- Upper cutoff of the filter reduced (5 kHz instead of 20 kHz)
- Filter 1 automatically toggles to HPF (when you first press BASSLINE)
- Envelopes use just 2-stage Attack and Decay (for front panel controls). So what happens to the other knobs? Well:
- Sustain becomes ACCENT DECAY
- Release becomes ACCENT amount
But it’s still a 3-oscillator, 2-filter synth with modulation and more controls, so really just with a different filter behavior and two-stage envelope. That being said, you get instant results when you toggle on this mode.
Here are some examples of what the Bassline can sound like with a ton of resonance and overdrive. So yeah, it’s not really a 303 – dual filters, and the ability to mix multiple oscillators. More like acid on acid.
Note that not all parameters are saved when you enter BASSLINE mode, meaning toggling it off again won’t return to exactly where you left off. The best workaround is to store any preset changes before you engage BASSLINE.

Sequencer and arp
There’s an onboard 64-step sequencer with both step mode (hit REC) and “real-time” mode (REC + PLAY). Real-time mode is still technically a step mode, but will add triggers as you play. Step mode requires you to hold down a step and press a key to input notes. Hold a step to edit it, then use the data knob and the shortcut keys next to the keyboard.
Most importantly, the sequencer also includes automation – and you can automate CV and gate, making this a powerful modular sidekick. Each step has editable automation along with pitch. It’s actually worth scrolling through some of the preset sequences, as a lot of them make heavy use of automation.
But stuck for an idea? Don’t forget SHIFT + OCTAVE DOWN for a quick random sequence.
There’s an arpeggiator, as well, with various directions and gate. SHIFT + one of the sequencer keys to choose mode. SHIFT+ACCENT sets gate length. The arp can easily be set to latch mode by engaging with HOLD, meaning a nice performance strategy is actually to use the arp rather than the step sequencer, and transpose with the keys. (That is, keep the step sequencer for your pre-programmed presets, but if you’re looking to jam, opt for the arp instead.) Hit HOLD, and then tap notes to change pitches and toggle individual steps to change the pattern – your hands are free for other tweaks.

Integrate with your gear and DAW
You’ve got some powerful onboard features for integrating with your DAW and with other gear.
Computer integration. Remember that the USB connection works with data, so you can sequence your UNO Synth Pro X from a computer over USB – or record sequence data on the computer or sequence software instruments with the onboard sequencer. You’ll find both an input and output on your computer.
The UNO Synth Pro X Editor also acts as a handy way of controlling parameters onscreen, and functioning as a librarian for saving and recalling presets. This is also the way you’d export presets to share with other people. You’ll find the Editor is useful for viewing parameters at a glance that might not be visible all at once on the panel – especially Modulation Matrix routings. It’s also the easiest way to check out effects settings and different parameter names all at once.
See the main, effects, and matrix screens:
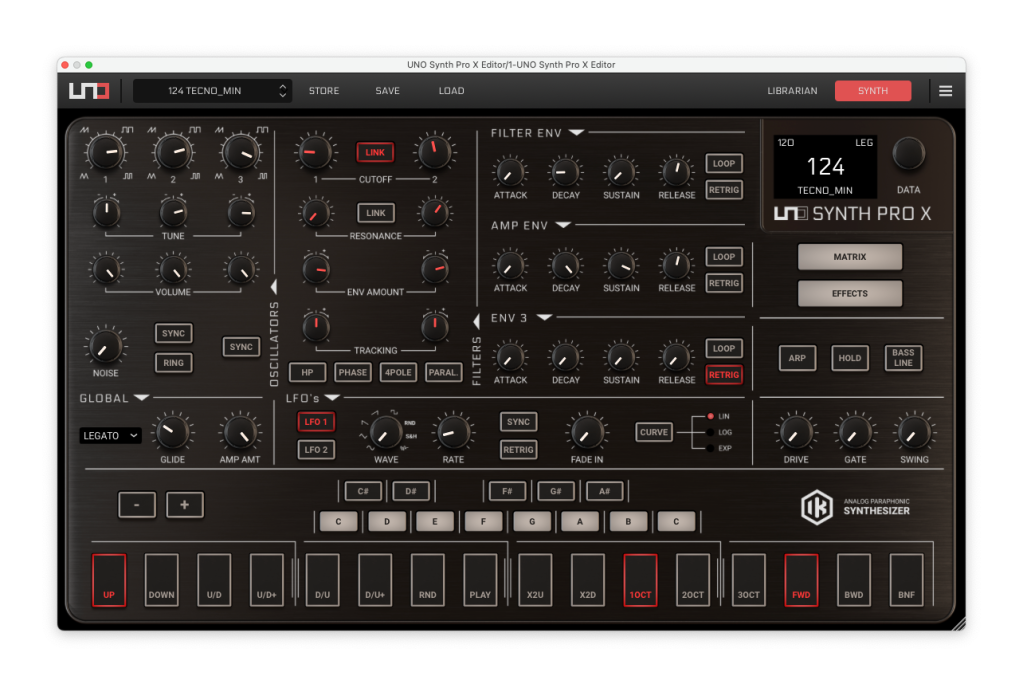
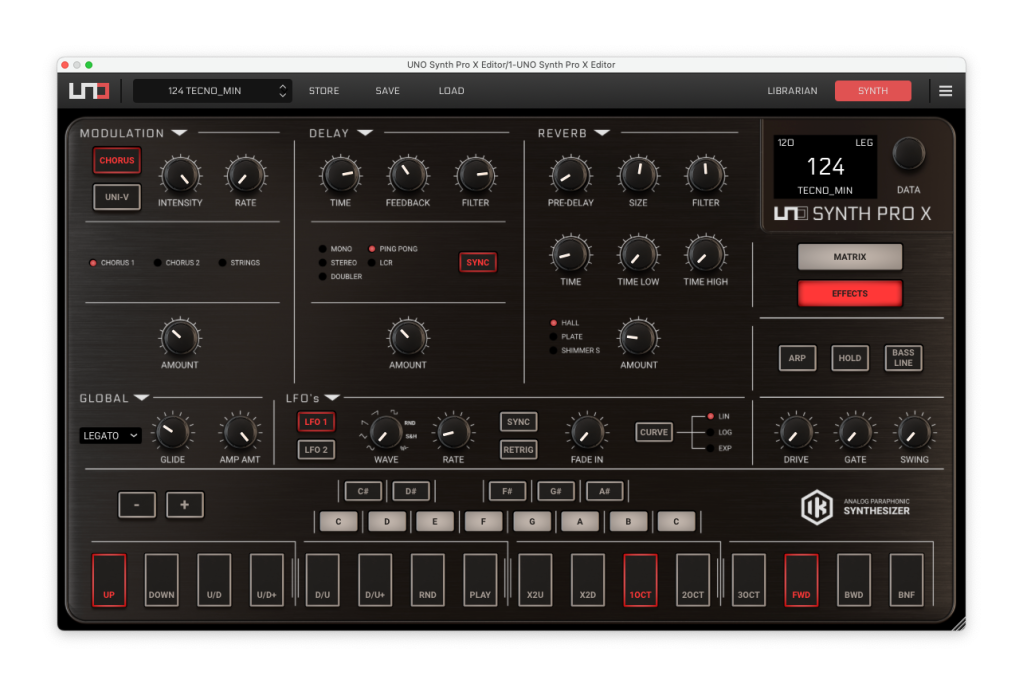
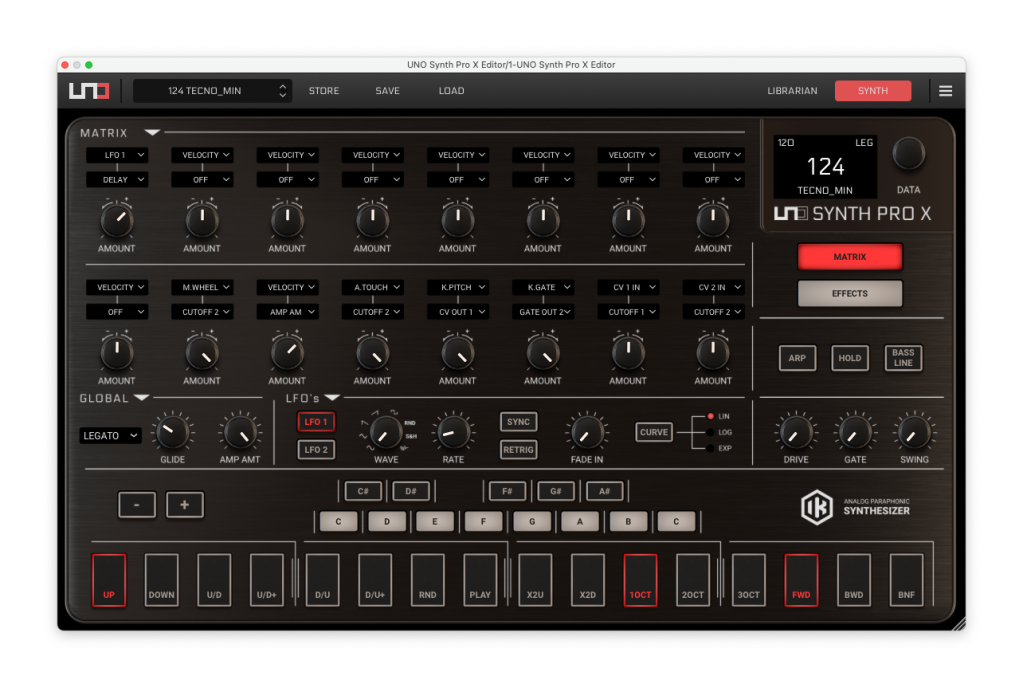
Click Librarian for preset recall and storage features. Also, crucially, you can automate preset recall using the Editor in your DAW, so you can save and recall presets with projects.
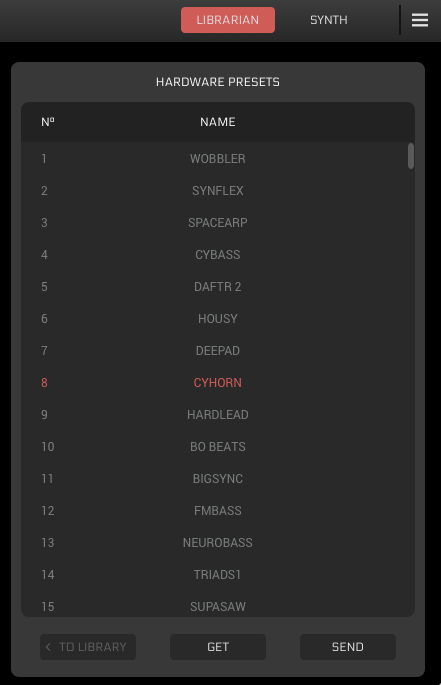
You’ll add an instance of the Editor to the project, and then you can record and play back on that track automation, control change messages, and even SysEx info. The Editor is actually what will send that data out to the synth. (One caveat: you won’t always see that data update in the Editor’s UI, as that shows what was received from MIDI input. But it will be saved and recalled with sessions)
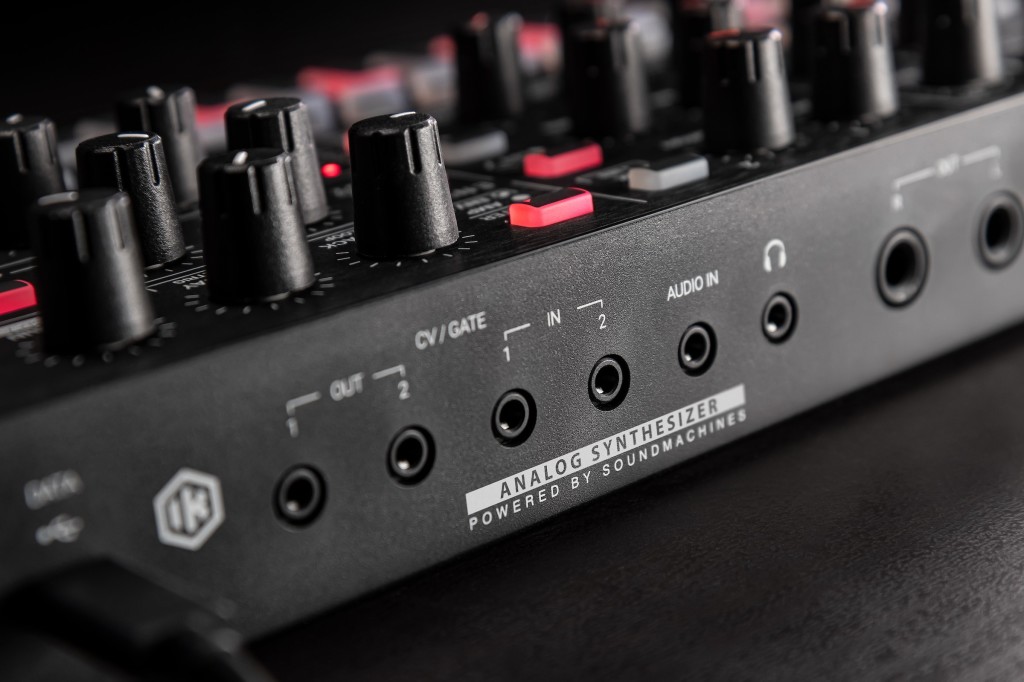
Hardware integration. In addition to obviously giving you MIDI I/O, the UNO Synth Pro X like its predecessor is a great companion to gear with CV and gate. Thanks to its compact size, it fits neatly next to a modular rig, and acts both as a complete synth and an additional sequencer, since you can use its step sequencer to sequence your modular. In the other direction, you can add additional modulation sources from a modular rig to use with the UNO.
Best of all, that CV and gate are available right in the Modulation Matrix, so you can route these freely as you like. Keep in mind:
CV input: -2.5V to +2.5V (bipolar)
CV output: 0V to 5V (unipolar)
And you have two inputs and two outputs you can use for CV or gate.
You can then use the UNO’s envelope generators and extra LFO(s), by routing those to your modular (or other gear). That frees up envelopes, VCAs, and LFOs on your modular, which I find are too often in short supply, especially in a mobile rig.
Use with external audio sources. There’s also the ability to route audio input into the UNO Synth Pro X (making it a nice multi-effects unit for your modular, as well). That gives you the full architecture, including the dual filters and effects section. Some tips on that:
- You can route audio through the UNO’s architecture (PRE), or just passthrough external signal directly to the output (POST) – the latter is useful if you just want to daisy chain other gear and your UNO. Set FIXED PRE or FIXED POST for a universal setting, or PRESET to store different settings with each preset.
- By default, the UNO Synth Pro X voice and your external input will be summed together. If you don’t want that, turn down the level for oscillators 1-3 and noise. (I stored this as a preset for external use, along with my favorite effect settings.) You can always get creative and mix those oscillators back in.
- (Be careful with gain staging, since you’re mixing internal and external signal.)
- The UNO will also route through its own VCA and amplitude envelope. Here’s where VCA AM comes in handy – set VCA to 0 and you’ll always hear the external input. Now this also means –
- You can use the UNO Synth Pro X as a VCA for a modular voice, by turning up VCA AM and then setting the amplitude ADSR controls, and still keep the effects going. (And that’s in addition to LFO/envelope operation, as mentioned above.)
Just remember that sequence (and probably store it in a preset). If you want to use the UNO Synth Pro X as effects, set the input to PRE, turn VCA AM to 0, and then check gain staging. Then you’re free to tweak filters, effects, and all modulation and envelopes on those using the internal architecture. It’s like an instant upgrade for your other gear.
Playing live
All of this means some powerful ways to play the UNO Synth Pro X. You can load different presets – and retain the same sequence or switch sequences with presets. The synth will advance at the end of the sequence, too, quantized to sequence length. This means you’re already starting with a way to load up sounds and/or sequences for a live set. From there, of course, you have all the tweakability of the instrument. You can also send or receive sync via MIDI, analog synth, or USB.
Conclusions
Yes, the budget UNO Synth Pro remains the previous-generation Desktop edition, and this is a larger investment. (And if you’re looking for a bargain, that previous generation absolutely qualifies!) But the additional hands-on control, brilliant feel of the new design, new effects, bassline mode, and overall polish make it easy to justify the upgrade. This is simply one of the most satisfying compact synths in recent years, and it’s easy to stash in a backpack or gear bag alongside your other hardware or computer. Or stash it anywhere you need some instant inspiration.
This is not a one-knob-per-feature synth, even with the additional controls; you do still need to use the SHIFT key and swap modes. I still found it fast working through multiple oscillators and so on, however. Having the editor is a good option, but in this case I used it primarily for editor/librarian functions and to double-check presets; I found in this iteration I worked almost entirely on the hardware and having to route the editor was even a distraction – so I just kept hardware-only, even with my DAW open.
Oh, and – since even in real-time mode this is still a step sequencer, I did focus on an external controller or sequencer when I wanted more control. (The original desktop unit had a touch keyboard, in addition to the full keyboard unit – here you’ll need to bring your own, apart from the manual on top.)
But all in all, it’s terrific having an analog paraphonic synth with multi-effects in this size and price, and with CV connectivity to boot. Let us know if you’ve got more questions about it or want any particular tutorials in text or video form.
More:
UNO Synth Pro X [IK Multimedia]
UNO Synth Pro X is available to preorder:
If you buy something from a CDM link, we may earn a commission.
IK Multimedia UNO Synth Pro X Paraphonic Analog Synthesizer @ Sweetwater
And check our in-depth guide to the previous generation and interview with the folks behind it – just as relevant to the X:
Oh yeah, and – top tip, this freebie for Ableton Live pairs perfectly with the UNO Synth Pro X in bassline mode: