Like well-stocked studios of hardware, software has become personal, idiosyncratic, and stuffed with functionality. Computer producers are passionate as always about what works. And that has made FL Studio a kind of subculture all its own. Image-Line has a unique way of encouraging loyalty: while the company still peddles new add-ons to its existing customer base, the expansive functionality of the FL Studio program and all its major instruments and effects are included in lifetime free upgrades. FL Studio is a program you buy once that keeps getting better, without the usual upgrade purchase treadmill.
So, when we talk about everything that’s new in FL Studio 9, or FL Studio 9.1, released last week, those improvements are free to existing users.
You can read my review of FL Studio 9 for Keyboard Magazine:
It’s a strange thing that the word “toy” has come to have negative connotations in music tech. Apparently, we want our music tools to be big and powerful, like a chainsaw, ideally emitting manly gasoline fumes. But when we talk about music, we use the word “play.” FL Studio is nothing if not a toybox. But it’s a toybox in the best sense.

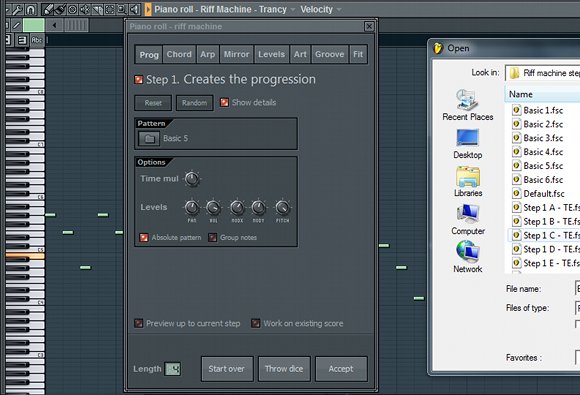
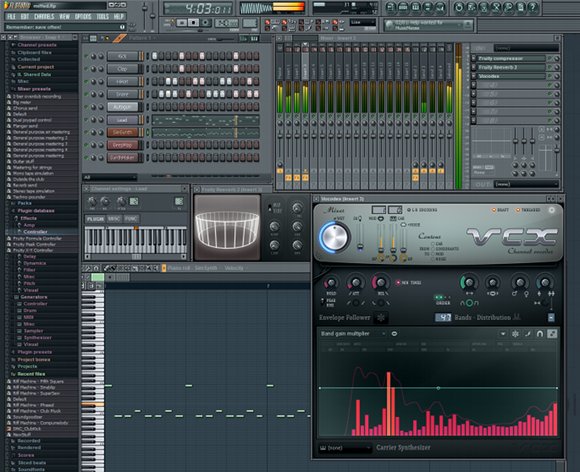
FL Studio 9 introduces a number of improvements, including a Riff Machine (pictured above), which can dynamically generate musical ideas if you’re stuck for inspiration. Perhaps more importantly, the upgrade also delivers more intelligent routing and MIDI control, and a really gorgeous vocoder. (Yes, Reason, Live, and FL Studio now all have vocoders; what’s interesting to me is that they’re each quite different, true to the personalities of the three developers.)
FL Studio 9.1 adds still more, as you can see in the video above. There’s a brand-new drum modeling engine called Drumpad, which should couple perfectly with FL’s sequencing features. (It’d even go nicely with that aforementioned Riff Machine, for some complex, generative patterns. Ah, I think I know what I’m doing with my Saturday night now.) There’s also a real-time convolution plug-in, which sounds like a fun feature to abuse.
There are lots of additional videos on the FL forum, though true to form, I find this isn’t necessarily how everyone uses the program:
Tips for Getting Started, with Jim Aikin
Jim Aikin has long been one of my favorite writers in this field; you can find his work in Electronic Musician, Keyboard, and others, including the lesser-known but superb Virtual Instruments. But, since working with him as the technical editor – slash – life coach on my book, I’ve also gotten to enjoy Jim’s emails, which are frequently themselves packed with knowledge, musical ideas, and perspective. Jim is a cellist, and as someone with a classical and compositional background myself, I appreciate that slant on things. (It’s certainly not what people typically associate with FL Studio.)
FL Studio is a deep tool – deeper than I think a lot of people appreciate. But it’s not always clear where to begin. Jim shares his own take on how to get started with the tool, creatively.
He writes:
My #1 tip would be this: Assign every Generator to its own mixer channel. (And name the mixer channels, so as to avoid confusion.) Then automate your levels by right-clicking the mixer faders and creating automation clips. (After selecting the part of the song where you want the gain change, of course.) The reason to do it this way is because then you can use the volume knob next to the Generator itself for _global_ changes in the level of that instrument. You never have to mess with re-editing tons of automation data in order to make a global gain change from one end of the song to the other.
Here’s another tip, which I learned by posting a message on an FL forum: By default, FL does not patch your mod wheel moves or aftertouch through to the 3rd-party Generators (softsynths). If you’ve selected a patch that uses mod wheel or aftertouch and you actually want to play an expressive line, this is annoying. But there’s an easy fix: Open the instrument’s edit window and select Browse Parameters from the menu in the upper left corner of the window. This opens the Browser, with a complete list of parameters. Scroll down. At the bottom of the list you’ll find all 128 MIDI CC’s, and also aftertouch. (The MIDI CC list does not appear with built-in plug-ins such as Sytrus and Slayer.) Right-click on the knob icon beside the mod wheel, select Link To Controller, and wiggle the wheel. Now the plug-in will respond the way you want it to.
Here’s another one: You can create your own quantization templates. Record a bar of regular 16th notes (or whatever) to a piano-roll, edit it to taste, Open up the piano-roll window’s File menu, and choose Save Score As. Save it in FL Studio > Data > Patches > Scores > Quantization. Now here’s the bonus tip: There’s already a long list in that folder. So that you won’t have to scroll down to find one of yours every time you want to use one, start your file names with an underscore (such as _Shuffle16th_32.fsc). They will appear at the top of the file dialog when you access it from the Quantize box.
And another: Learn the QWERTY key equivalents. When you hover the mouse over a tool button, the key command equivalent is shown as a dark gray (almost invisible) letter at the right end of the info bar, under the word HELP. I’m constantly switching back and forth from Select (E) to Draw (P). Then there’s the scroll lock key (important) and the fact that left Alt is not the same as right Alt.
Jim also shares a bit of how he uses FL in his own workflow:
I clone patterns a lot. But then, I’m a composer, not a loopin’ beatbox guy, if you see what I mean. I lay down a pattern that I like, and then I start to think, “Hmm … I need an extra hi-hat hit on the last beat in every other bar.” So I clone the pattern, delete the hi-hats from version 1 and everything else from version 2, then I put the hi-hat pattern in its own lane in the Playlist and clone it so I can alternate Hat #1 with Hat #2 in the Playlist. That would be a simple example.
The “Jump to next empty” command in the step sequencer is also indispensable, I find. When you’re in song mode and want to record something new, you almost always need to use that command before recording.
The grouping function in the step sequencer is nice. I usually group all of the percussion channels together, just to get them out of the way visually.
After adding a generator, go to the Channel Settings box and give it its own mixer channel routing (“FX”). This is a good habit to get into. With multi-channel VST plug-ins, the MIDI Out generator is absolutely essential — if you can’t figure out how to make this work, let me know, as it’s a little twisty.
Be sure to check out Slicex. It’s a killer plug-in for any type of sampled beat loop. A number of other plug-ins … just go down the Generators list and try them all. Beepmap is cool (it’s a postage-stamp-sized version of [visual/image-based synthesis tool] Metasynth), Slayer rocks, the Drumsynth is stupidly good for analog percussion, Wave Traveller is great for programming scratches, and you can do some fun stuff with the Speech Synthesizer as well. Oh, and SynthMaker … a complete programmable synth, under the hood. Some of the synths that ship with it aren’t that inspired, but SynthMaker is capable of doing many of the kinds of patches that Reaktor does.
The live mode features are not as extensive as those in Live, but they’re usable, I think. Check ’em out.
And have fun — FL, in my experience, seems to make music fun again.
FL users, got tips we missed?
Has anyone created something with the included version of SynthMaker they’d like to share?
Other questions?
Let us know. And yes, we’ll keep calling it Fruity Loops.

