With Ableton Push 3, Max for Live effects, instruments, sequencers, and other tools can work on standalone hardware – even without your computer. So it’s a perfect time to look at how Max for Live devices can work without a computer display – and, by the way, that’s just as useful on Push and Push 2, as well. Here’s what you need to know, as a user, a first-time patcher, or an experienced developer.
Thanks to our friend Darren at Isotonik Studios – we got chatting about this and he reemerged with some useful video demos!
This is the first part of a three-part guide to patching for Push. If you’re new to Max for Live and curious, stay tuned, as we’ll cover starting from scratch next month. It’s worth checking out the Building Max Devices Pack from Ableton to help you get started.
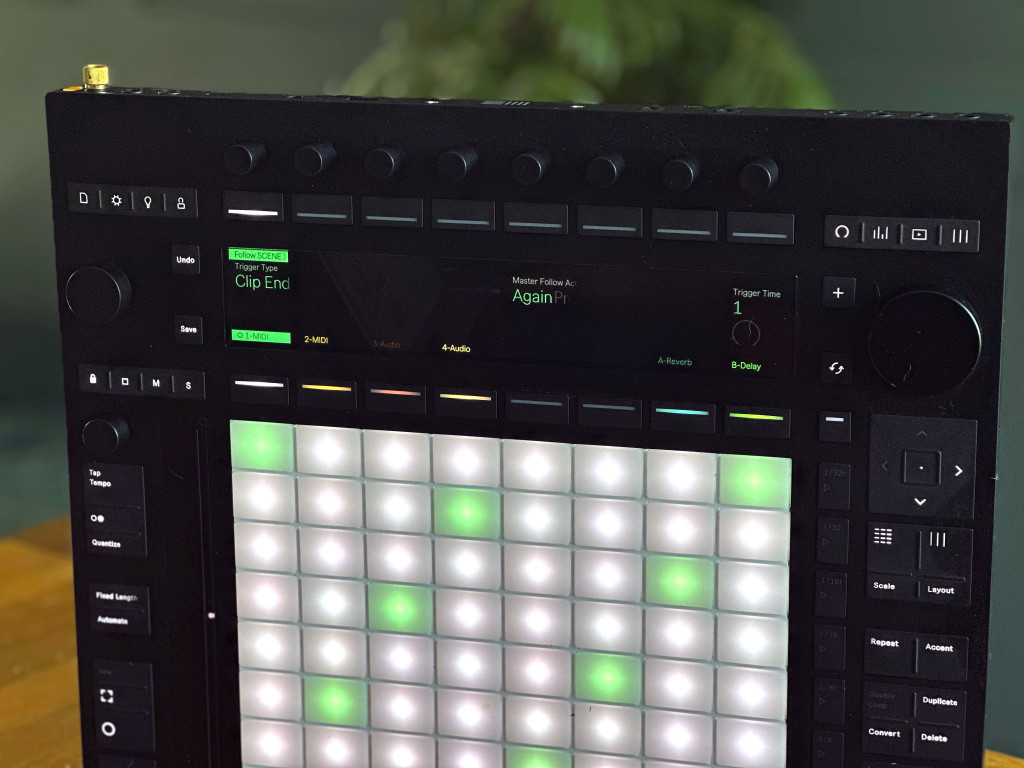
Photo courtesy Isotonik Studios.
Standalone compatibility
The techniques below for handling Push encoders and display will work for any Push hardware version. If you want to support standalone mode on Push 3, though, there are some additional requirements. (Of course you’ll need a Max for Live or Ableton Live Suite license, which you’ll also want to register to Push standalone if you’ve got it.)
Use the latest version. Keep Max, Max for Live, and Ableton Live up-to-date to be sure to incorporate all the latest features and fixes.
Third-party externals are not supported. You’ll need to adapt your patch so that it relies on only native Max 8 objects and libraries. Gen will run, though you’ll need a full Max 8 license to build your device.
Test first. You will sometimes encounter the error message “This device contains missing or incompatible Max objects. Please contact the device developer for more information.” This is an indication of some incompatible object in the patch, though generally this will be triggered by a third-party external.
Evolving support. Ableton and Cycling ’74 say they’re actively working on developing additional support – greater compatibility and more fixes now, and possibly new features later. So expect some things to change. (Ableton has published a support article on compatibility of its own Devices. Their general Push 3 technical FAQ is also useful.)
RNBO also isn’t supported yet in the release version of Live, but will be supported in Live 11.3.20 currently in public beta. You’re then able to use the rnbo~ object in your Max Devices on Push standalone. (Compiling to externals still won’t work – as with other externals.)
But I will say despite these notes, we found a lot of stuff worked. Apart from any third-party libraries, largely the sticking point was the use of live.banks, below.
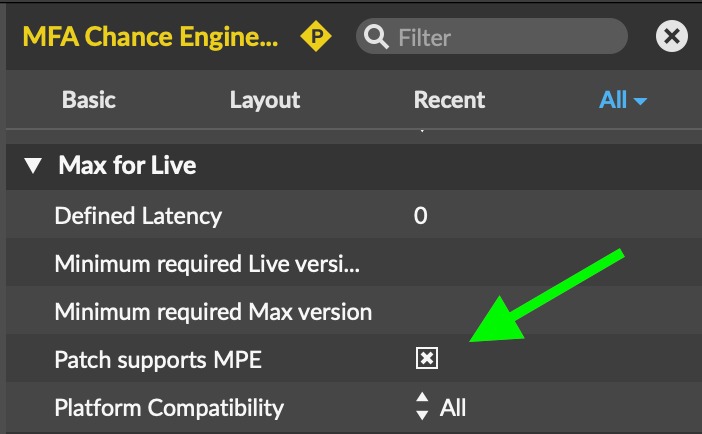
Enable MPE. In the Patcher inspector, it’s worth also enabling MPE support – which then allows support for the expressive grid on Push 3 (and other MPE devices). Thanks to Noah / Manifest Audio for the reminder!
Push hardware. What is worth saying is that approaching the UI in this way works in both standalone and controller mode, including on original Push and Push 2 hardware. That’s relevant for Max patchers and users – even if you don’t have Push 3 in standalone mode, it’s great to be able to focus on the hardware and take your eyes off the computer screen.
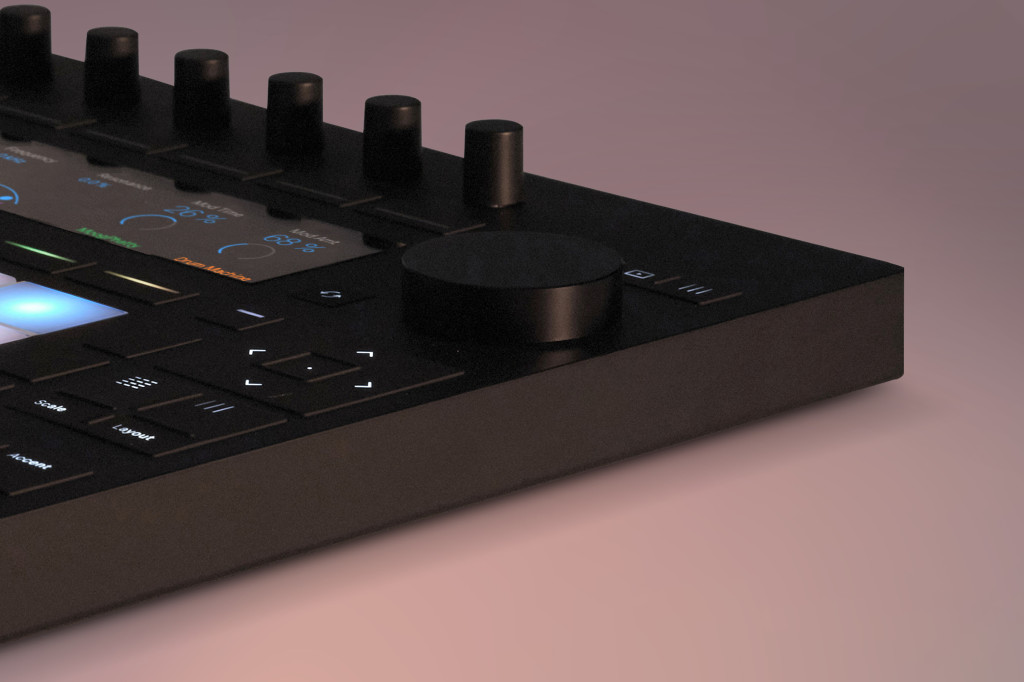
Photo courtesy Ableton.
Push is the UI
There are some really cool graphical interfaces in Max for Live Devices. But for hands-on jamming and performance, we want to be able to focus on the Push display and its encoders. In Push standalone mode, of course, it’s a requirement, since you won’t even have the computer interface available.
This means reimagining Max patches for those encoders. (For now, you can’t access the Push’s buttons directly – but remember that you can use MIDI and MPE from the Push grid, too, as note and expression input.)
Here, put this on in case you forget.
live.banks
The trick to all of this is live.banks, part of the Live API support in Max for Live. The “banks” as in parameter banks – that’s the pages of encoder parameters you see on the Push display, in groups of eight.
Without live.banks to register parameters from the Max for Live Device, you won’t be able to interact with the Device on Push. You’ll see controls on the computer UI, but just an error message on your Push – including in controller mode.
Even non-patchers can actually go in there and add support. Darren shows us how, using the (amazing, by the way) forthcoming GrainyDay device as an example, plus Elisabeth Homeland’s Latency Fixer:
- Open a Device, Unfreeze, and enter Patching mode. Be sure not to save/overwrite existing Devices, especially if you’re not a patcher – to avoid accidentally breaking a device!
- Search objects in the patch (cmd-F/ctrl-F) and type live.banks to check if the patch contains one. (Make sure to use find, not the Search Sidebar function which is for documentation!)
- If not, add a live.banks object.
- Double-click the object and you get a graphical editor for Parameter Banks.
- From there, you can add or change parameter mappings, add and remove banks (+/- buttons at bottom), or even just reorder mappings.
- Freeze the device, and save a copy of your modified device (best in Places in your browser).
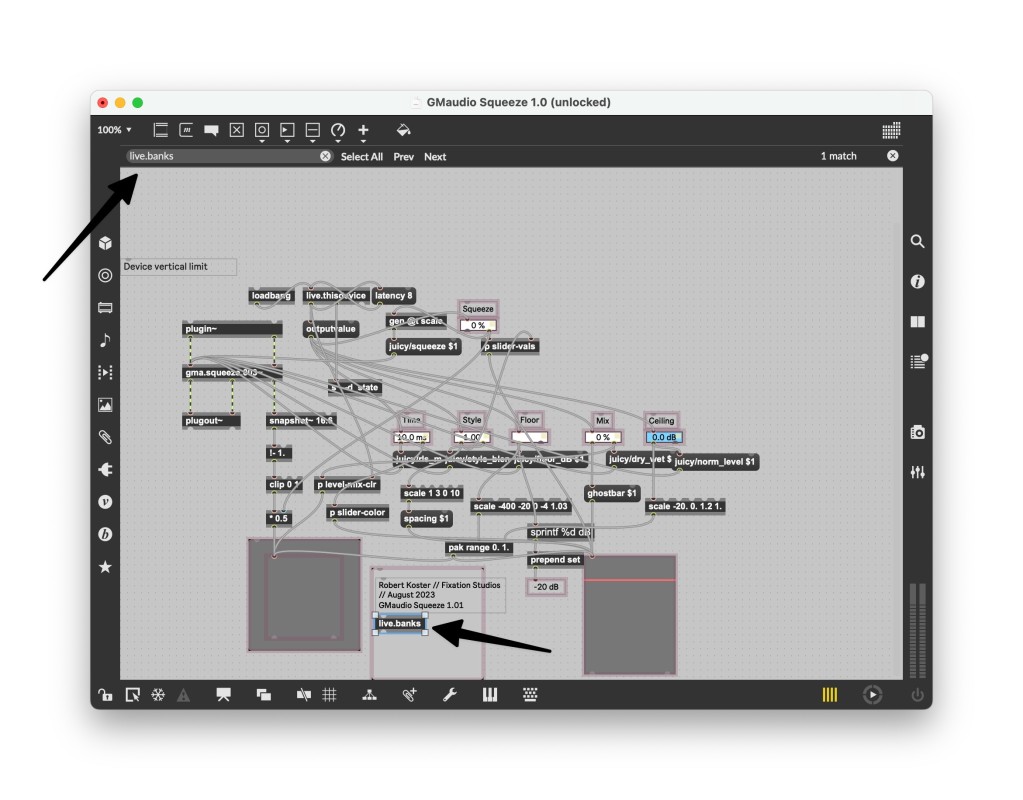
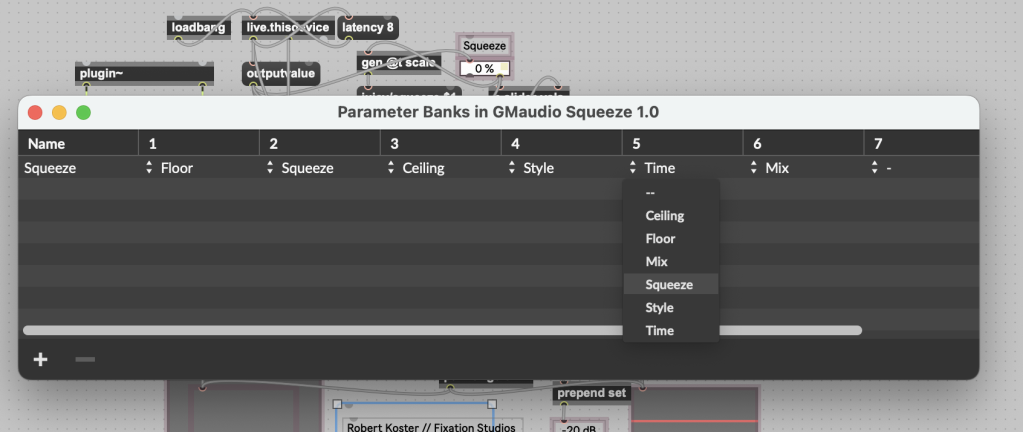
What’s cool about this, too, is you can go in and remap parameters if you want to customize what the developer did.
UI parameters you want to map do need to be automated and stored. We’ll go into this in more detail when we walk through how to make Max for Live devices from scratch, including for folks who know nothing about Max.
Dynamic controls
But wait – there’s more! Max for Live devices can also dynamically remap their parameters on the hardware. This bit will be mainly useful to developers, but end-users you’ll get a chance to play with this a bit, too.
Let’s actually dig into the live.banks docs:
live.banks has not just this UI, but also getters and setters. And that includes the ability to edit parameter mappings on the fly.
Here’s how the edit message works:
Edit a parameter bank, specified by bank_id (0-indexed). To change the bank name, pass a new name as bank_name , or pass – (minus) to use the existing name. The optional list of parameters should be a list of index/name pairs in the form parameter_index parameter_name . For instance, edit 0 newname 0 foo 2 bar 4 – 5 bap would change the name of bank 0 to newname and modify parameter slot 0 to use the parameter foo , slot 2 to use the parameter bar , eliminate the parameter in slot 4, and assign slot 5 to the parameter named bap .
This opens up the possibility for far more dynamic, interactive Max for Live devices running on Push. Instead of paging through parameter banks while you try to play – which is a major disruption in flow, especially (gah) onstage – you can have the Device remap parameters for you.
Note that you can’t dynamically rename parameters – that question came up – but you can rename banks and assign different parameters (with their existing names) to slots. That is, you’ll still see the dynamic parameters labeled correctly. For more bidirectional UI feedback, we’ll see what Cycling ’74 and Ableton choose to do with this API in future.
Here’s Darren again, showing a clever way one of their Devices works with the dynamic mapping feature. After that demo or if you skip ahead, he shows off how those edit messages work inside the Max patch, too. This time the example is Follow Scene and Clip XL:
I hope this inspires some of you Max patchers to work creatively with this, and – yeah, I’ll try to think of an easy example for us beginners in the tutorial content next month. Darren has even gone further than this, grabbing the Live grid and adding dynamic light feedback, lots of other cool hacks. Stay tuned for another video.
Developers: supporting multiple versions
One last note just for Max developers. If you want to offer different functionality when running on desktop that isn’t available on Push standalone, there is a workaround that lets you adapt the Device based on whether it’s running on a computer or standalone hardware.
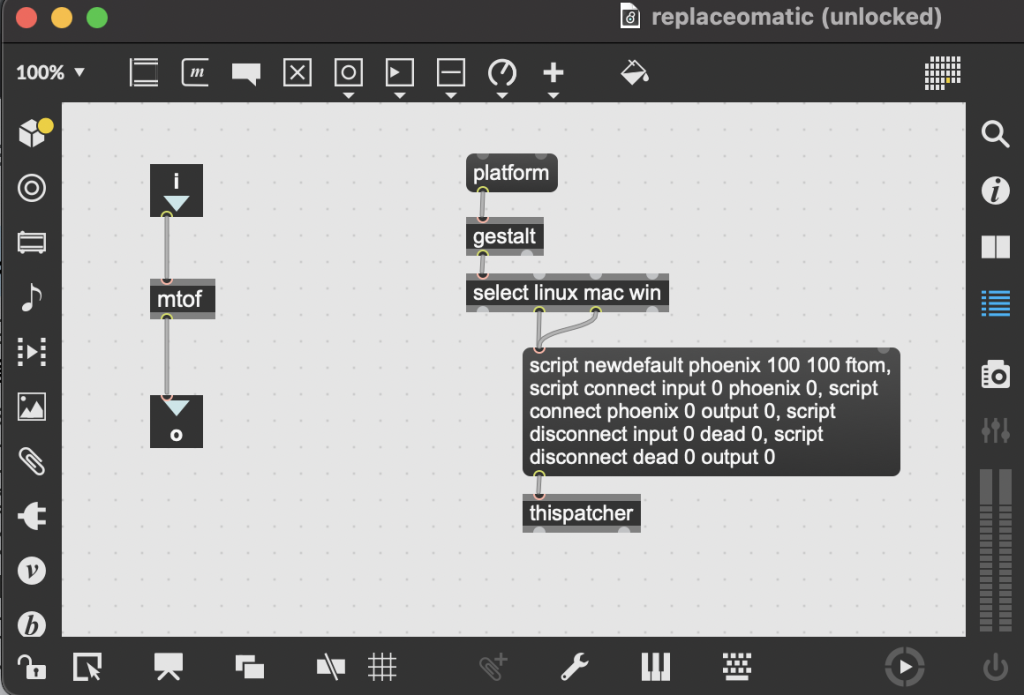
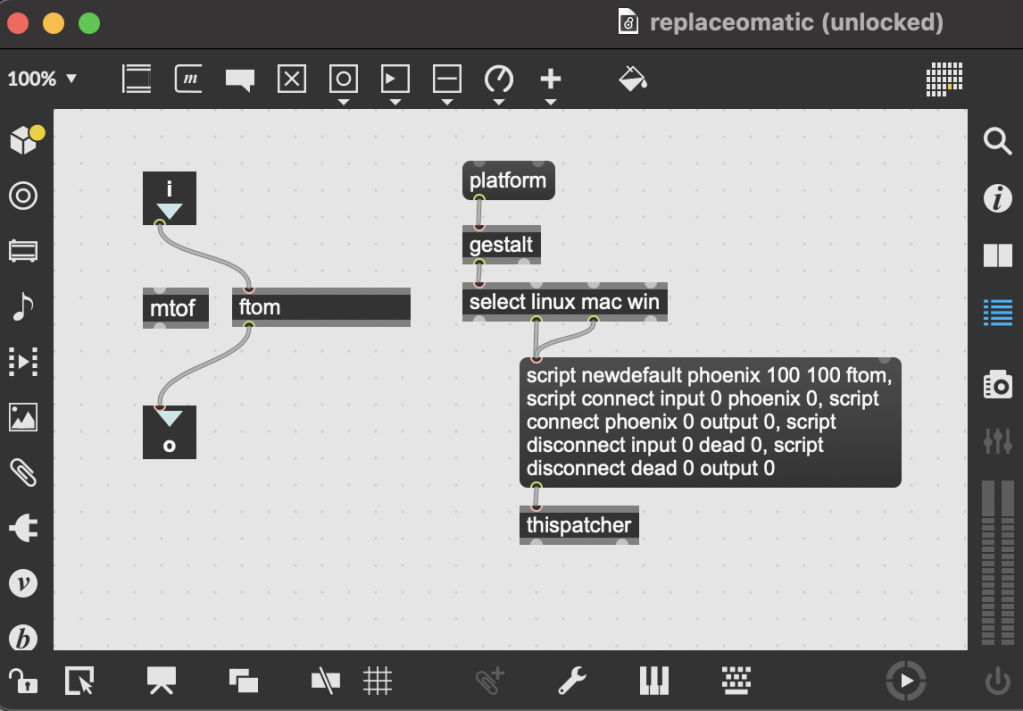
This tip comes from none other than legendary Joshua Kit Clayton at Cycling. The idea is to check whether you’re running on Linux or not – that being a giveaway that it’s Push standalone. Then, modify patcher flow using scripting. With this trick, you can customize third-party externals for any platform (macOS, Windows, or Linux/standalone). You use platform > gestalt > select [linux mac win] and then add the script you want, routed to thispatcher.
Here’s a Linux example (standalone):
And here’s a Windows/macOS example:
Here’s the solution as a .maxpat – thanks, Joshua!
Finding Max for Live devices for Push standalone
Isotonik Studios has already made a page with all the devices they’ve verified work with Push in standalone mode:
Isotonik Studios > Category > Push 3 Standalone
Manifest Audio’s devices, including the new Sonification Tools (which CDM will be covering shortly) all run on Push 3 standalone. Updated: Manifest completed compatibility with all remaining devices!
If you buy something from a CDM link, we may earn a commission.
If you’re a developer and want to feature yours, or have a similar list, feel free to send it and we can link to you. It’d be great to have everything in one place! (I think, or I just volunteered myself for way too much work! But I’m curious to see what you’re working on!)
That’s all for now! Got more questions? More tips you’d like to see? Let us know!
https://www.ableton.com/en/push/
Previously: