Ableton Live 13 is now in public beta. That includes a lot of what you’ve asked for, like multi-band Racks, overhauled preset navigation, and ARA 2 support for tools like Melodyne. And it’s packed with new goodies: a very Ableton step sequencer, a multi-engine Drum Synth with some nice twists, new effects, a new ambient looper, and more. Also, I know some of you will like this: no mention of AI. It’s like we just get to talk about music-making tools again.
Live 13 “pluses” just about every aspect of the program — especially when it comes to Devices. This time, it’s not just packing in some extra gadgets, though we do get those. Ableton has refined how we interact with the Devices, Racks, and plug-ins themselves.
There’s a new Drum Synth that tucks away some unique modes alongside the basics — no relation to an earlier entry in that category. There’s a step sequencer editor for Clips for the first time, so you’re no longer restricted to piano rolls. There are new effects and soundmakers, including a couple of new Softube additions. Racks, automation, and sound-shaping options are expanded, with multi-band and mid-side Rack options, plus the ability to add Envelope Clips on Return tracks. There are new ways to navigate presets, and finally (!) you can see Devices in the Mixer.
Oh, and one more thing … ARA 2.
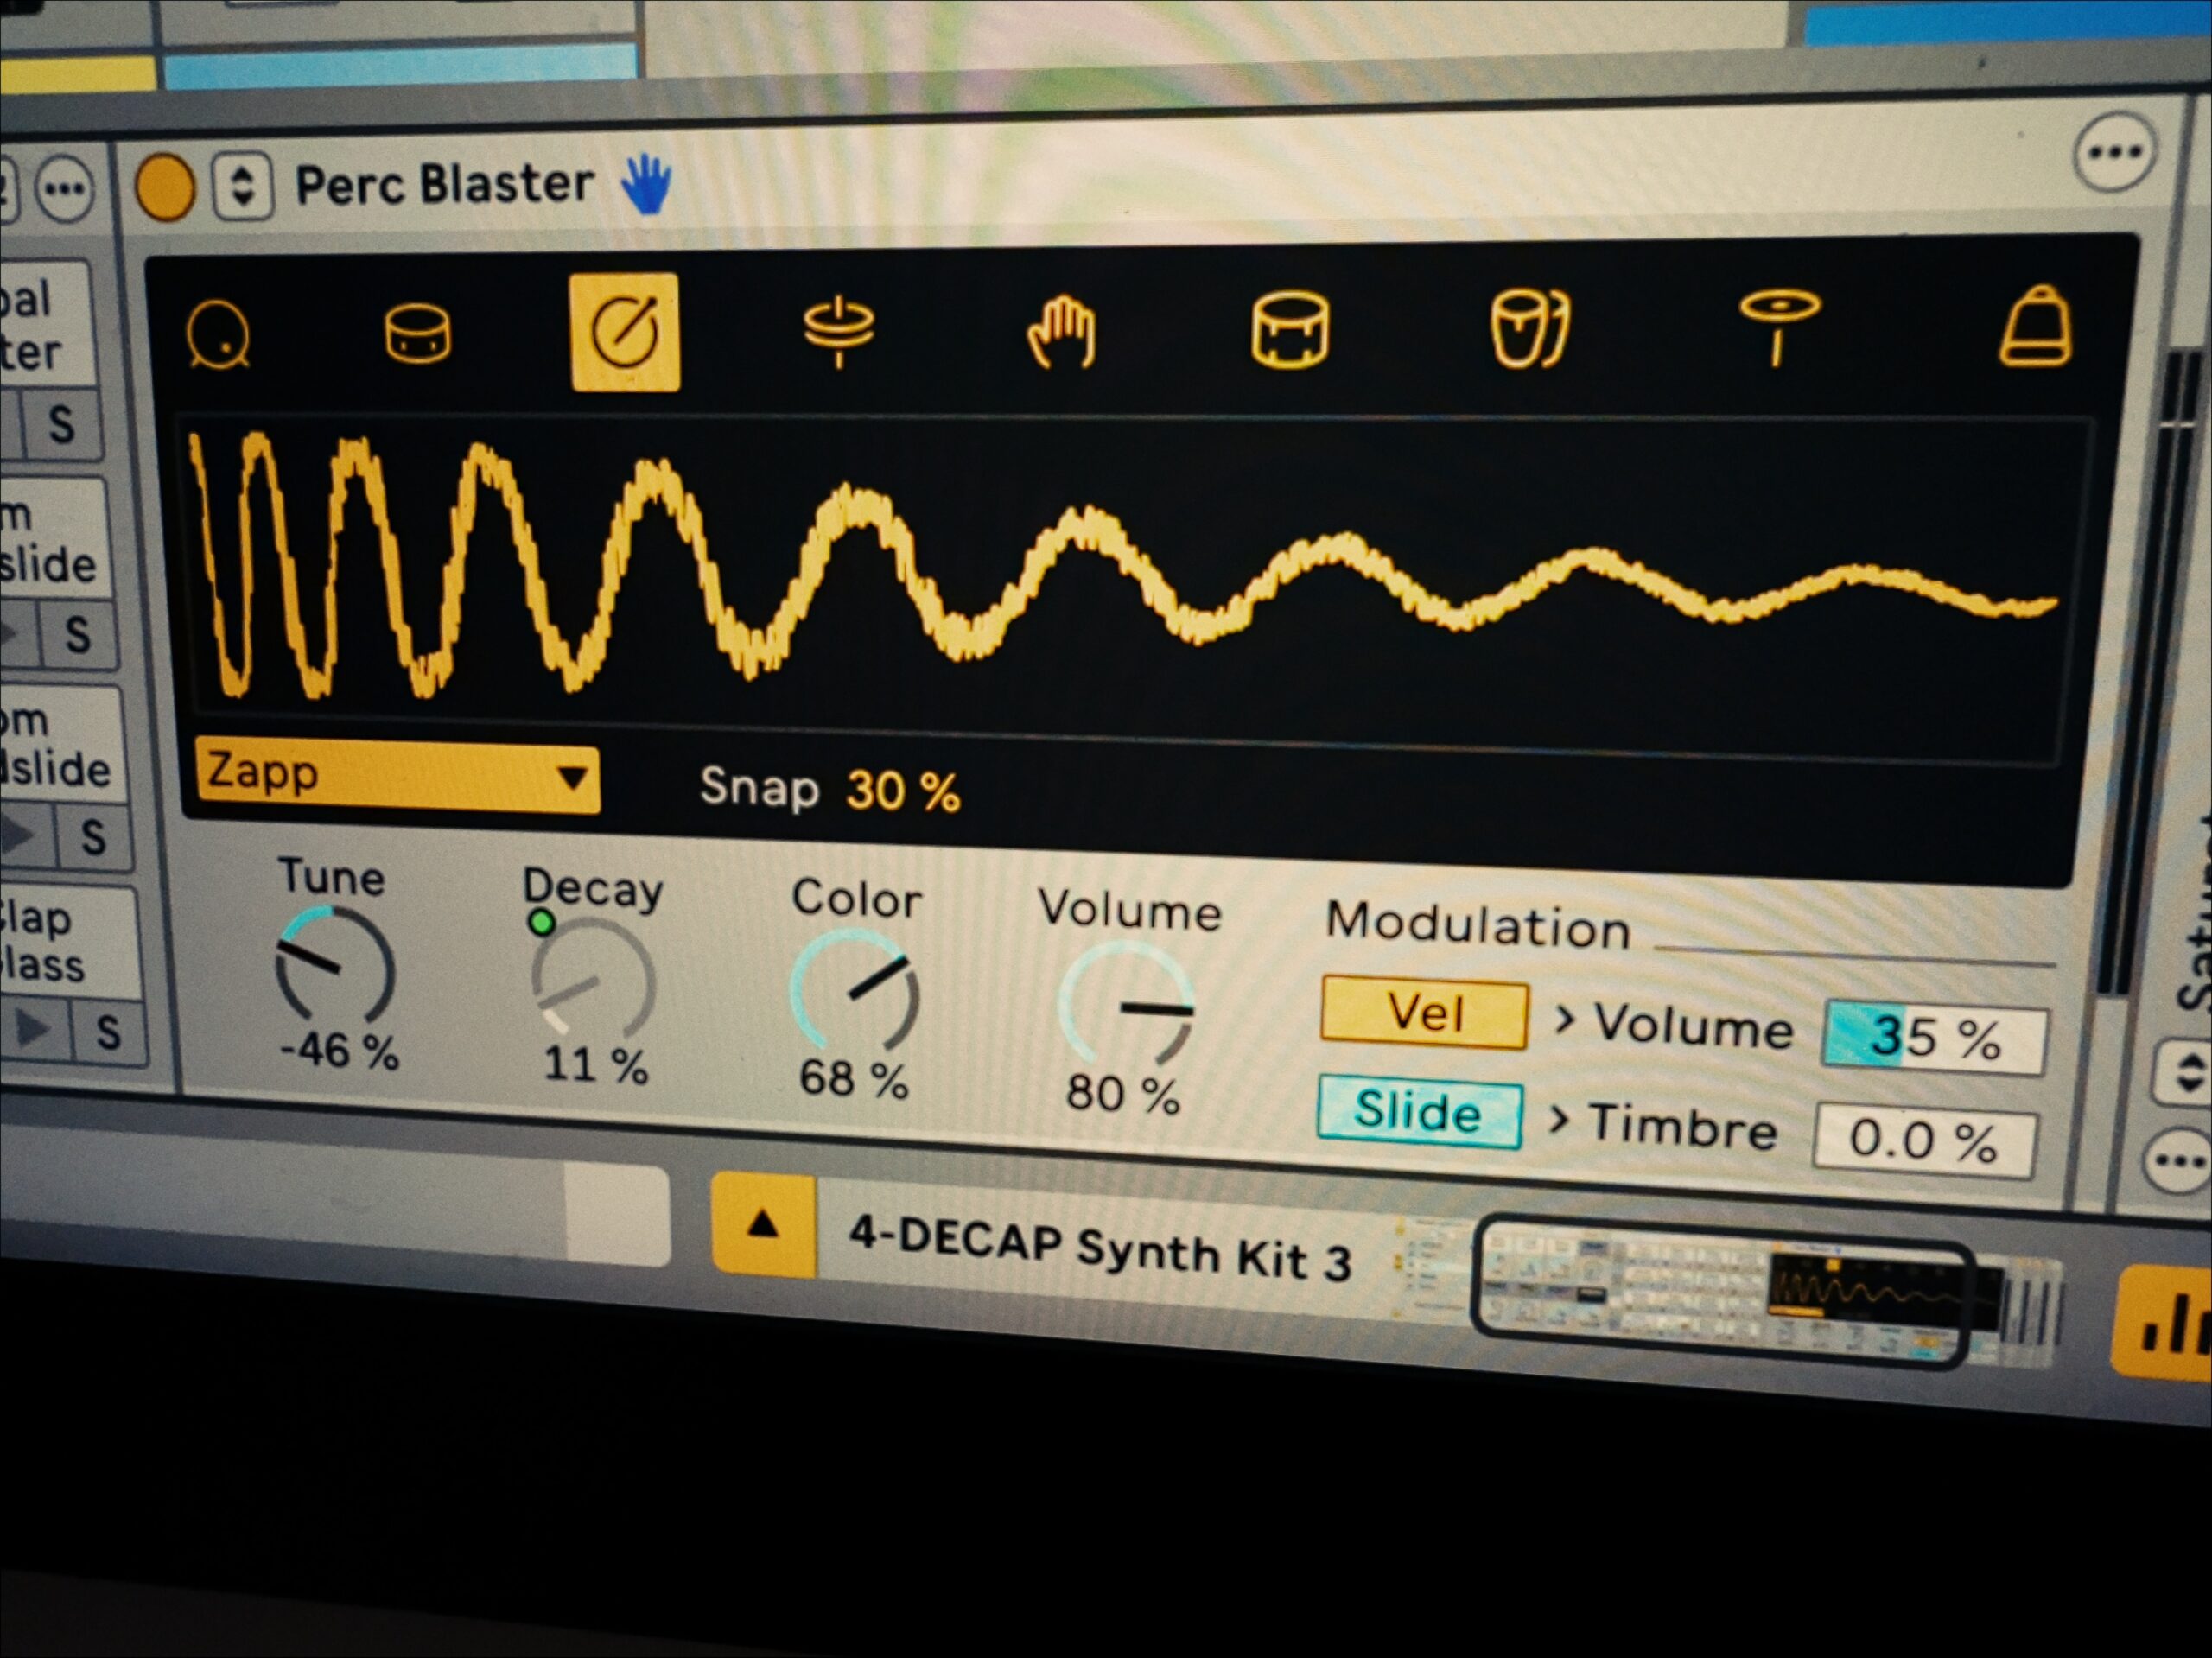
New Drum Synth
We have no shortage of drum synths out in the world, plus now everyone is hacking everything to run everywhere. But Live 13’s Drum Synth feels fully like a native Ableton device. It’s a return to form: deceptively simple, with some subtle extras that make it sonically unique.
At first glance, it looks like Drum Synth is just the basics: along the top, you have dedicated model categories labeled Kick, Snare, Rimshot, Hithat, Clap, Tom, Percussion, Cymbal, and FX models. But while the Kick covers the obvious analog modeling of the 808, 909, and CR-78, and the default modes for all of these are TR, you find some of the more unusual alternates:
- Modal (physical modeled) and acoustic snare
- “Zapp” rimshot
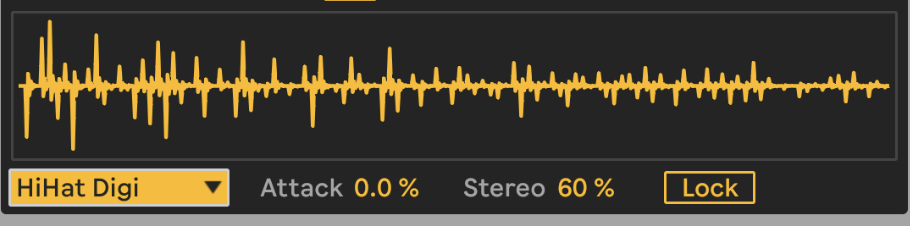
- Digi and “Spark” hats
- Marbles clap
- Timpani
- “RH” cymbal (not sure what that is modeling, but it sounds awful purty… )
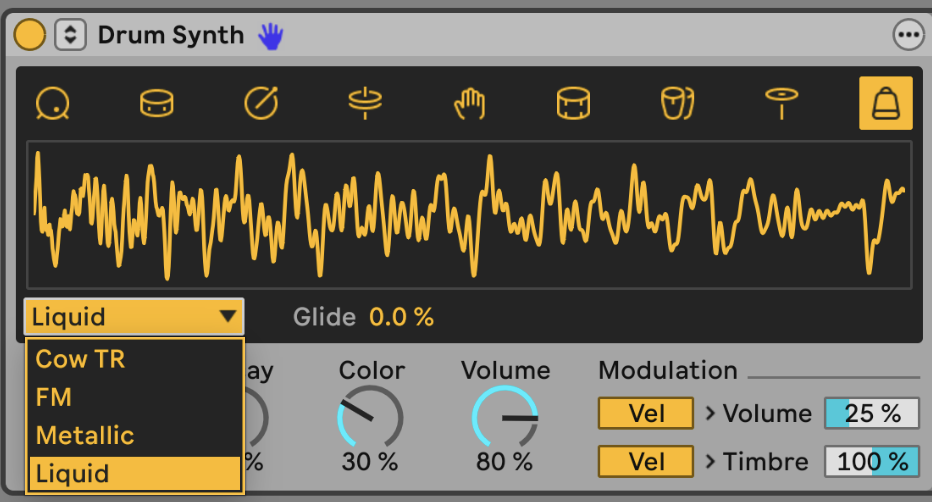
- FM, Metallic, and Liquid percussion tucked away under the cowbell icon (FX)
…plus Bongo and Guiro models, for some added spice.
Engines have extra, model-specific parameters shown next to the mode dropdown — click and bend on the CR-78; Attack, Noise, and Type on the TR hi-hat. Like the knobs, these are mappable for hardware control or modulation. They also show up on Push.
For expression, there’s persistent access to mapping velocity and MPE Slide to both Volume and Timbre. That’s a joy to play on a Push 3, for instance, as with MPE controllers like the Osmose.
Ableton did have a previous DrumSynth, minus the space. It was best described as idiosyncratic; the new entry is better designed and more sonically versatile by a country mile. I wish they’d given this one a new name, because it makes for some serious confusion in the browser. (Um, Ableton “Donk”? “Whack”?)
Drum Synths also appear by default as melodic, single-part instruments, which is a whole lot of fun to play, especially as you add in velocity and (if your controller supports it) MPE Slide. But it is sometimes more useful to have them in a kit. There are a handful of Drum Rack templates that use the new Drum Synth. Try the “DECAP” kits for a good starting point. I wound up making my own template with my favorites.

Tuned percussion. One really cool feature of the new Drum Synth is that it obeys the active Tuning System, as well as responding to polyphonic pitch bend information. Want your percussion to be tuned to something other than 12-TET? Solved.
Step sequencer
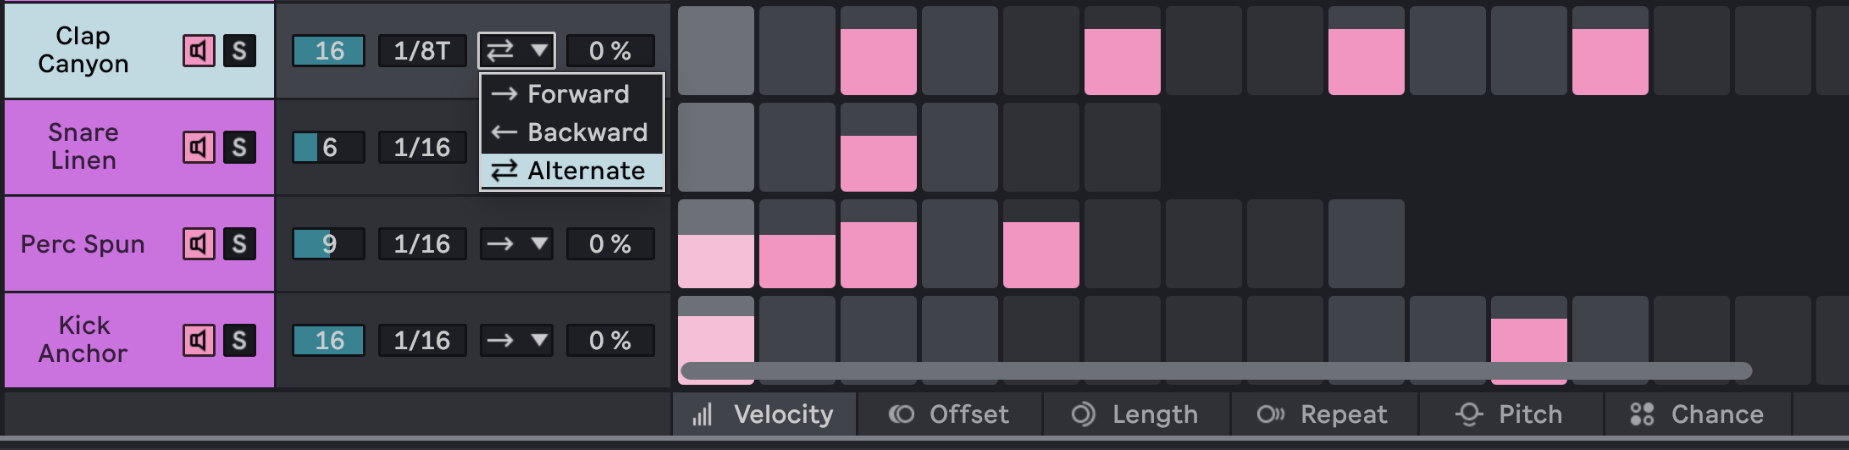
No Drum Synth would be complete without a step sequencer. Now any Clip can be converted to a Step Sequencer and back again. Having a Step Sequencer in Clips is already a boon — both for mouse users and Push. But while this looks similar to some other offerings — Logic, FL Studio — it definitely feels both Ableton-native and feature-rich. That includes, for instance, per lane:
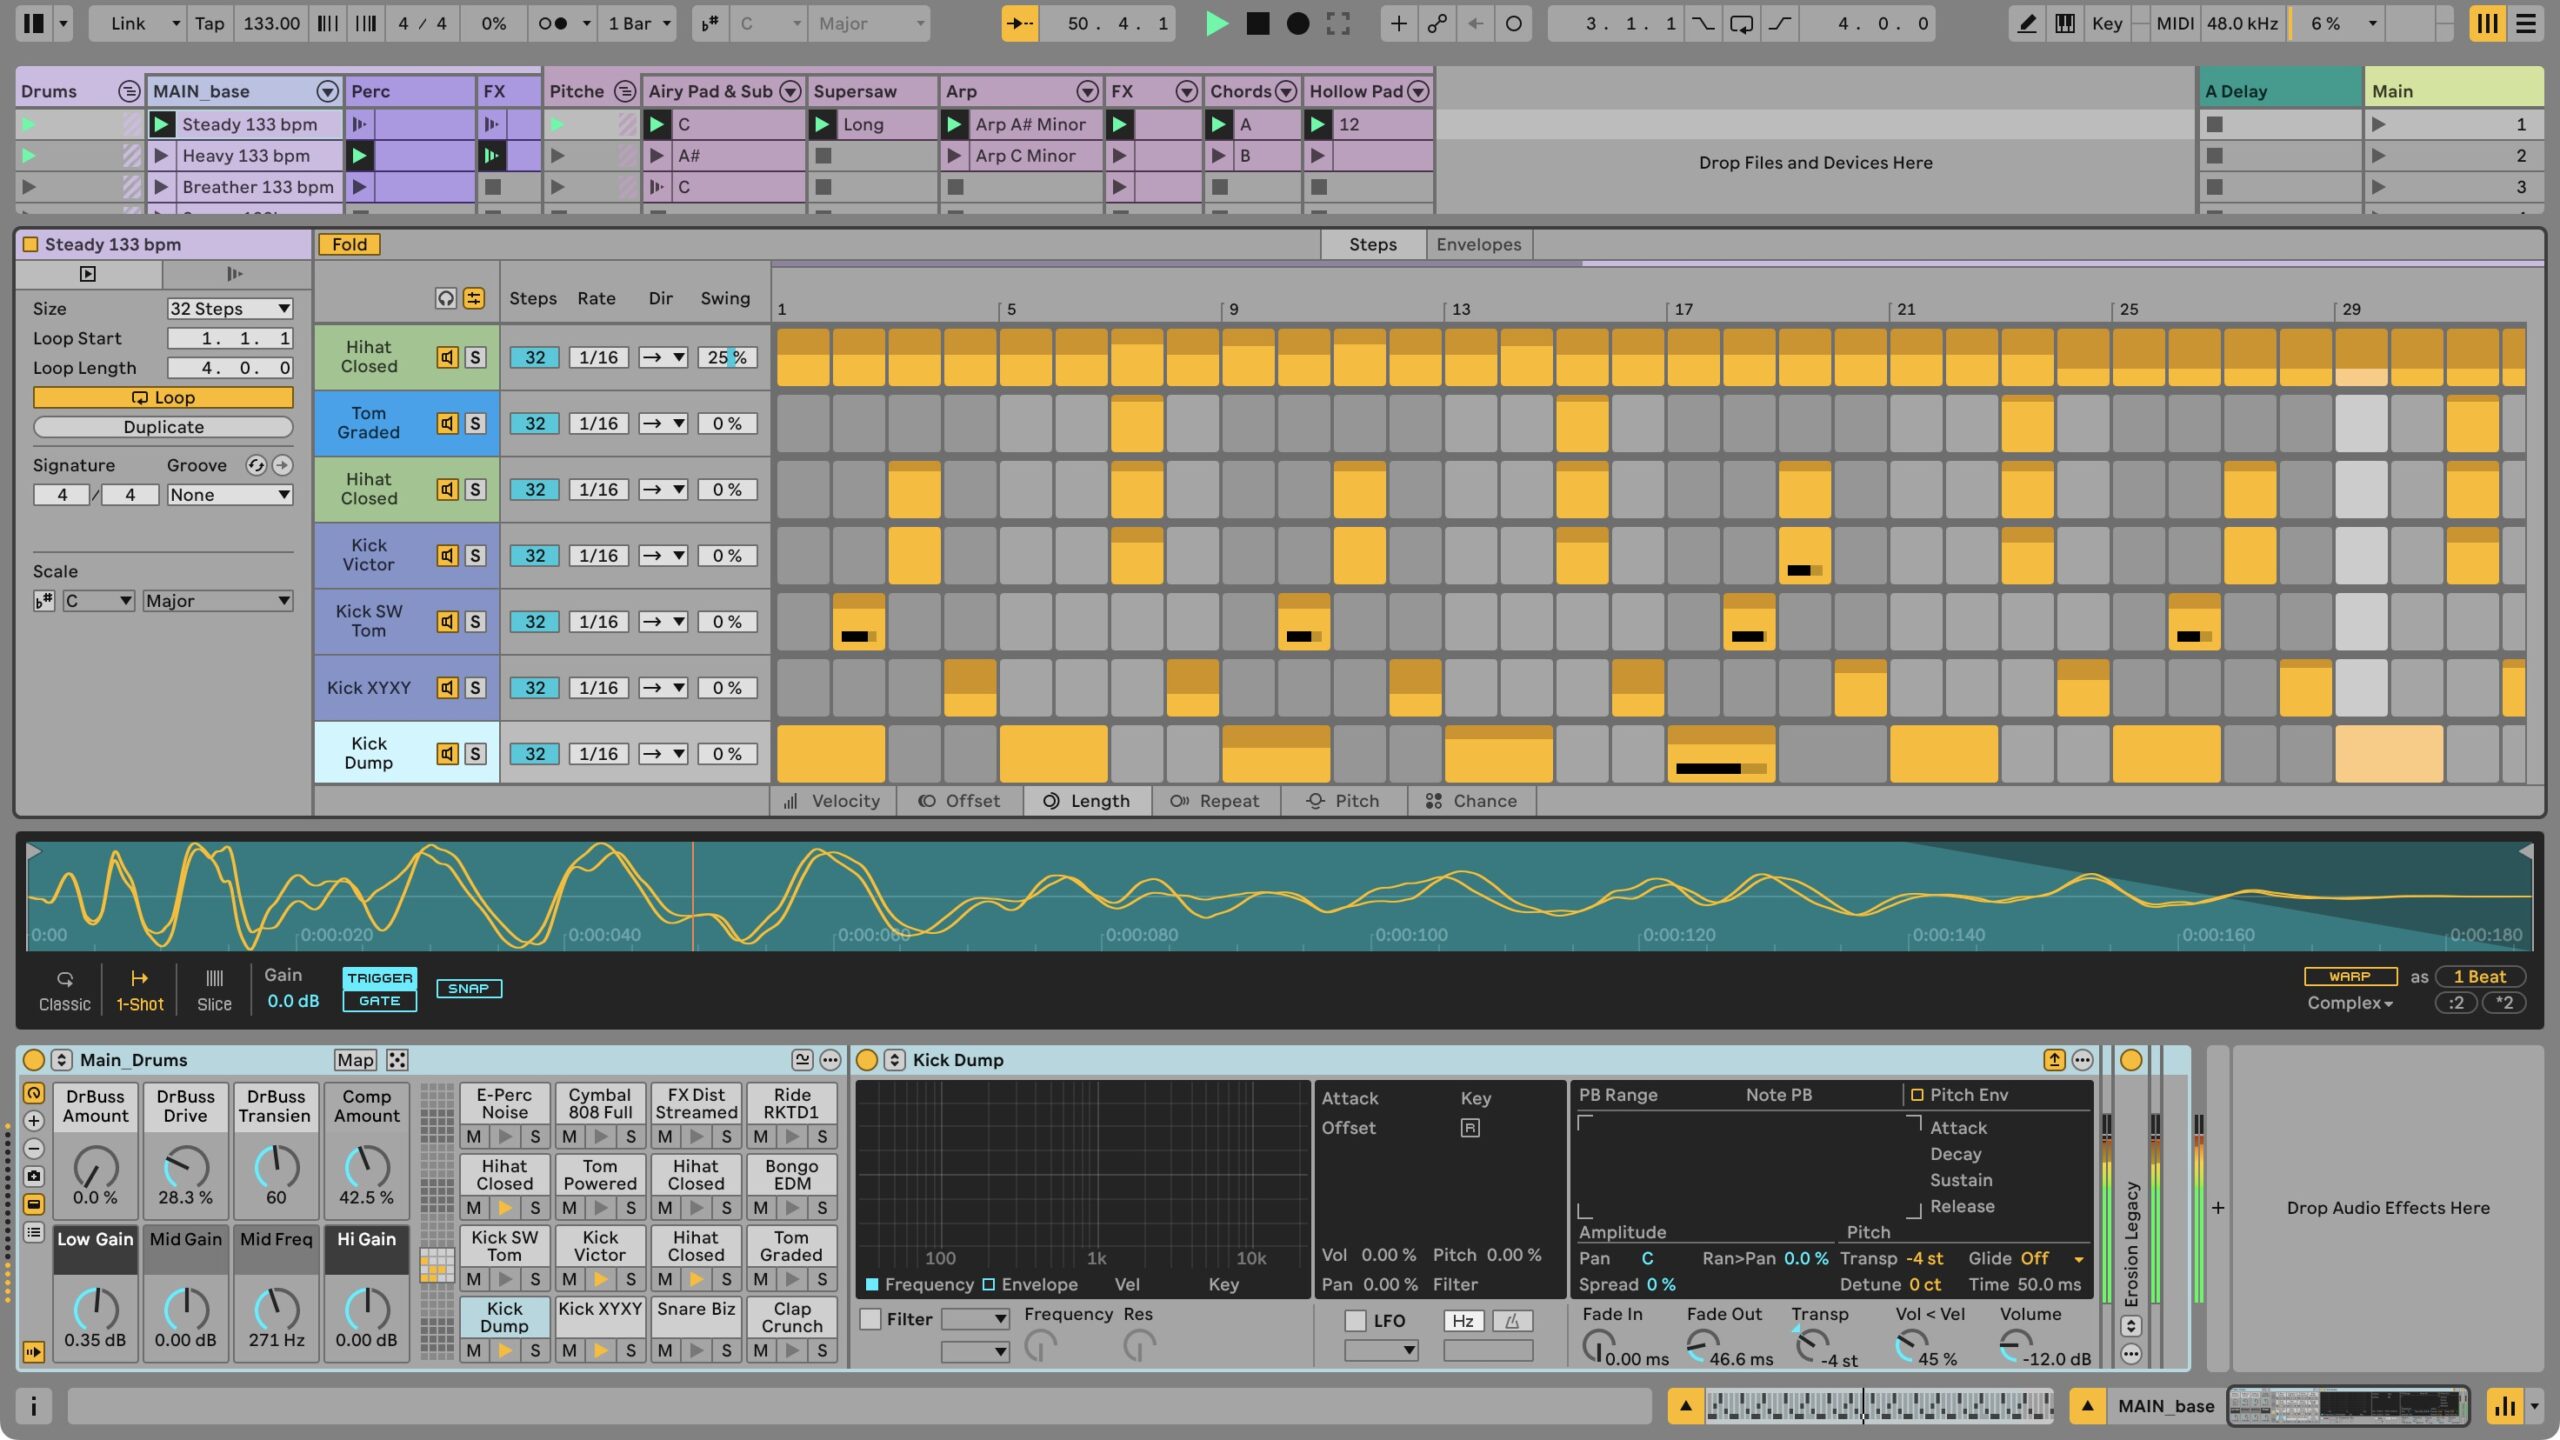
- Drum Pad labels (with a pop-up to assign a different pad)
- Step length
- Step size
- Forward/backward/alternate
- Row swing
- Velocity, offset, length, repeat, pitch, and chance modes
- Draggable edits / per-step settings
…and it all integrates nicely with Push. You can set each from its default of 16 steps max up to 128. Plus, that pitch control can optionally work with MPE pitch. I wouldn’t mind a few more direction options, for instance, but this is otherwise a terrific breakthrough. And it feels like more is coming to this section.
ARA 2, by popular demand
ARA 2 is Celemony’s mechanism for expanding edit functionality in plug-ins, allowing advanced editing functions with the host that standard plug-in support doesn’t allow. If you need it, you probably already know you need it — and this format is now not just about tuning correction but all kinds of applications, like Steinberg’s amazing spectral editing tool SpectraLayers or voice synthesizers or various others. (I’ve even used Synthesizer V Studio, a machine learning-powered vocal synth — so it’ll be great not to have to leave Ableton Live for the full functionality.)
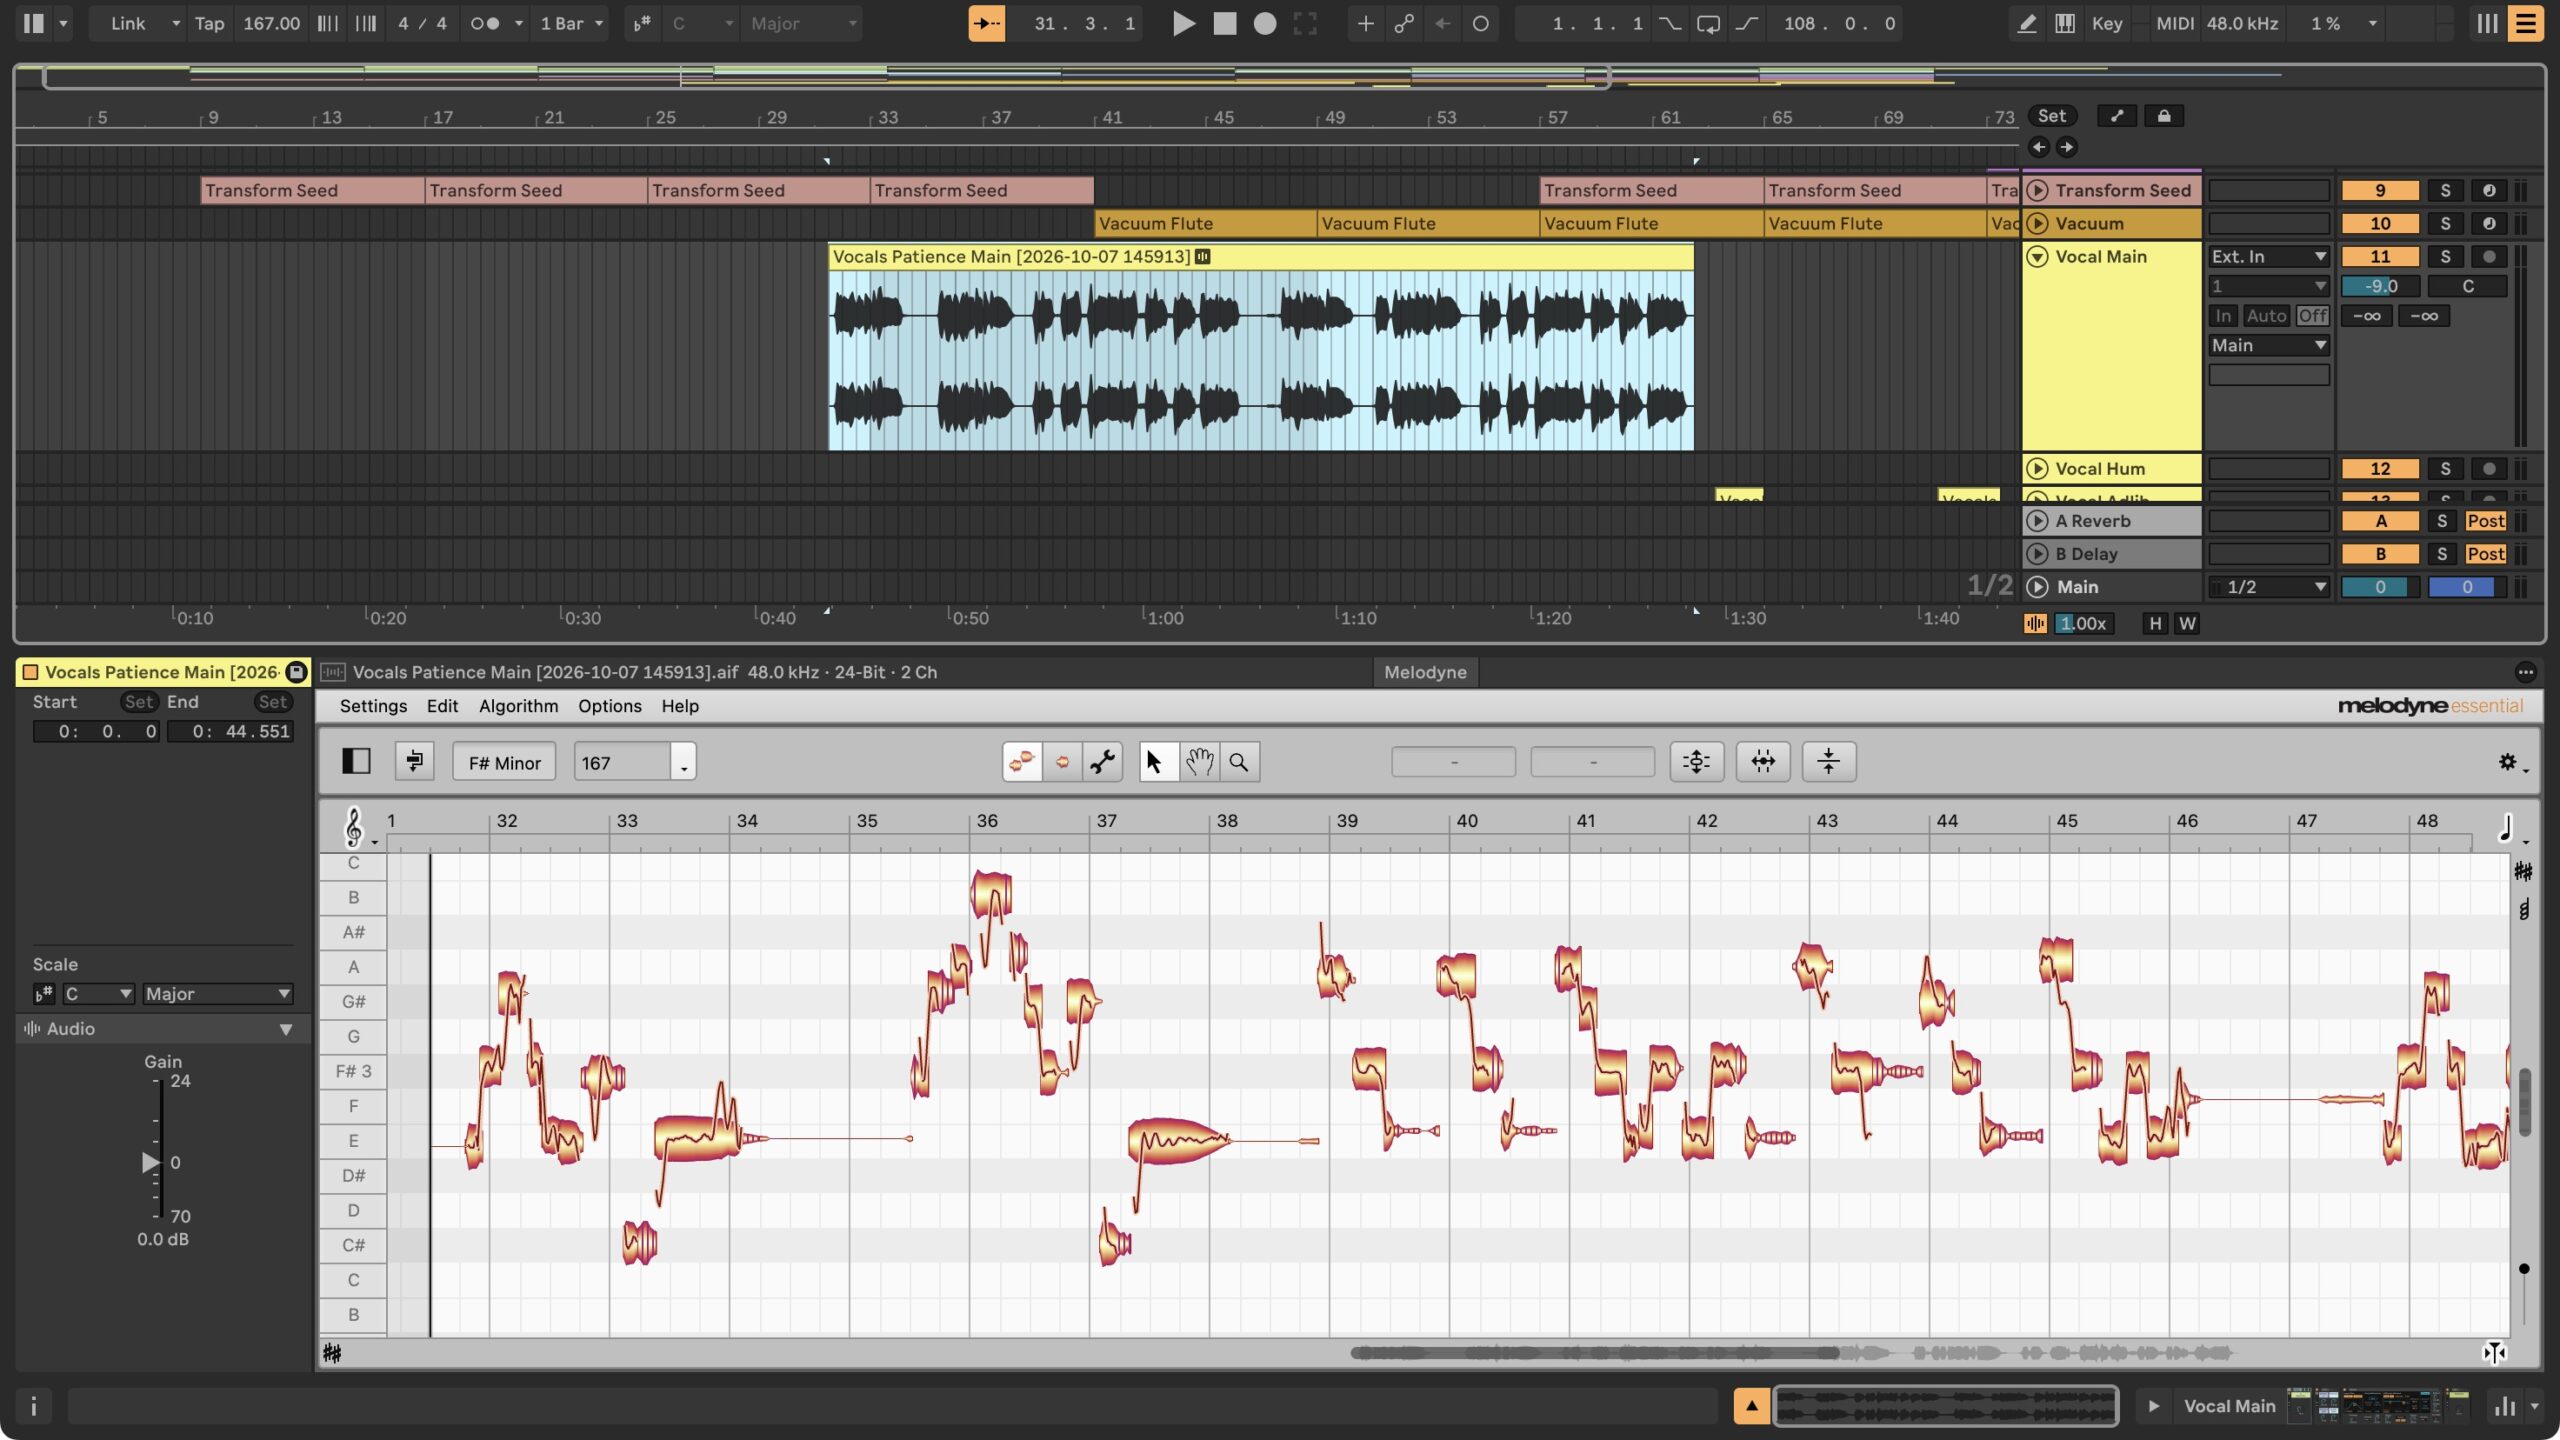
If you don’t know what it’s about, Melodyne Essentials is now bundled with Suite for tuning and timing edits, so you have something to give this a try.
ARA 2 was often one of a handful of obstacles for folks switching from other DAWs, so this is a significant development. I didn’t get to test it in my prerelease version, but it means we’re due for an ARA 2 follow-up.
Expanded Racks
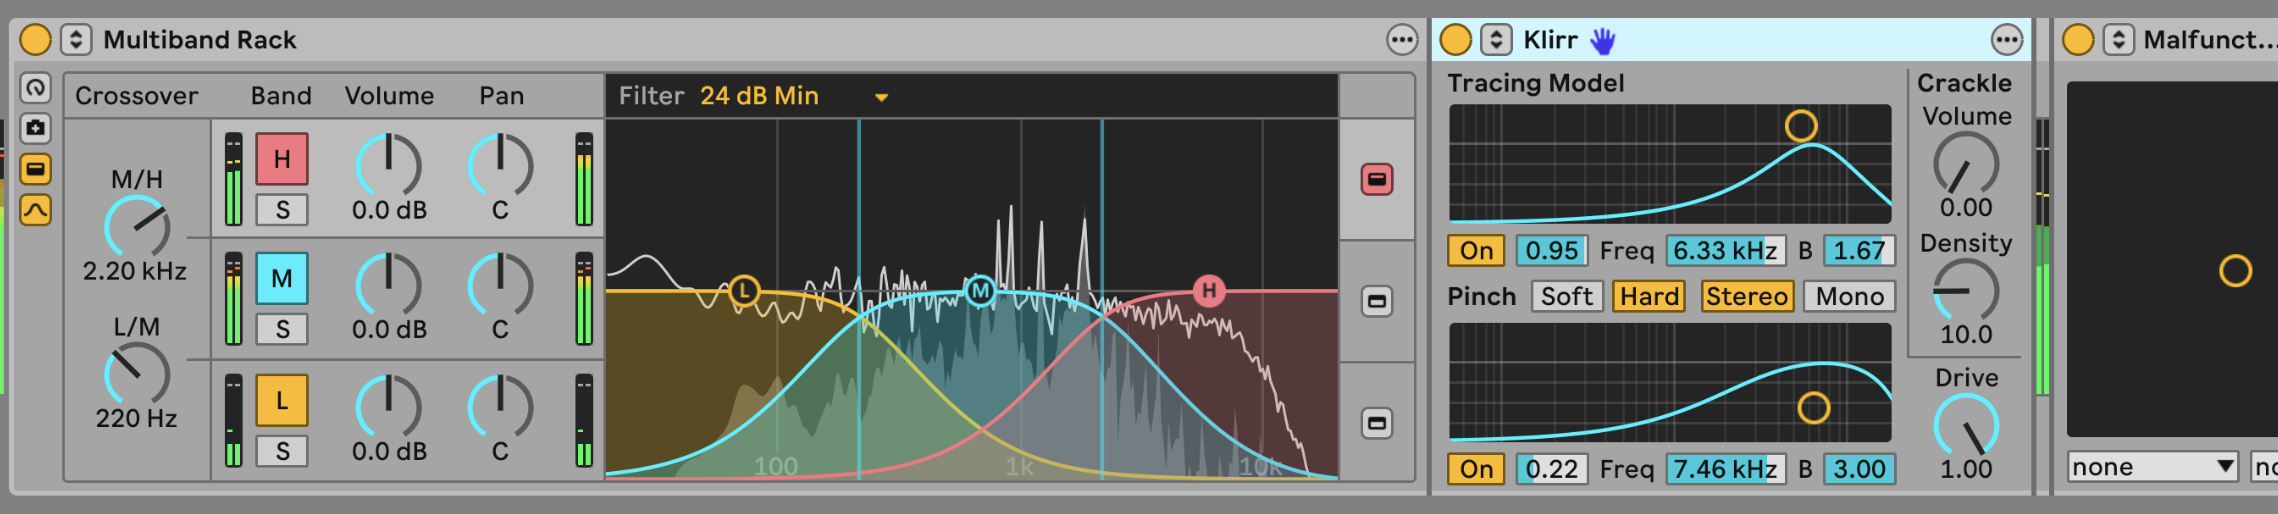
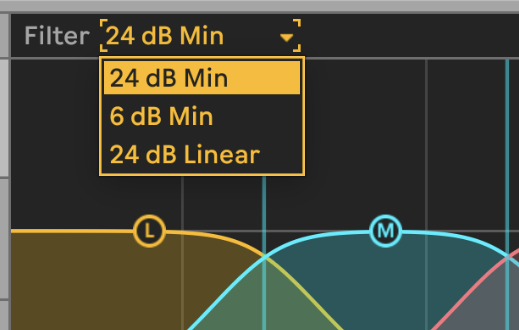
Right out of the gate, this is the one feature I’m using the most — the one that means I don’t want to go back to Live 12. You can now set up Racks by Multi-Band (high, mid, low) and Mid/Side, then add in whatever internal or third-party effects processors you like. I was already excited to use this with Sinevibes Malfunction while working on that review last week, but I couldn’t mention it because of the embargo. But this is an overdue feature, and it includes nice touches like filter options (see below) and the usual complement of Rack features (macros, snapshots).
Rack functionality is also expanded:
- 32 assignable Macros (up from 16)
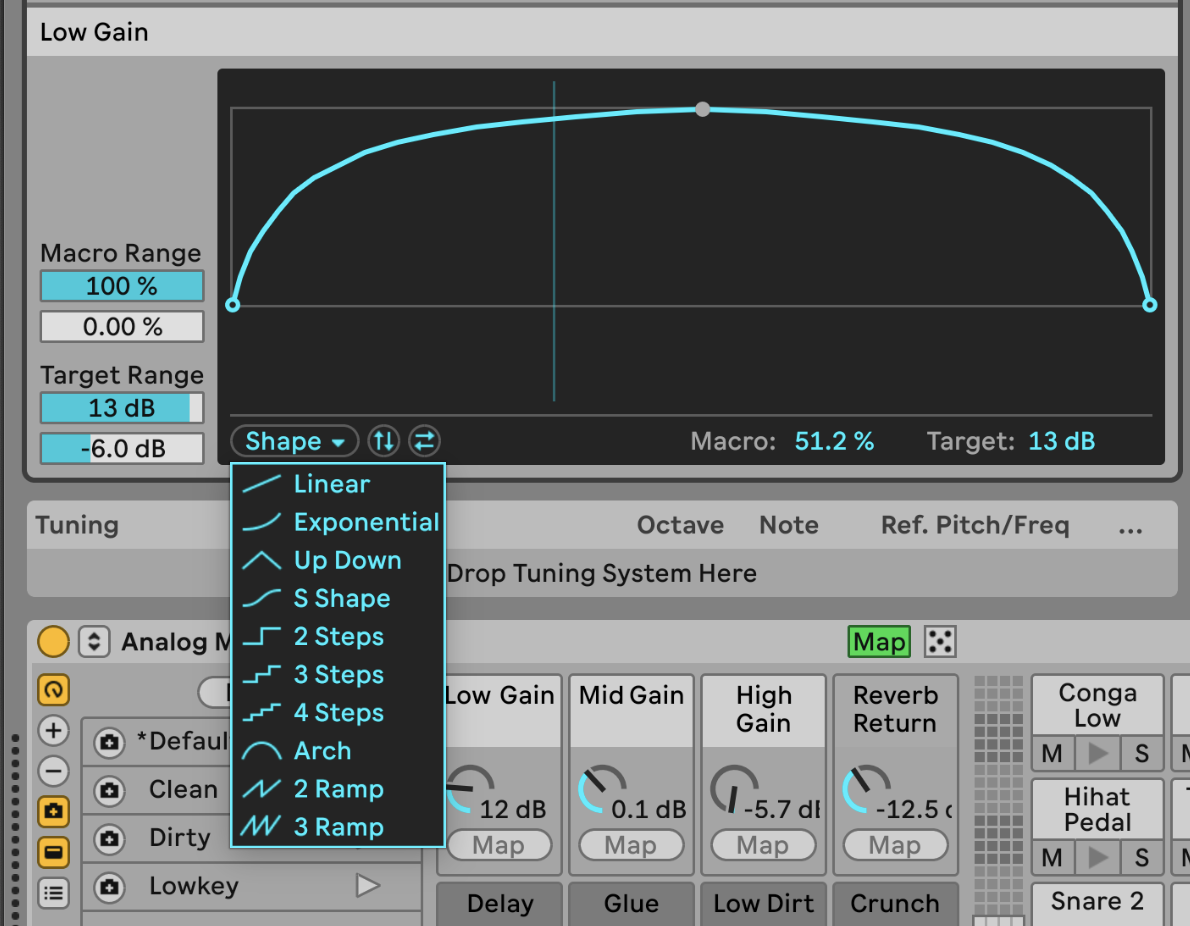
- Mappable curves per control (see image, below)
- Reorder Macros
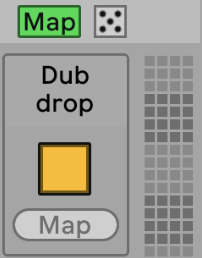
- Buttons, not just knobs. (No more making knobs that you have to pretend are buttons, etc. — oh yeah, and this is big for Push, too)
- Drag and drop mappings
- Round Robin cycling through chains (both Instruments and MIDI Effects). This is the most subtle but arguably the most interesting of these features, in a way — because it lets each new note cycle through a chained set of presets, KORG Mono/Poly style.
Curves! These appear when you click the Map button (note that it’s highlighted in green):
Buttons!
Preset navigation, Envelope Clips, automation
Here’s the other preset that made me switch to Live 13 and not look back: preset navigation. Finally. Yes, previously saving and managing presets in Live involved a draconian process of hitting save, then finding them in the browser, without any usable classification — it was, to be kind, a mess.
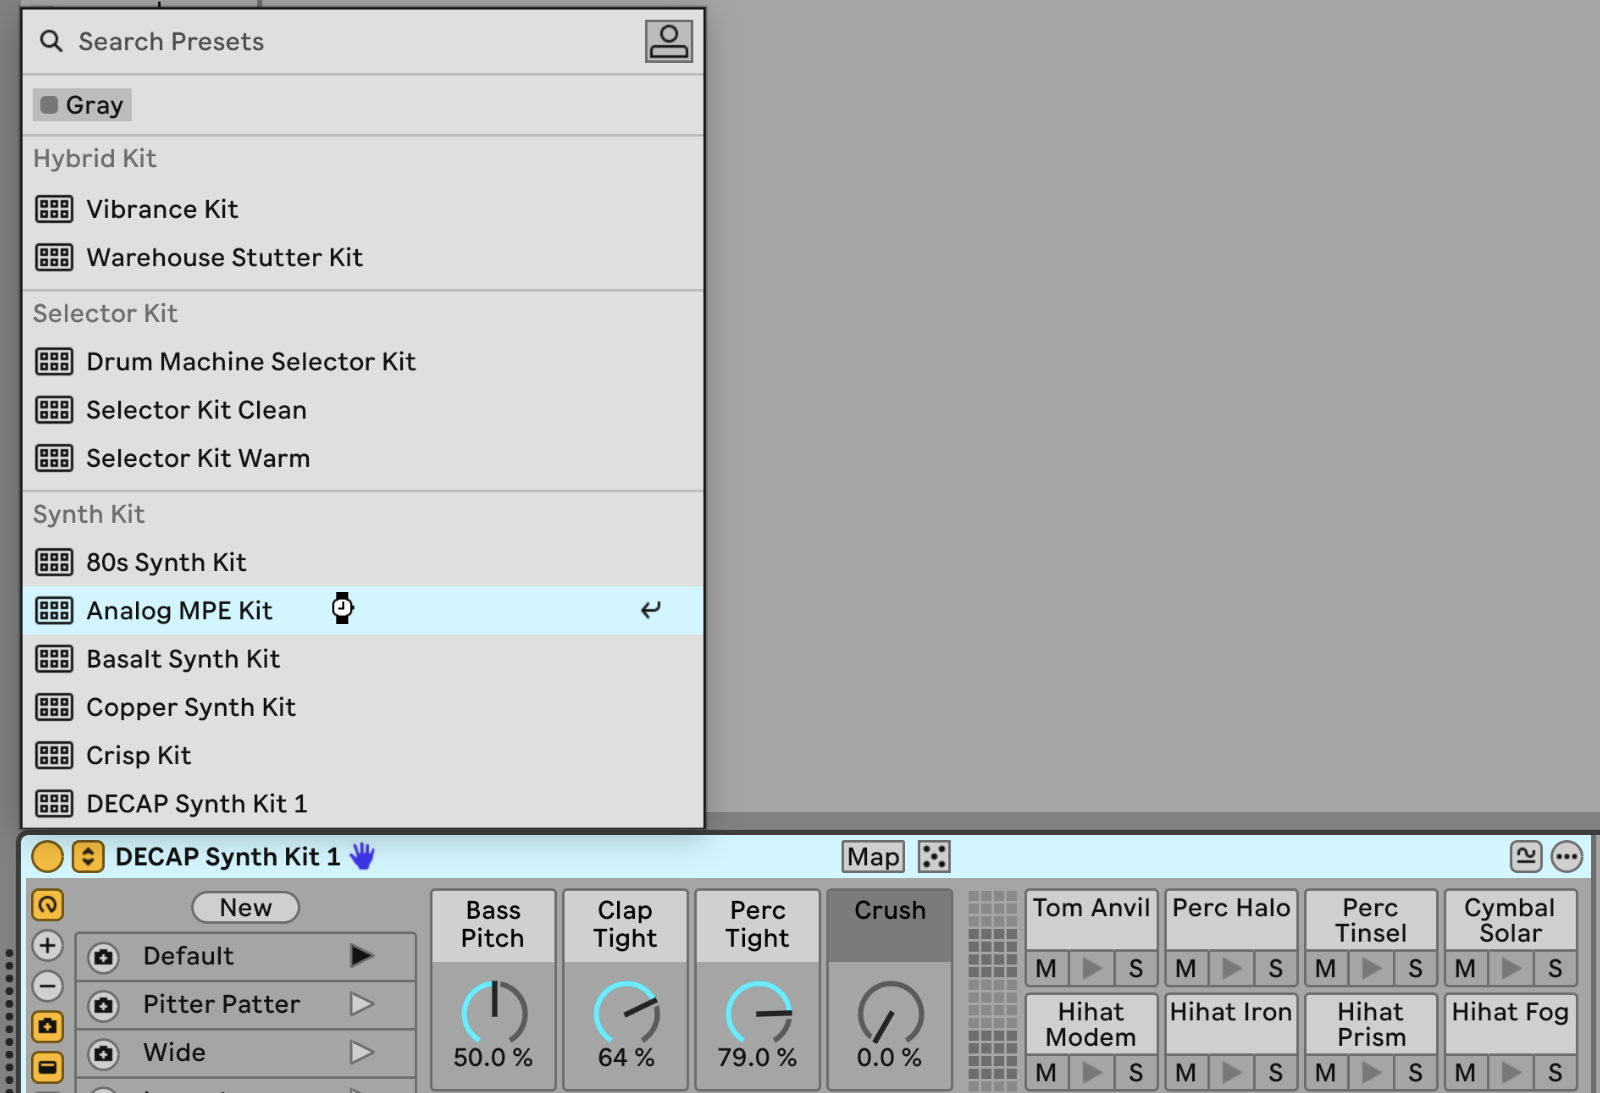
Now you just get a pop-up menu on Devices (including third-party plug-ins), with an organized, contextual menu that makes everything easy to browse. (Randomization was always there, but for some reason, having the dice icon makes me use it more than “rand” did.)
If you’re wondering where the save button went (the one that looked like a vintage floppy disk), you can either use the keyboard shortcut (opt-shift-S/alt-shift-S) or check out the reorganized menu on the right-hand side of the Devices:
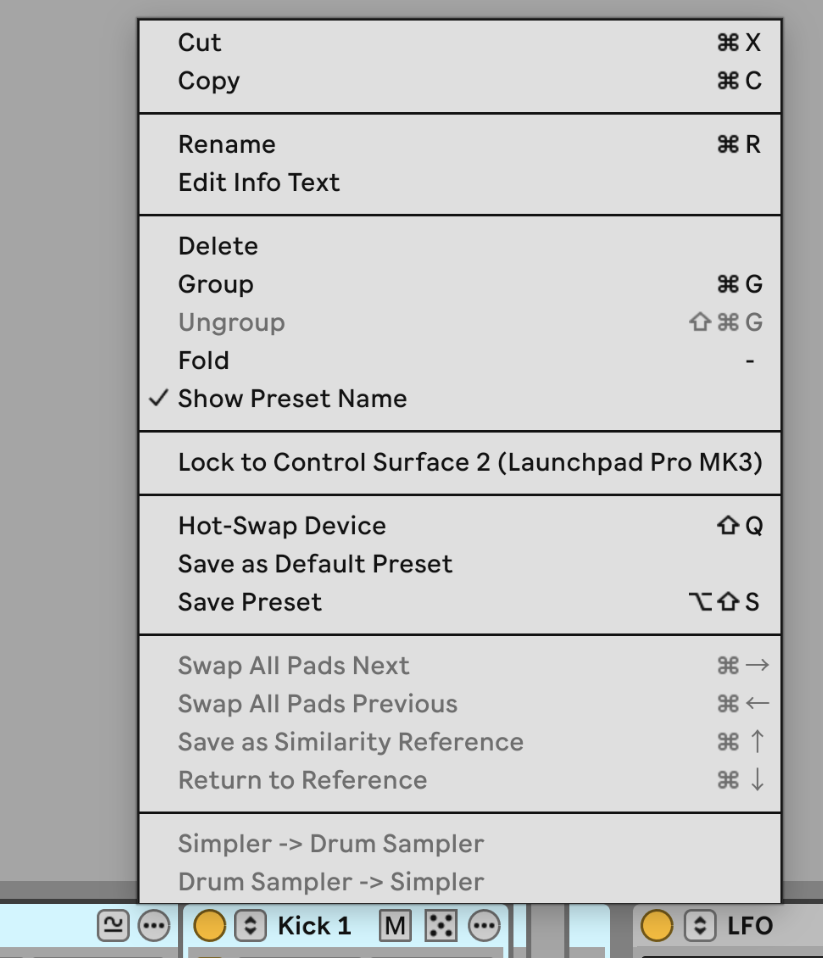
For third-party plug-ins, I still generally use their internal preset systems, but this is even useful for making some third-party presets navigable from the host level.
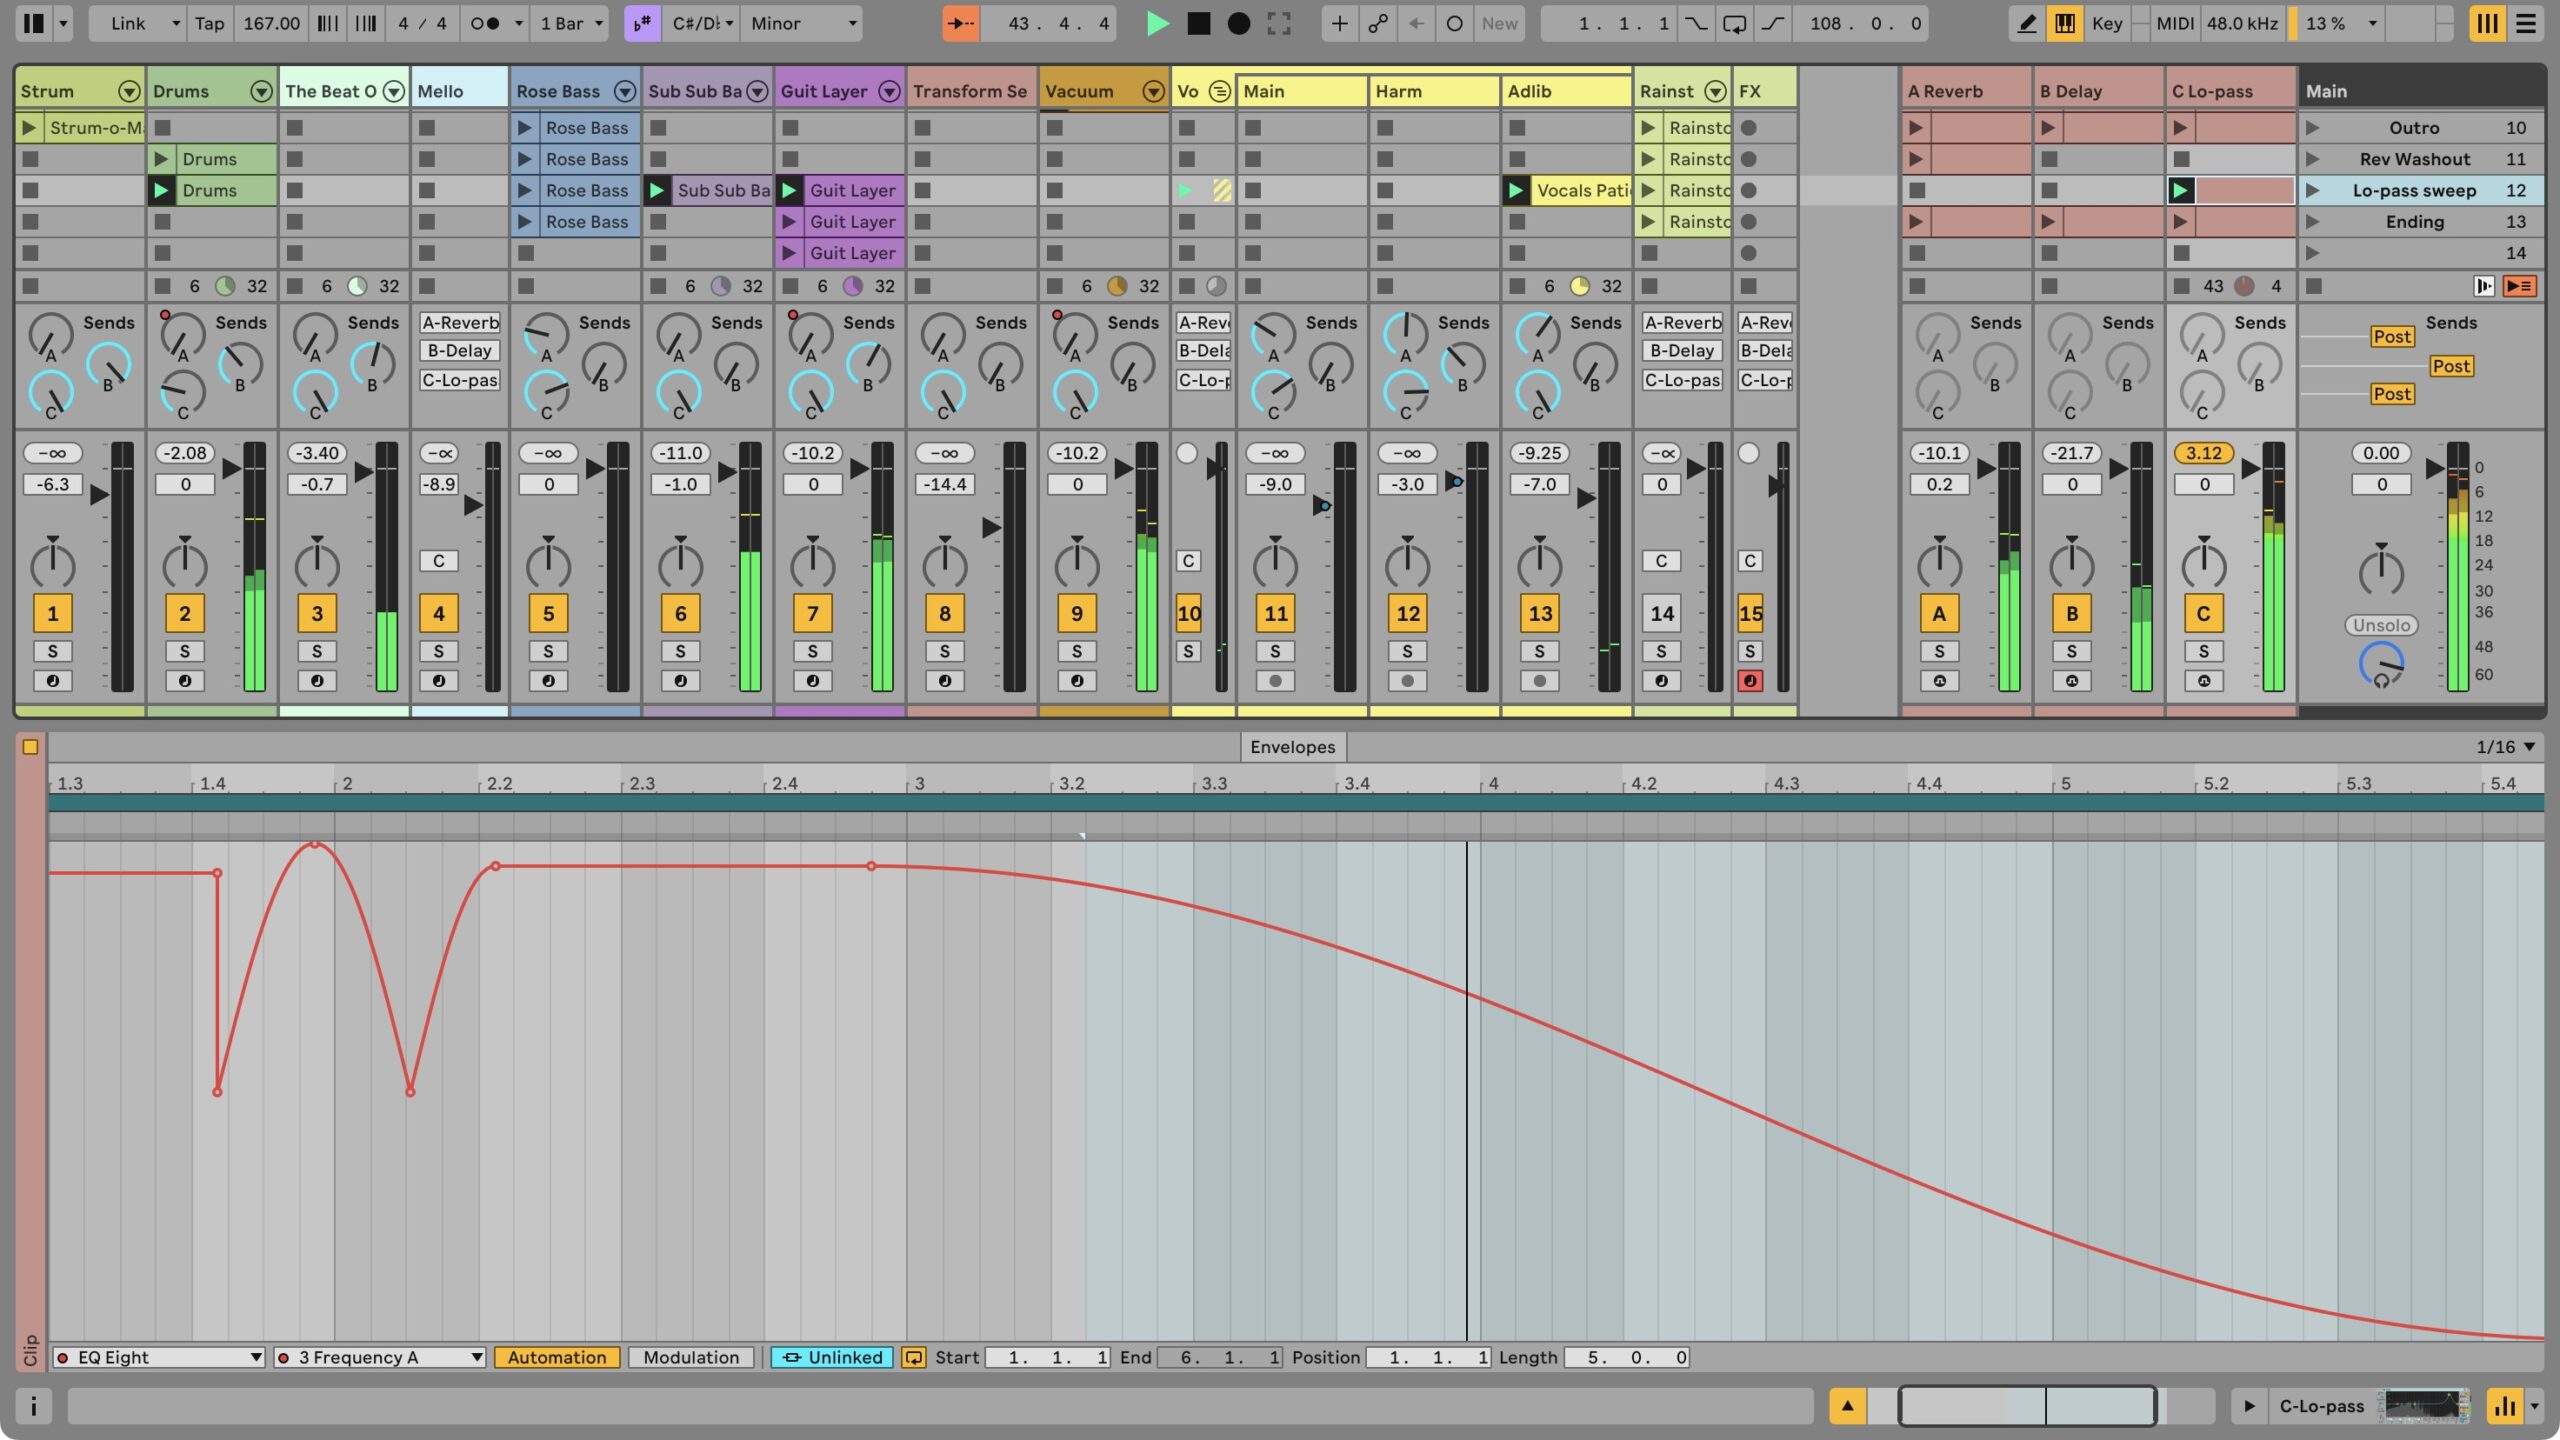
Envelope Clips are a new Clip type that live on the Return track. Those returns have just been blank spaces all the way back to Live 1.0. Now you can launch automation across the mixer, Devices, and plug-ins, meaning you can also now use Return tracks as playable performance clips for all your effects.
Speaking of automation, Capture Automation now lets you save your most recent tweaks and knob twists, just like other elements of the performance.
Again, this all makes me excited to rediscover some of the possibilities of my favorite third-party plug-ins. But since we’re going wild in the candy store, it’s time to talk about —
New effects
We don’t need more effects. But they’re delicious anyway.
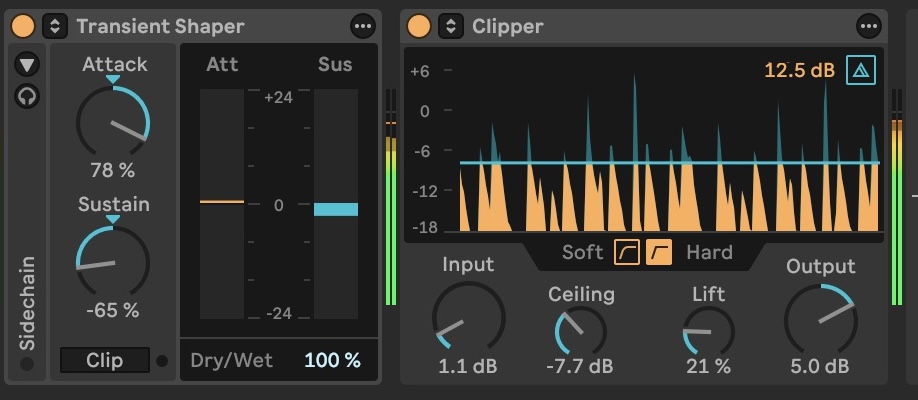
Clipper and Transient Shaper nicely round out Ableton’s complement of dynamics processors, and they’re done in the usual Ableton-ish manner. I’ll probably go into these in more detail later, but they are as advertised on the tin.
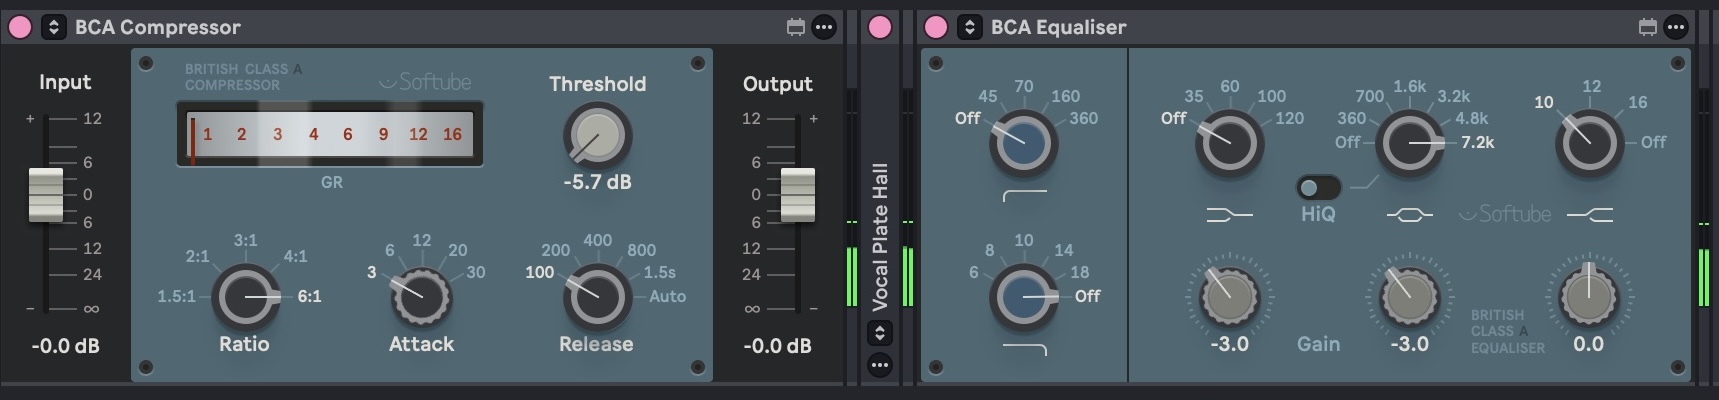
Softube makes some of the best models out there, and maybe the most interesting aspect of these is their UIs — built in Max for Live, and reminiscent of the Elisabeth Homeland reskins of popular plug-ins like Soundtoys and Universal Audio. FET and optical compression, British console EQ and compression, and analog-style drive — you know, at this point, these processing designs have been in far more productions as software than they ever were as hardware. Funny.
But while each of those effects is nice, they’re hardly anything out of the ordinary; odds are you have something like that in your plug-in folder already. The curveball in Live 13 is something called Looplet, built in Max for Live.
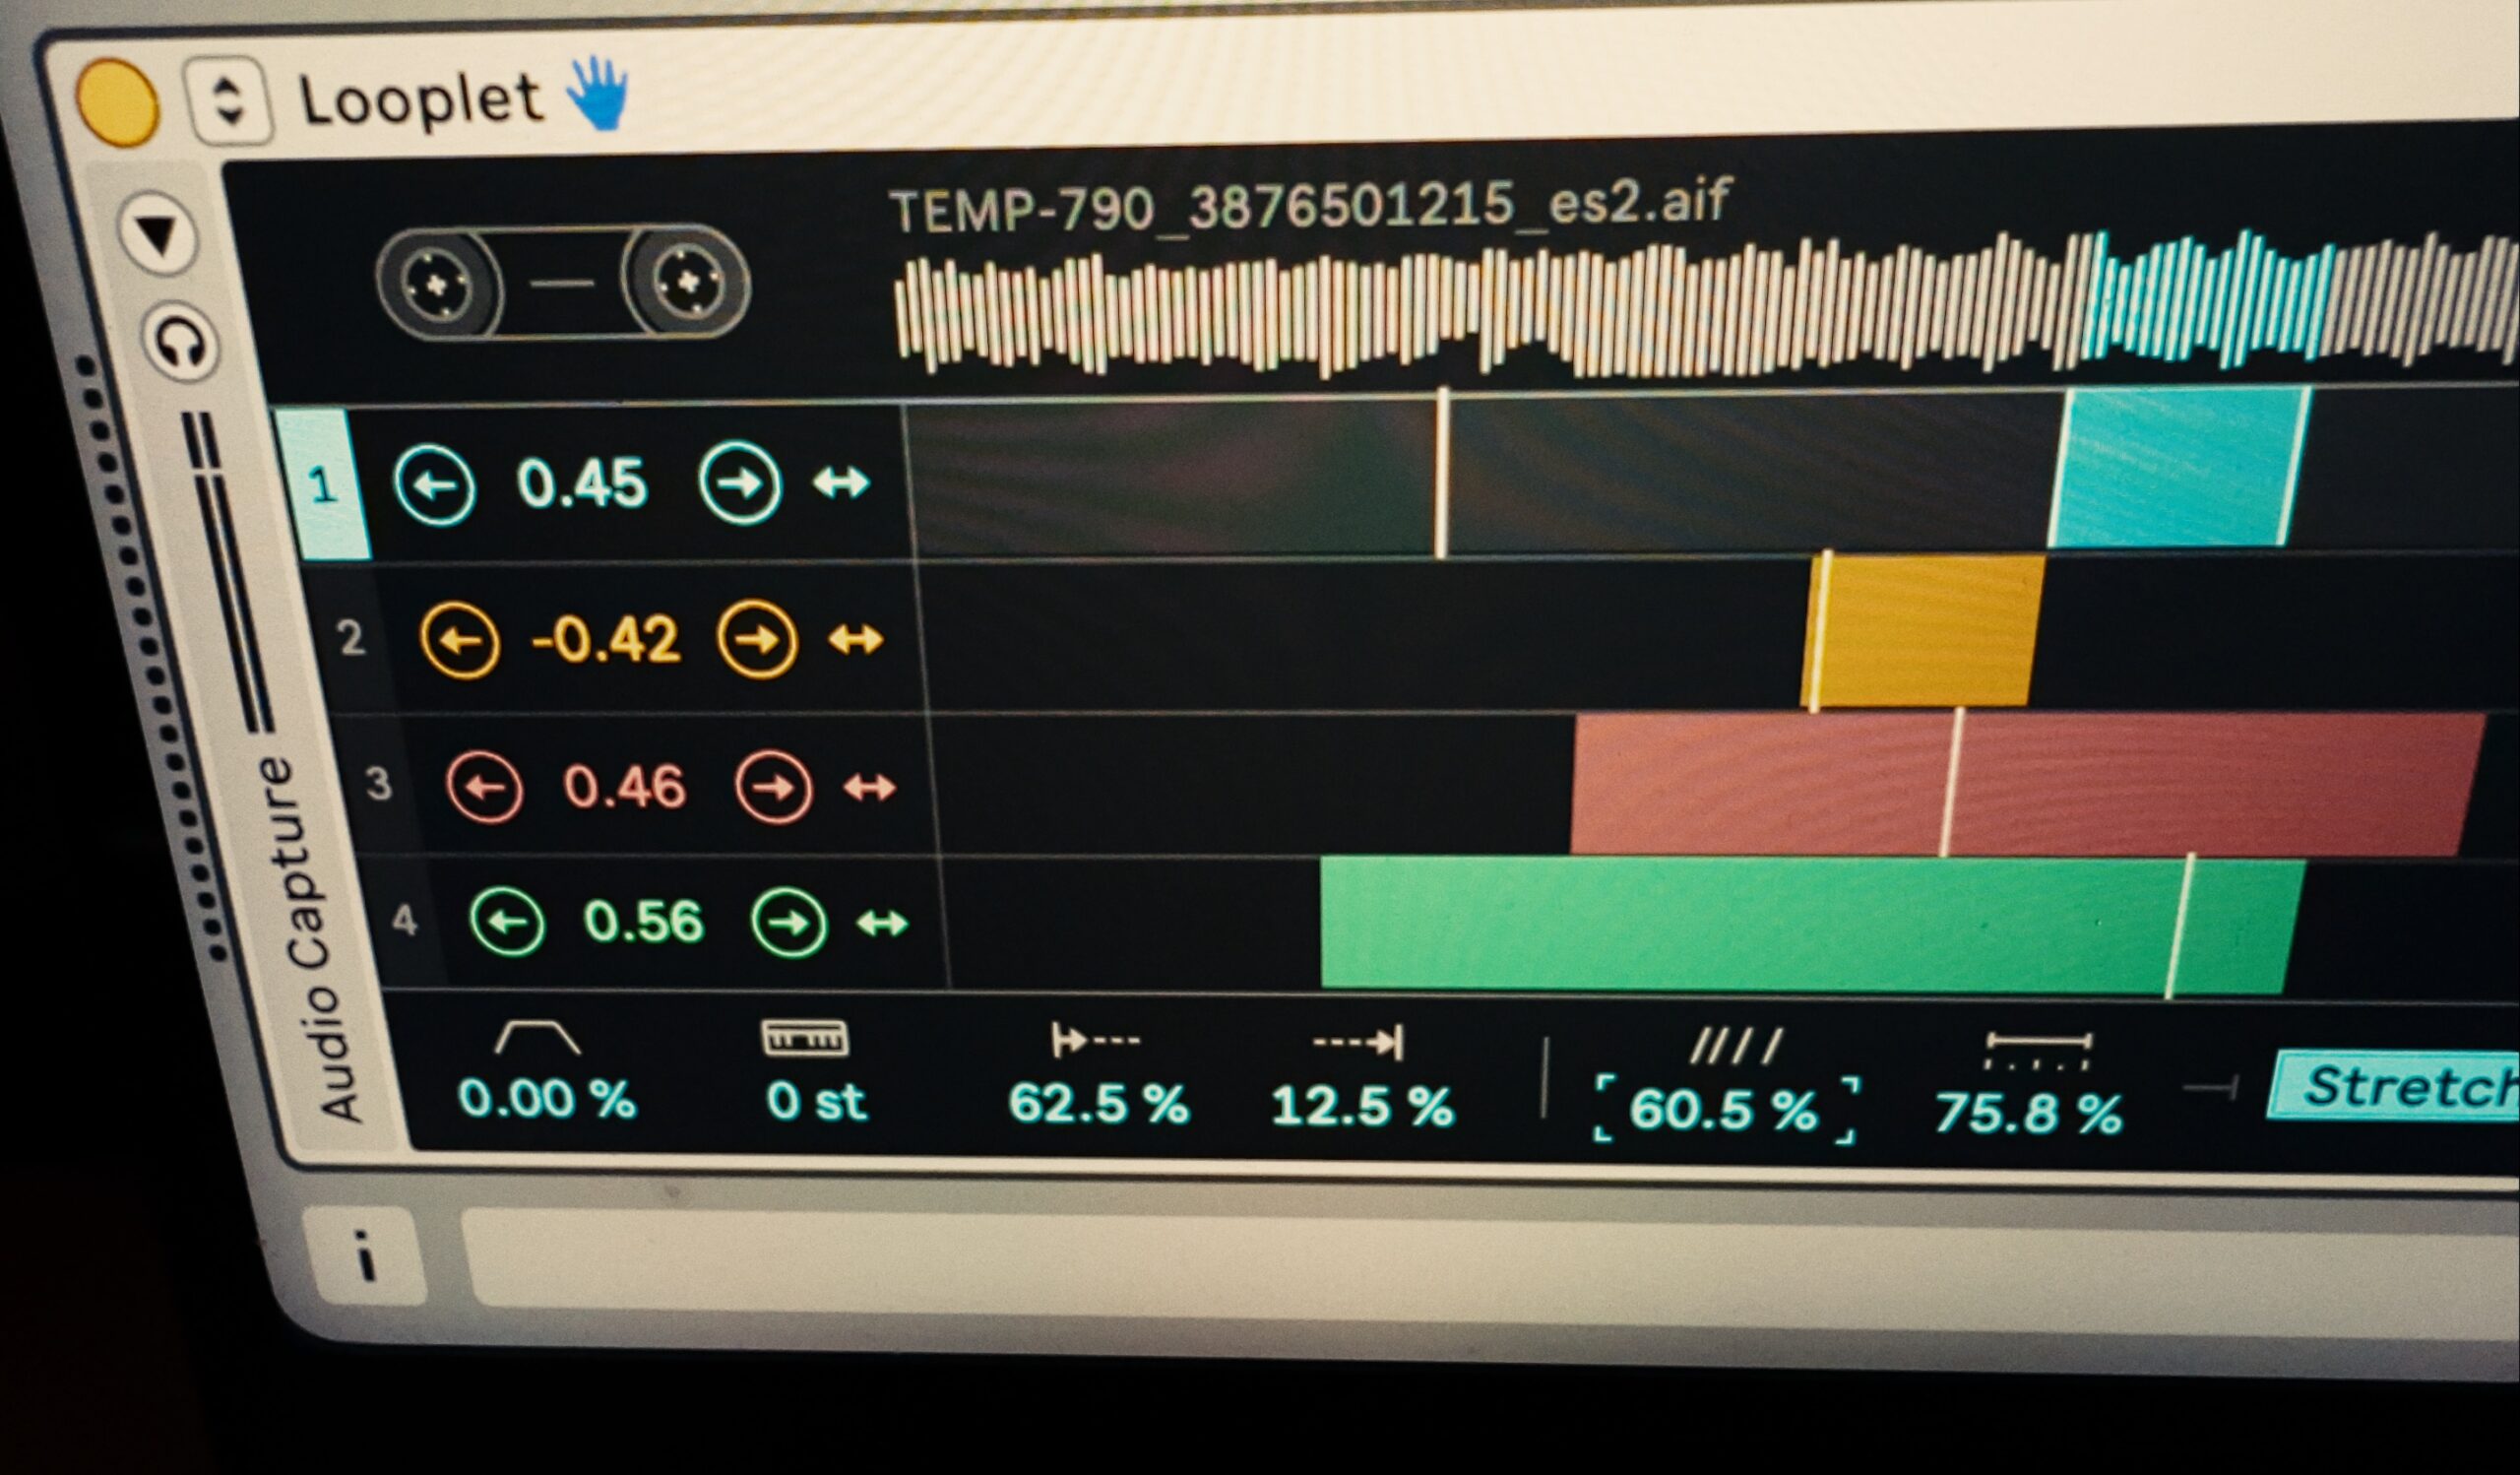
Imagine four tape playheads, scrubbing over sound you either drag in or capture, making all kinds of wonderful sounds from tape to granular wonders.
This one really comes alive when you plug in a Push, as you get hands-on, color-coded controls for each of the four parts.
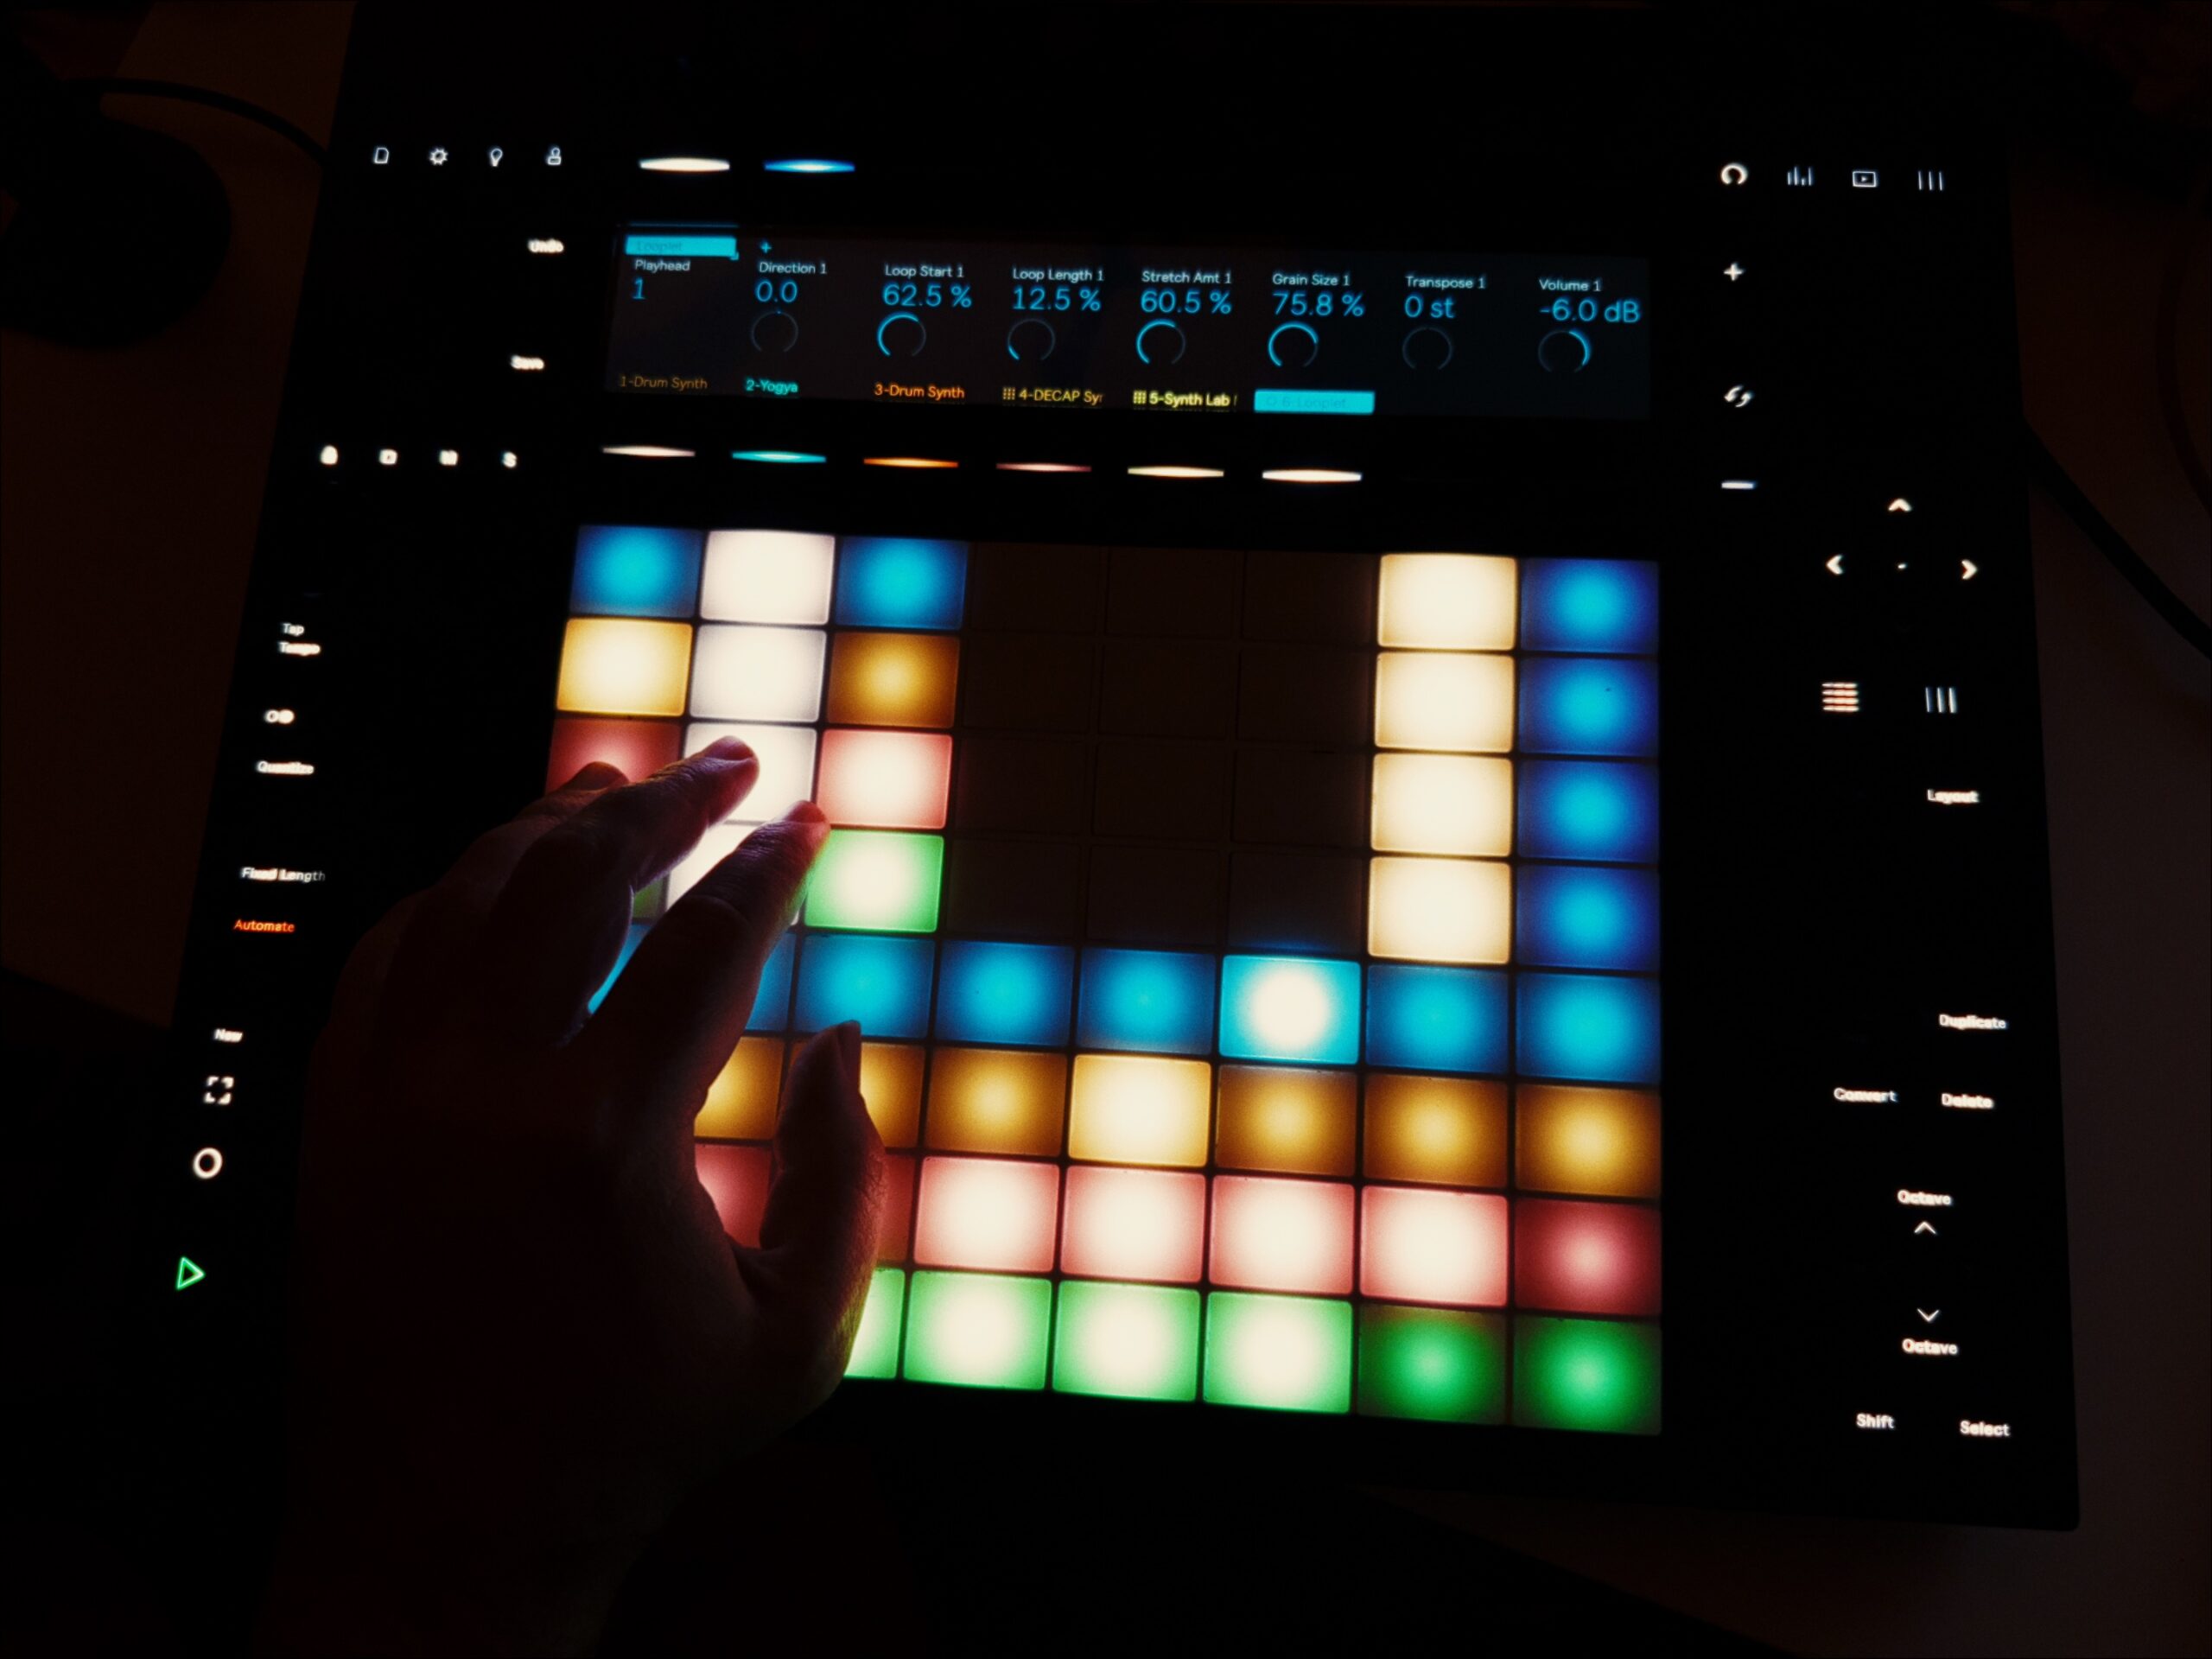
Hey, those are Devices in the Mixer!
Oh, and one more thing. You can finally see Devices in the Mixer. No more scratching your head clicking through each track to remember which plug-ins were where. You can toggle this view from the pop-up menu in the lower right-hand corner of the UI.
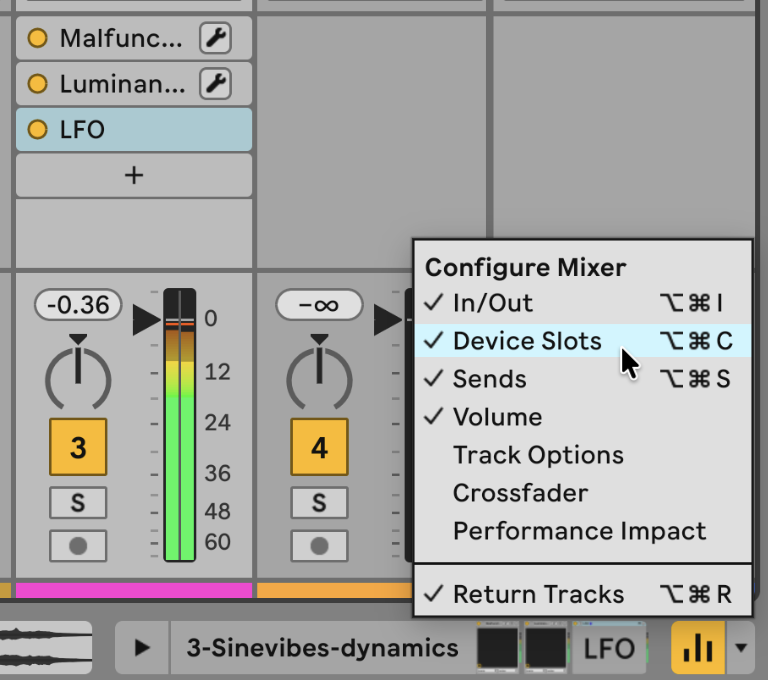
You can do all the things you can do in other programs, too: bring up third-party plug-in UIs directly, drag to reorder, delete, move between tracks, uh yes, probably Live should have done this earlier, but now it does and there is much rejoicing.
Push
Push deserves its own story, but let’s go over the basics — some of this mirrors what’s in the Live 13 software update, and some (Custom Layouts!) is just overdue and finally arriving. Again, rejoicing!
- New Step Sequencer features (ooh, this is good fun on Push).
- Device Mode now lets you build your Racks easily on the Push itself, without returning to the computer — naviate through devices, parameter banks, and chains, set up your routing, the lot.
- Multi-Band, Mid/Side Rack support (also fun here).
- Performance Mixer view, which adds Session View above faders on the pads. We’ve seen pads for mixing on Novation’s controllers, but the combination of clip/scene launching and mixer performance works really well on Push.
- Custom Layouts. At last. This deserves its own deep dive, but heck, yes!
For the release, Live 12 is 20% off, with free upgrades to Live 13 when it’s released (and access to the public beta now for registered users).
If you buy something from a CDM link, we may earn a commission.
Also, it appears Robert Henke stole a crayon and drew all over all the materials, but I approve of that.