The granular engine in Baby Audio’s HyperWarp can bend time along graphical paths you create with curved and stepped drawing tools. The result: glitches, timbres, and grooves, rhythmic chops, sweeping pitch shifts, rich coloration, and stasis-leak madness when you want it. I’ve got a hands-on, plus a big CDM-exclusive bank of free patches.
Thanks to Baby Audio for sponsoring the free preset bank.
To set the mood, here’s a piano jam in the effect:
HyperWarp factor
This is just the kind of plug-in that excites me, as it pushes into realms that are still largely unexplored, and where the outcomes can be so varied. It’s a perfect antidote to software sameness, clones, and retreads.
But wait, didn’t we just do something like that? Yes! Earlier this year Baby Audio released their granular instrument Grainferno, and I did a bank of sounds with granular samples. HyperWarp is based on the same engine. But this is not just Grainferno with an audio input: Baby Audio has built something genuinely new and distinct from the same underlying engine. And they’ve done a copious amount of tweaking to navigate the theoretically endless potential of granular synthesis and build something with some personality.
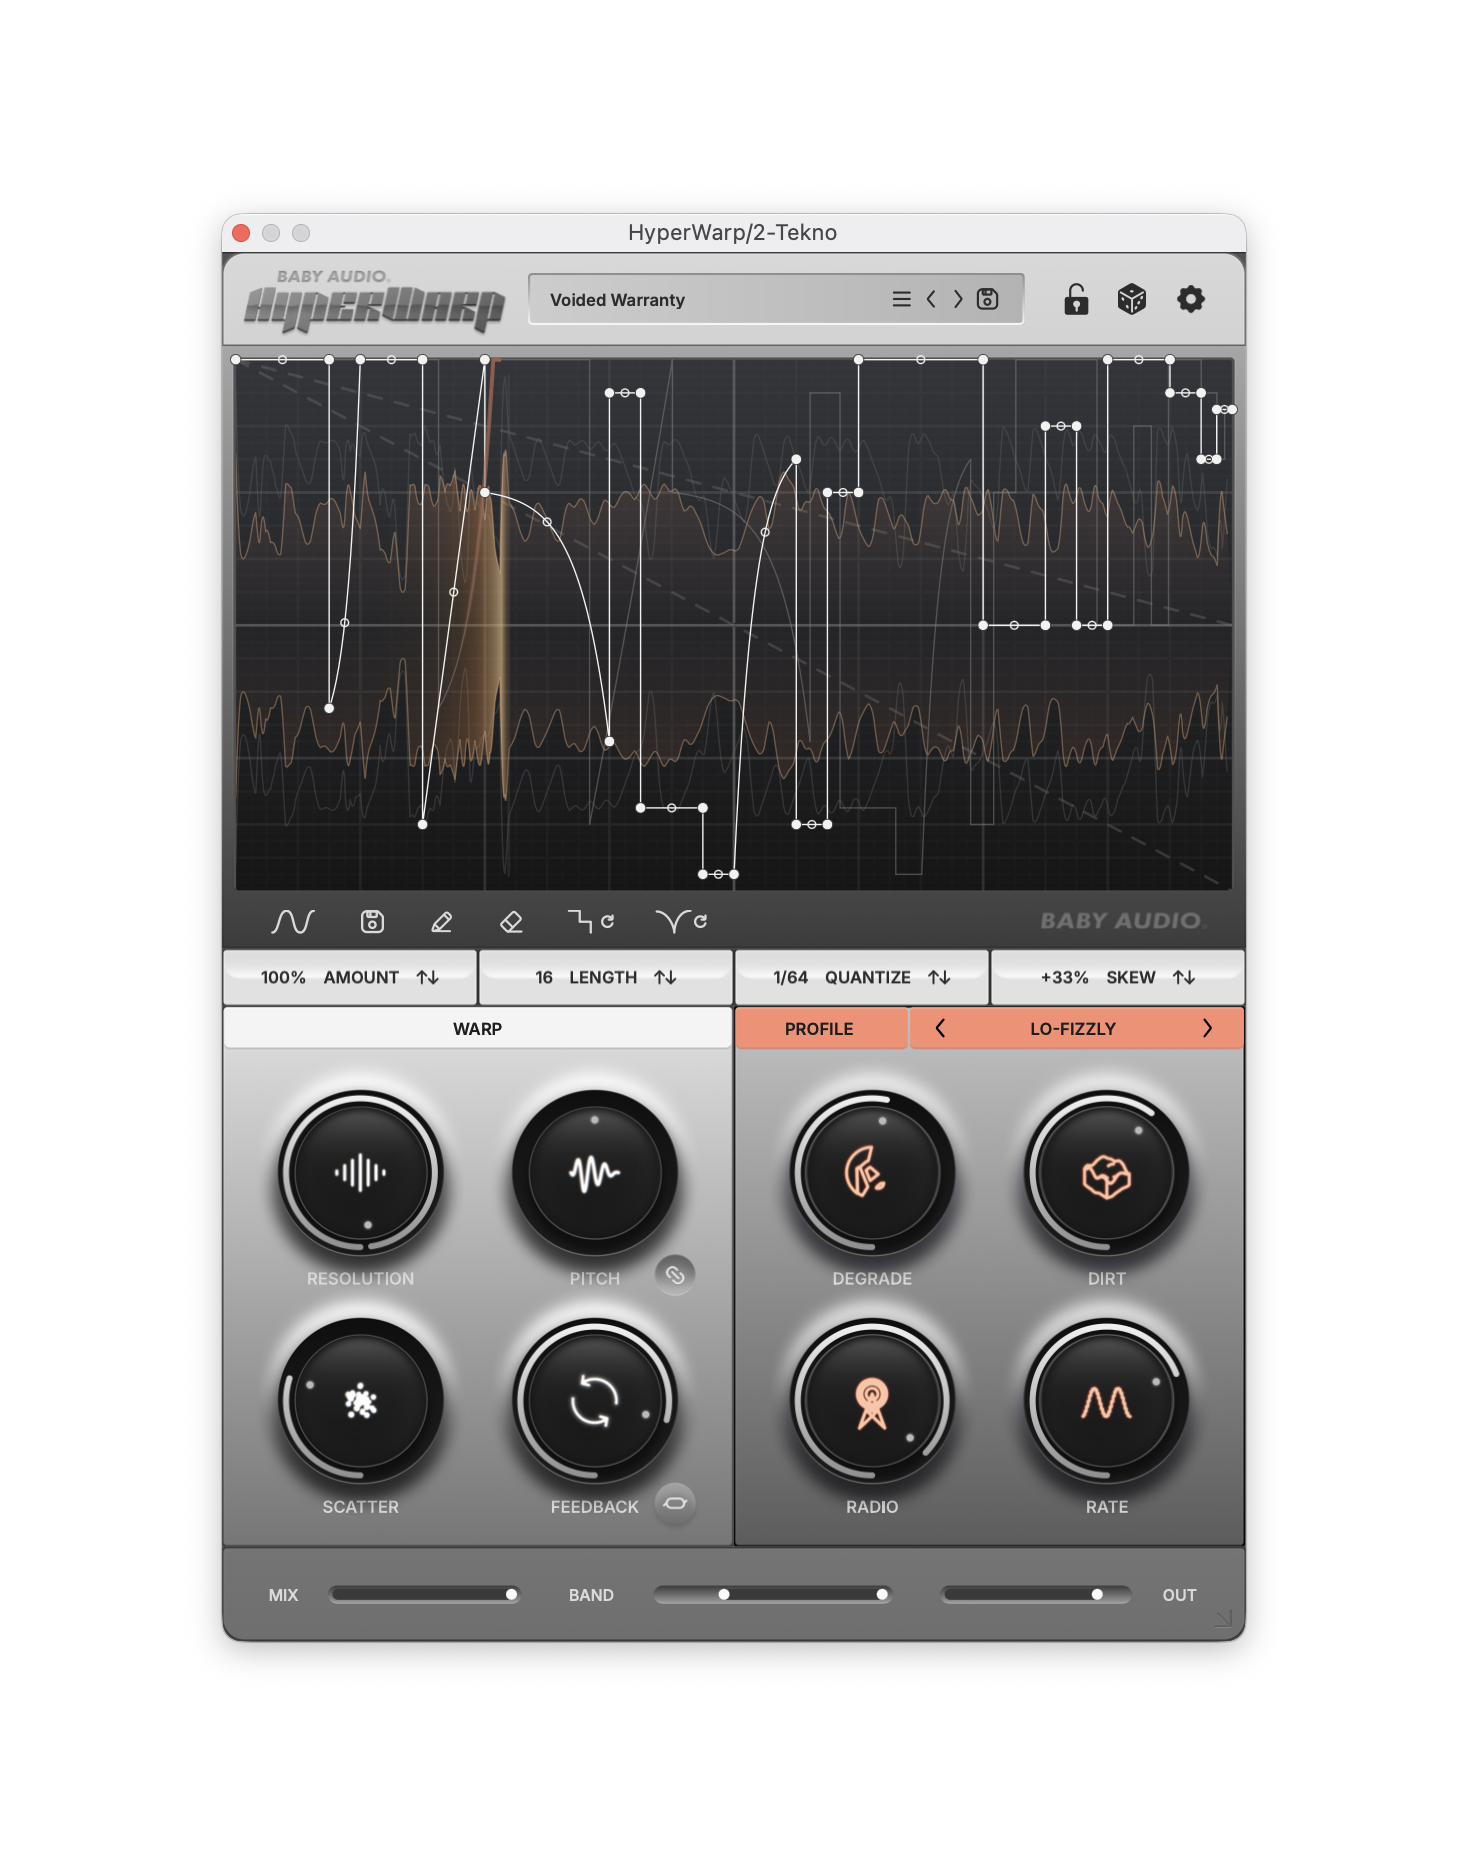
First, there are global warp parameters — Resolution, Pitch (quantized or free), Scatter, and Feedback (with stereo randomization option). From there, you can switch between seven color-coded “profiles,” each based on under-the-hood adjustments to the engine that can radically change the sound, and each with its own control macros. It makes this feel amonst like a multi-effect with seven modes, even though it’s all done inside the same engine:
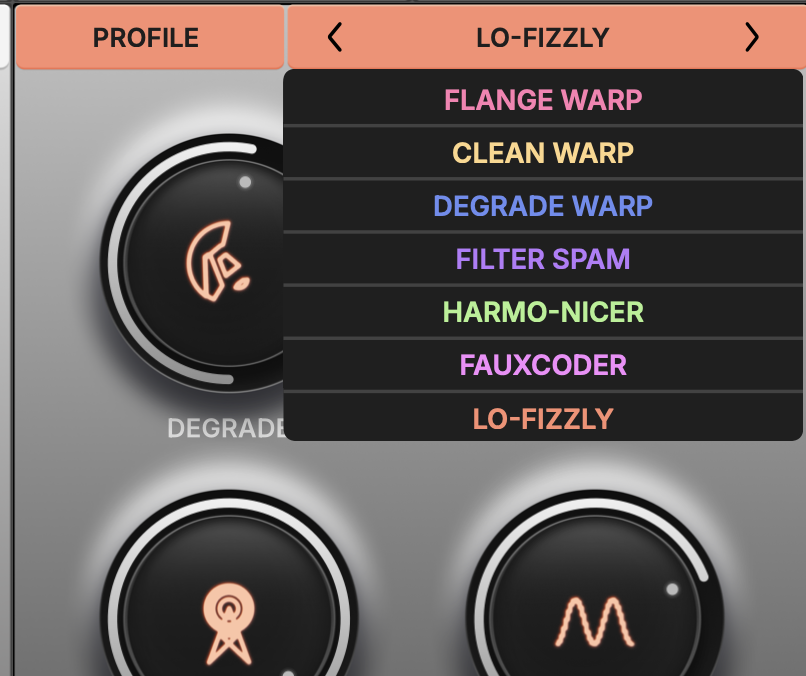
- Flange Warp which modulates pitch and rate with physics (pitch intensity), grain size, and stereo width controls. (It’s easily my favorite, so it makes sense that this is the default — it has a wide range of possibilities).
- Clean Warp is, as advertised, the cleanest when set to neutral controls, with pitch-independent speed. But it also has tricks of its own, with vibrato amount and speed and a grungy “circuit-bend” option that degrades the correlation algorithm — meaning it can also be one of the dirtiest of these, perversely!
- Degrade Warp is a pleasing downsampling variant with filter and pitch randomization (“chaos”). That lends itself nicely to lots of glitchy and lofi results.
- Filter Spam is really unusual — per-grain filtering with randomness, plus octave randomness. I’ve written elsehwere why I’m such a fan of per-grain manipulation.
- Fauxcoder is not a vocoder (that’s the “faux”) part, but adds harmonic resonance and zappy “squelch”. Did I mention you can do lots of forward-thinking electro-style sounds here, too?
- Lo-fizzly is another somewhat exotic spice to add here — “similar” to digital downsampling or radio degradation, but again a particular set of tweaks to processing as grains are generated. This has Degrade, Dirt, Radio, and Rate options. It is not going to give you typical downsampling degradation — that’s what Degrade Warp is for — but that’s the point. It’s another unique set of textures.
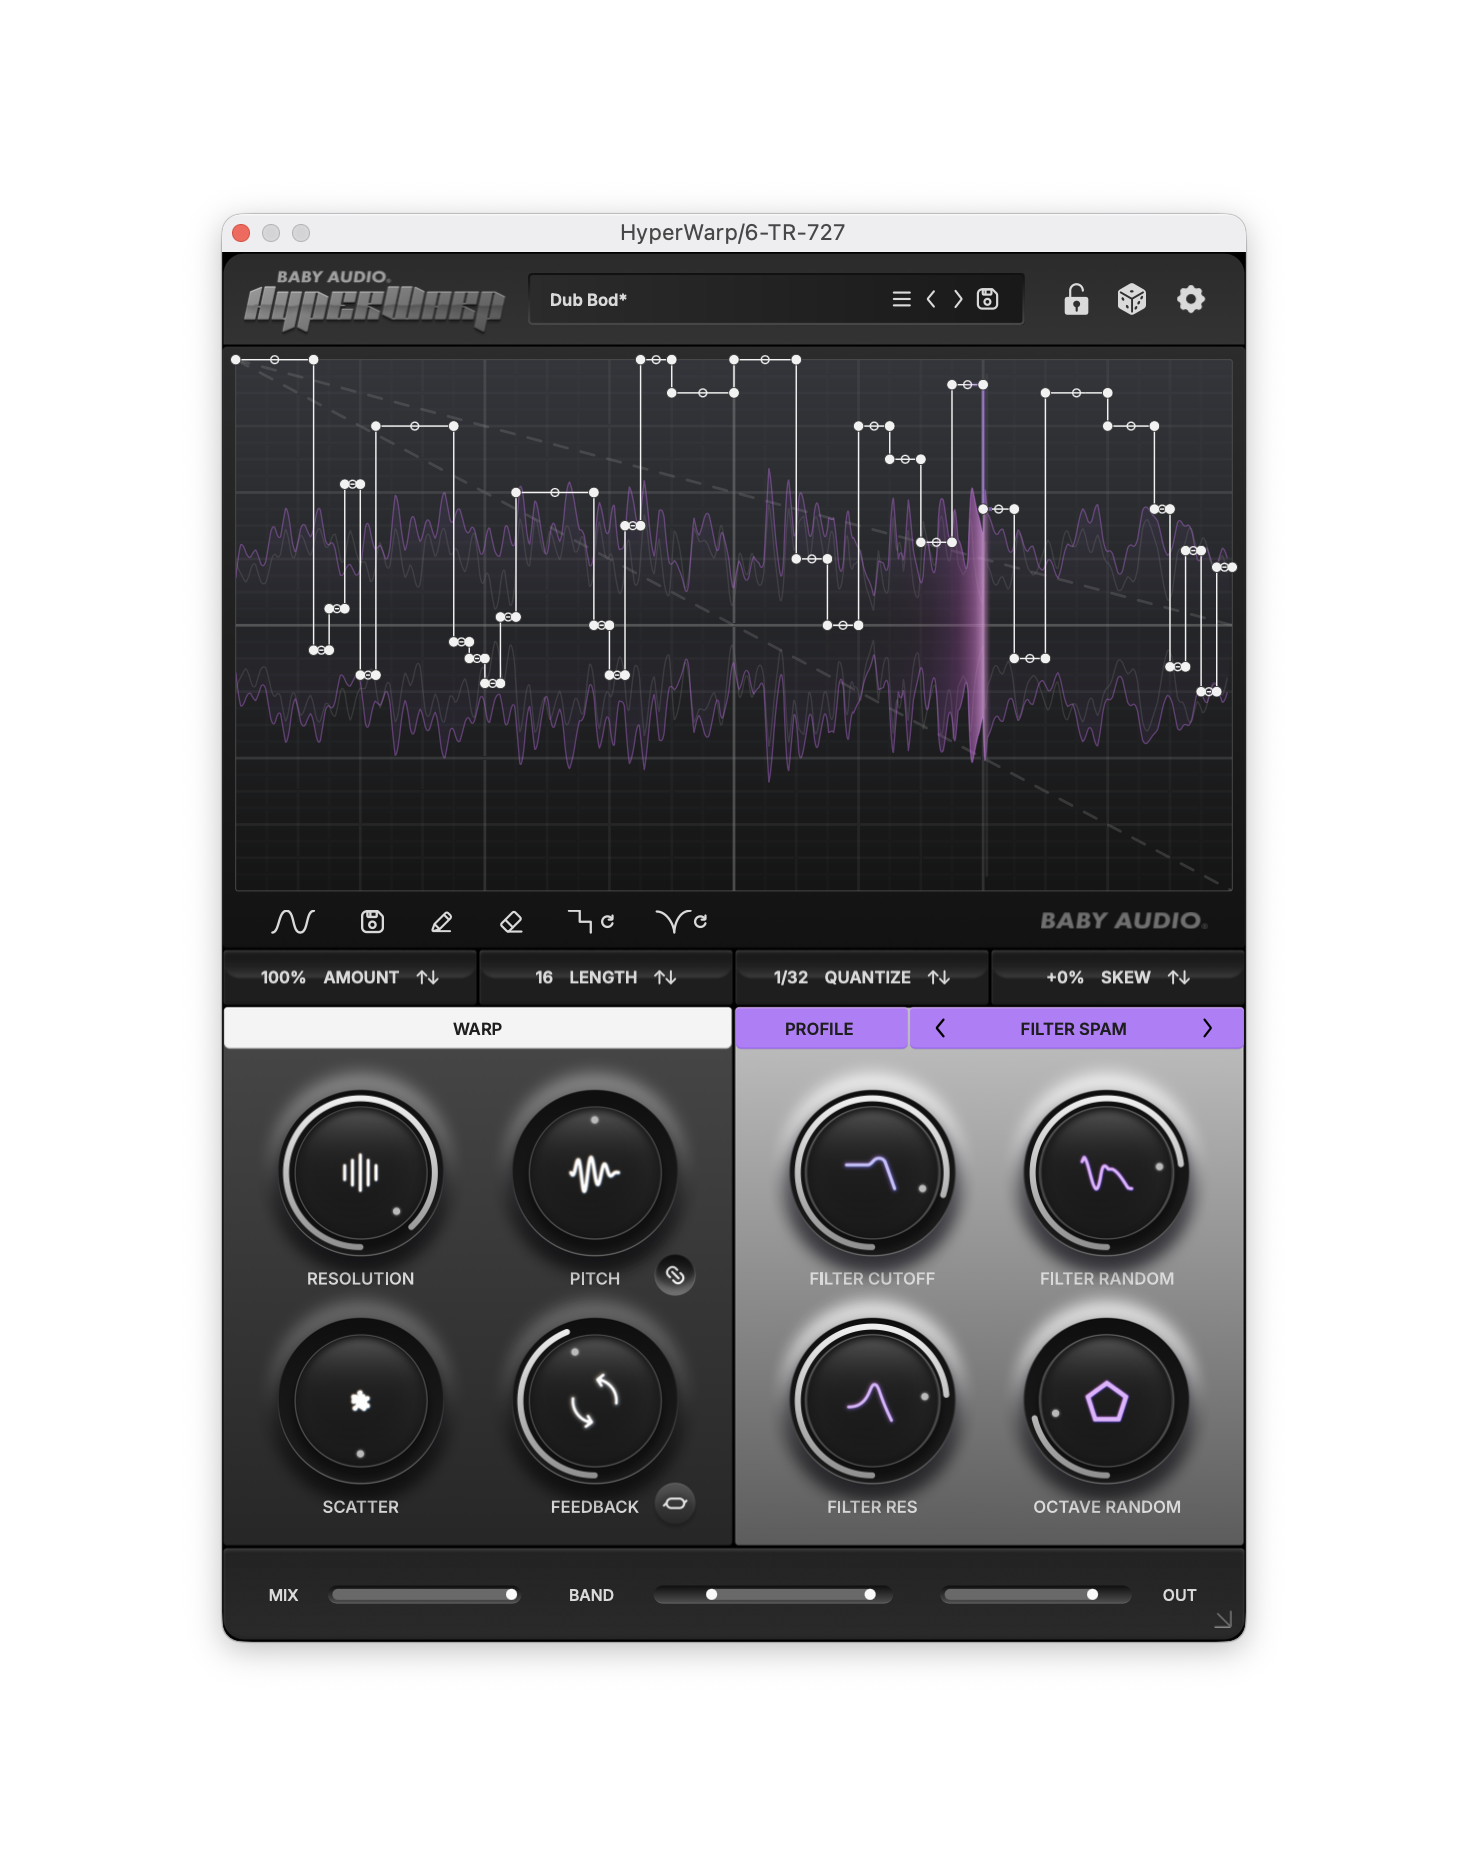
So, generally I’ll draw in a curve I like first — especially as that may give a groove its rhythmic shape — in Flange Warp or Clean Warp first. Then I’ll see what the same shape sounds like in different modes, as you often don’t know until you’ve tried.
The basic idea is, sound is loaded into the processing window, then the lines direct the engine backwards in time. Horizontal lines play at regular speed. Angle down to slow down; angle up to speed up — either tape machine-style or with independent pitch and tempo. The stair-stepped edges will stutter or glitch.
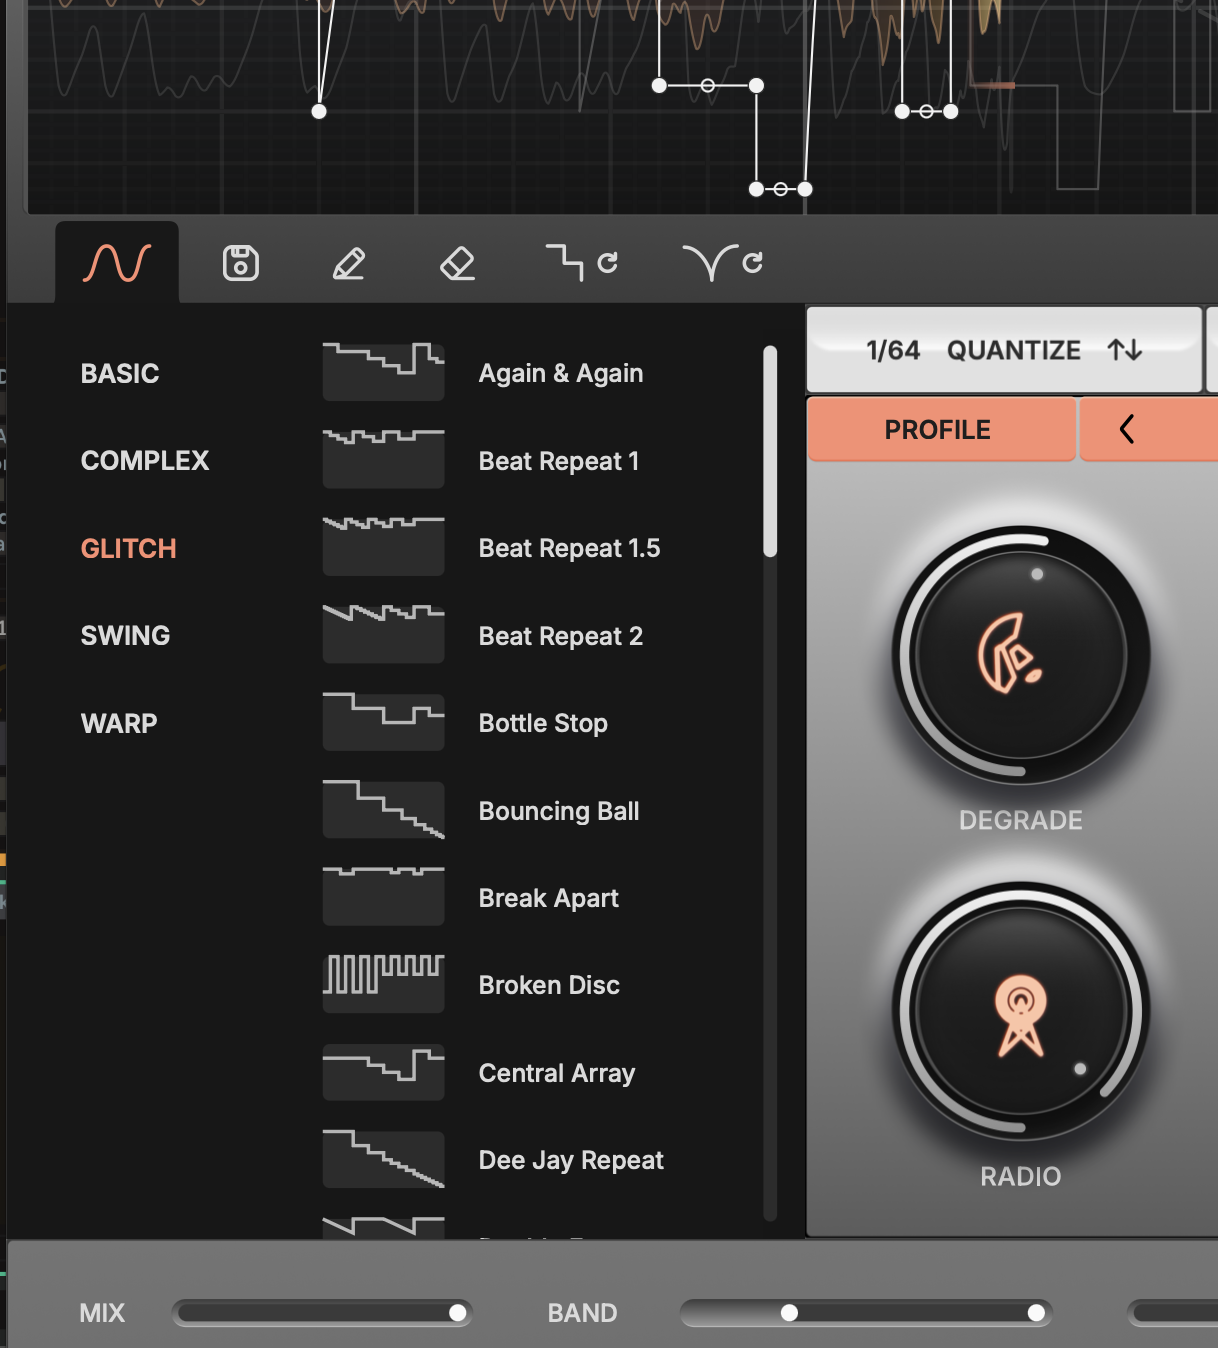
The drawing tools for the Graph input are exceptional, and exceptionally fast. You can draw in via envelope with parametric control, for linear interpolation or curves, or in right-angle steps (for steps, hold down shift). The steps give you the most clear glitches, as you’ll see/hear in my examples. And you can mix and match, too, creating subtle or mangled grooves. (You know, it is really hard to write this article without using the word “warp,” which I can’t, because it’s already in the product name. Suffice to say, you’ll do a lot of warping.)
You really want to dive into experimentation quickly, and you have a lot of options for that. There’s a full bank of pre-built graph shapes, plus you can quickly shuffle random stepped or random curved envelopes (via the toolbar at bottom), and you have a randomization for all parameters at once if you want to completely roll the dice.
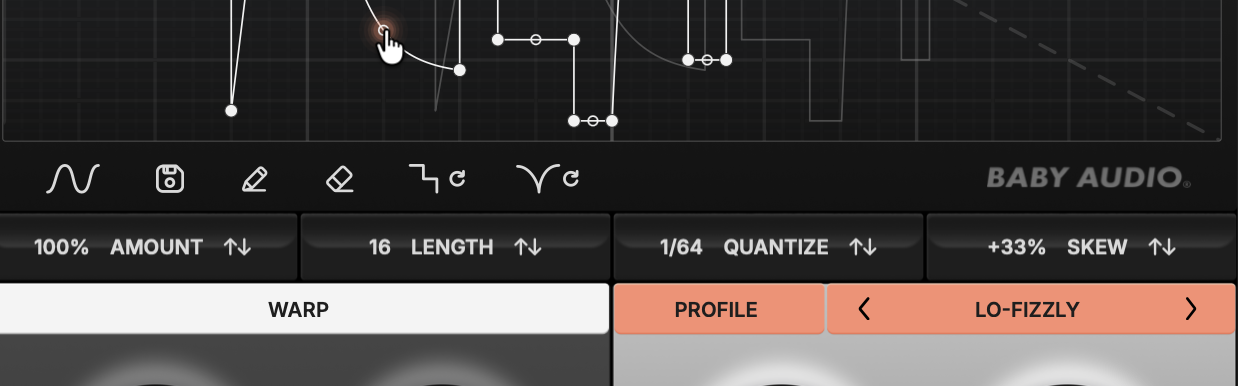
I hestitate to even call this a granular effect. It absolutely is, but the precise envelope controls and all the engine variations make it sound very unlike other granular effects.
I think it is really important that the engines underneath are built with pre-constructed characters. There’s more than enough diversity of sound — it’s really insane how many different results you can get out of this, even with a fixed envelope path and one engine, just shifting audio input, let alone shifting modules. So it’s really about having something that’s always satisfying to tweak and experiment. You have all this freedom without feeling like you’re going to break something.
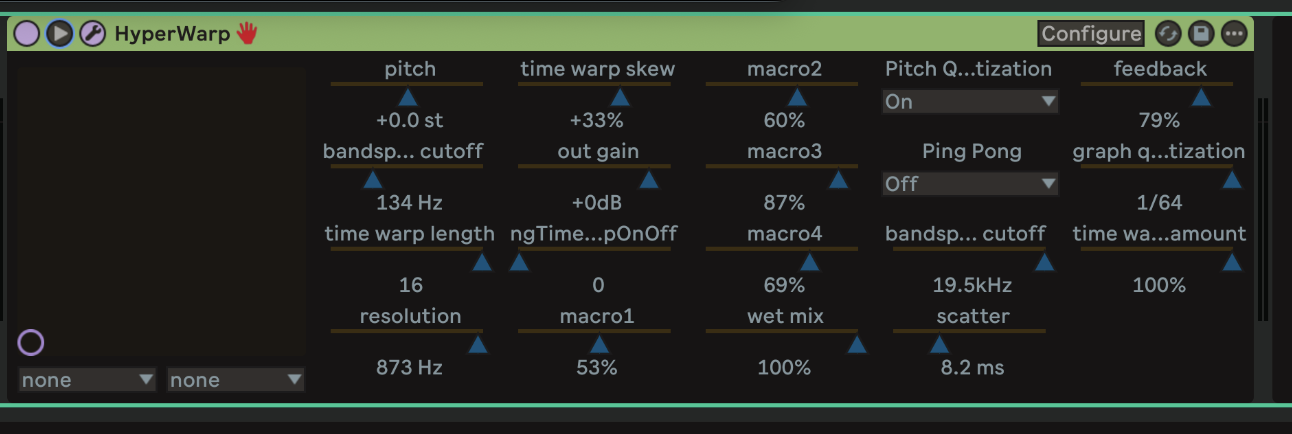
There is not internal modulation apart from macro settings built into the profiles. That’s not really an issue, though. There are macros you’ll want to modulate — I purposely didn’t do that in my video examples, but I am using it in production. But the interface here remains clear and uncluttered, and then I just used modulators from Ableton Live. (Bitwig Studio and Cubase also have great modulation sources I’ve been using a lot lately!) But yes, everything is exposed:
Free soundbank from CDM
Here we go again! We already got to share free kits and patterns for Baby Audio’s Tekno (the patterns will work with anything, in fact), plus a free soundbank with samples for Grainferno (audio CC-licensed for use anywhere).
Now, here’s a soundbank for HyperWarp, complete with some original, hand built envelope shapes for the Graph input. There are a lot of ways to modify these, too — though sometimes I went ahead and included alternatives. But you can try modulating parameters, swapping Profiles, or tweaking macros, as well as varying the graphs.
If you want to try this for free, a free trial is available in the More Details section of the HyperWarp website. There is a subscribe-to-own option and the intro sale on now.
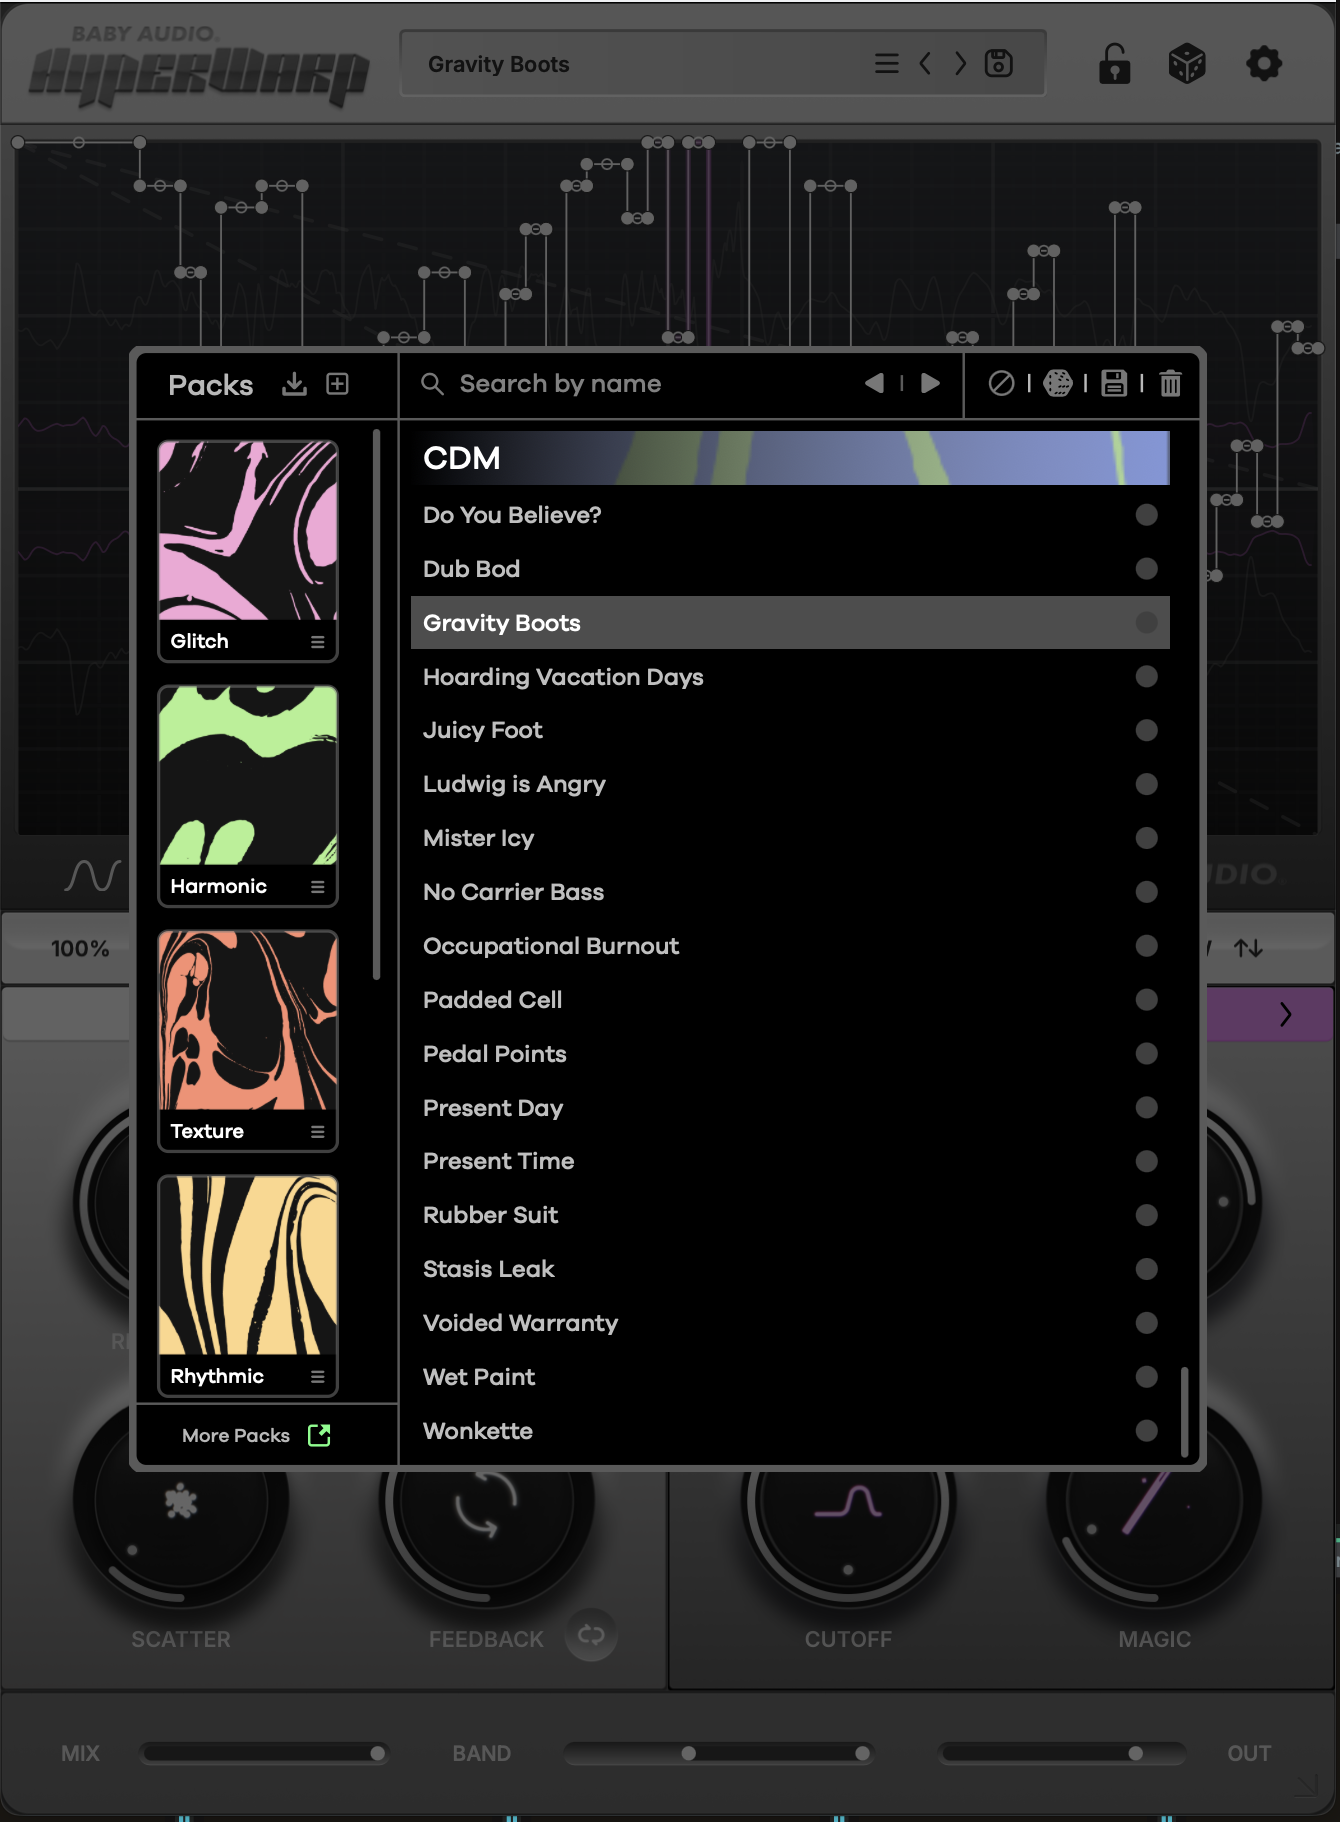
And here’s just some quick-and-dirty jamming with some of the presets, plus tweaking parameters to show you some of that impact (no talking):
Behind the scenes
PK: I’m curious how this evolved through development? Especially as there are so many details to the profiles — sounding like there was a ton of effort and hand-tweaking/hand-tuning done there. And maybe a mode or parameter or two that was also a happy accident? What was the genesis of some of these?
Baby Audio: Everything began with the granular engine that HyperWarp lead developer Joel Keohane has been working on since the early 2020s. It’s a powerful platform that also forms the basis for our flagship granular instrument Grainferno.
After releasing Grainferno we still felt the granular engine had a lot of untapped potential, especially for users who primarily work with samples and audio. So the initial idea was to create an expression of the grain engine as an audio effect to explore more of its capabilities.
We worked on various ideas for creating glitch effects and rhythmic patterns and we settled on the graph input as the best interface to combine those gestures with the grain engine.
Developing the final profiles was a subtractive process where the principal sound designers started with a highly expanded version of the engine that they curated into four macro controls for each profile. Each macro affects multiple underlying behaviors in the engine, so all seven of them give you different sonic outcomes. Under the hood, each profile is a completely custom configuration with unique modulation routings, envelopes and LFOs, per-grain processing and even crazier stuff deep at the grain level.
One interesting thing, the profiles are all created from in-engine parameters and don’t rely on post-effects, even for things like the filter and lo-fi capabilities. So it’s a fully granular take on everything it offers.
How should we think about the graph and the parameters and their relationship when working in the interface?
To understand how the graph and the parameters are related, you can think of the playhead inside the graph window as similar to the grain generation position in Grainferno. In HyperWarp, the playhead follows the host tempo until you sequence changes in speed or direction with breakpoints on the graph
Since the grain engine generates the playback by reassembling grains on the fly, the granular parameters are always active and have an effect on the sound even when the graph has no pattern drawn in.
Once you start drawing shapes in the graph panel, the granular engine varies the speed, direction and starting position of the grains according to the pattern you’ve entered. This is where the profiles start leading to vastly different results, since each of them is a different configuration of the underlying engine parameters.
The controls are all interactive. Since the Warp panel controls act on the grains as they are generated, they affect the response of the per-profile parameters depending on how they’re set. This is one of the reasons why there are so many different sounds you can achieve with HyperWarp, it’s behavior is really dynamic with the combination of the graph and the grain engine.
As for live-tweaking and modulating the macro parameters, we wanted to stick with a fun and immediate feel for the user, so we intentionally limited it just the four macros, but rest assured, there’s a ton of modulation possibilities embedded within the interactions between controls, so there’s plenty to explore as you go.
Tutorials
And more on that Time Graph:
Get HyperWarp now for USD $49 intro ($99 thereafter).
Previously: