Feeling the need to make music making a little less solitary? In this multi-part series, we’ll be exploring some resources for adapting Ableton Live to playing with others — playing in tune, in sync, sharing ideas, and producing together. So let’s start as instrumental ensembles do: by tuning up.
Thanks to Ableton for helping support this series.
Playing in Tune: at a glance
Use a Tuner to match other instruments
Tune, calibrate, and interface with CV Tools
Track an instrument/vocal playing with Envelope Follower, pitch following
Map to Scales and Scale Roots, including Scale-aware Devices
Trigger Scales with Clips
Explore harmonies with Max for Live
Use Tuning Systems; create your own to match a player
I don’t know about you, but I love working alone — it’s just that I also love playing with others. Sometimes shifting modes, especially with technology, can just require some additional prep. So what I’ll compile in this series is approaches to doing just that. I hope that’ll trigger some conversation, and we can expand more.
For this series, I’ll focus specifically on playing in person, in physical space, because that brings a lot of particular demands and possibilities (including working with acoustic players).
And let’s start with how you play in tune across various environments, including when combining your set with other instruments.
Tuners
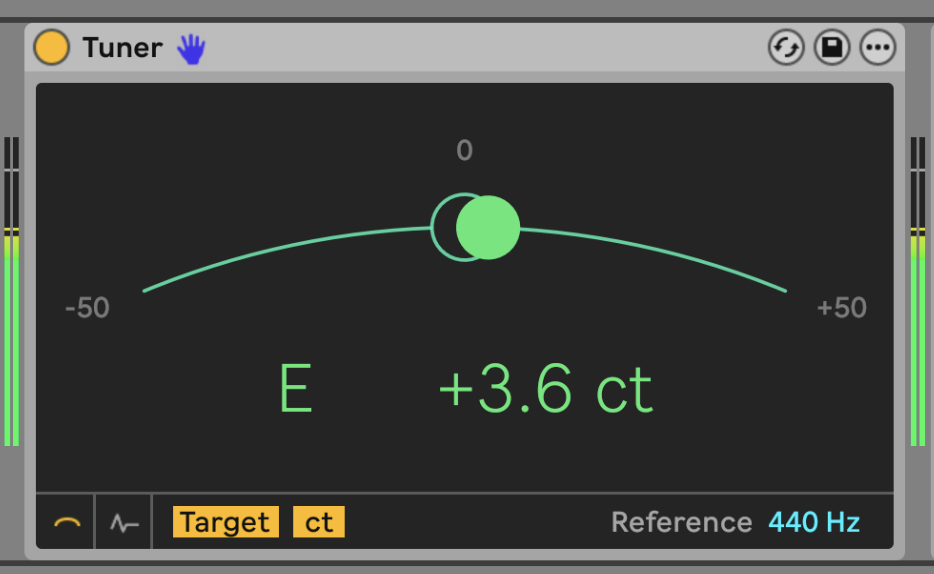
Live doesn’t have a single pitch reference by default — see Tuning Systems, below. But you can always use Ableton’s Tuner, introduced with Ableton Live 9.2, to check incoming pitch. That can act as a tuner for instruments, or in the other direction, gives you a reference for tuning your Live session or individual synths. Just insert it on a track with an audio input, or after a software synth you want to measure or tune.
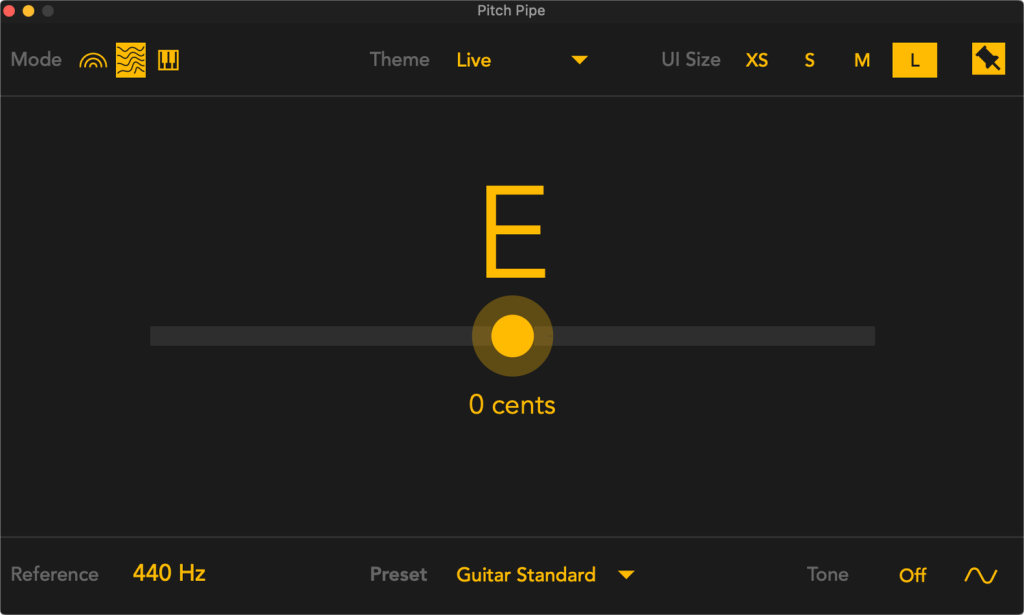
Even better, try Iftah’s Pitch Pipe, a more advanced tuner built in Max for Live. That has accessibility features for blind, visually impaired, and sighted users. There are also extra modes for string and percussion instruments. Like Iftah’s other software, it’s pay-what-you-choose, so cost doesn’t have to be a barrier but you can also choose to spend to support development.
Tuning and interfacing with modular gear
Calibrating and tuning analog oscillators is a lot like tuning instruments — and you may even make use of those same tuners! CV Tools works with Live 10.1 and later. (If you have Push 3, you can use that hardware interface, as well, including the standalone version.)
CV Instrument from Ableton’s CV Tools can assist in tuning modular equipment. Kirk Degiorgio has done a great guide:
DC Coupling: CV Instrument uses the audio output, so you’ll want a DC-coupled (not AC-coupled) interface; see Ableton’s FAQ or Sweetwater’s guide to DC-coupled audio interfaces.
CV Tools: Overview & Technical FAQ
But even without the interface, you can make use of CV Clock, CV Clock Out, CV Triggers, and the “Pitch” mode of CV In (converts pitch to CV). You can also use any MIDI/CV interface and calibrate pitch that way; some even have their own calibration routines.
For more, see my previous tutorial:
The best way to integrate Ableton Live and Eurorack modular – for any rig
There are plenty of opportunities for integrating software modular systems inside Live, too — aside from Max for Live, that includes Eurorack-style modular environments like VCV Rack (and its fork Cardinal), AAS Multiphonics CV-3, Softube Modular Reaktor, and Reaktor Blocks. Before I get sidetracked by that, though, let me say that the same techniques work — sometimes using the internal tuning, scale/mode constraints, and pitch and envelope tracking facilities in those tools.
Tracking pitch, envelopes
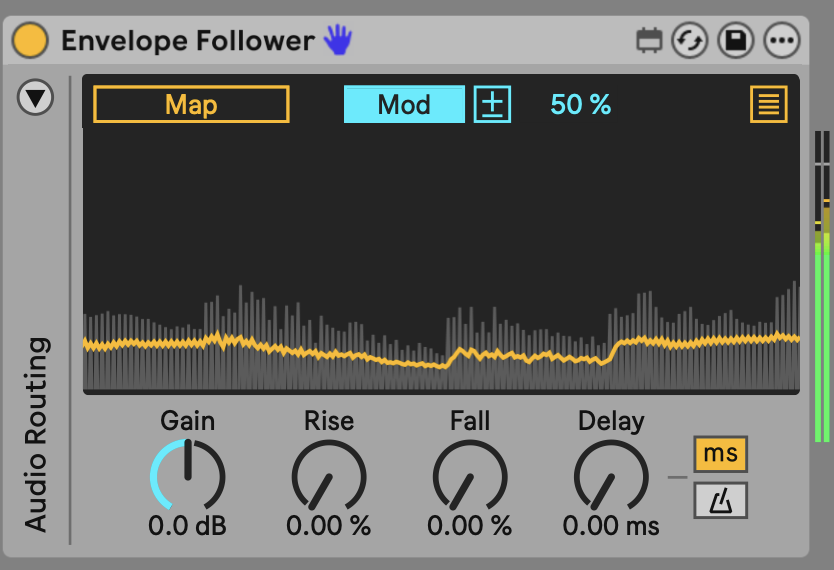
Just as you can route voltage out of Live (or into software modulars), you can also respond to the person playing. There’s the Envelope Follower, now one of the default Modulators in Live. (There’s a version of this in Max Essentials back to Live 9.) This lets you track the amplitude shape of an internal signal.
That isn’t technically in the scope of the article (it has nothing to do with pitch), but it brings me to the next tip. Ableton has its own built-in Envelope Follower, but no Pitch Follower — not yet, anyway! A great third-party option is the free Helmholtz Pitch Follower by Delta Sound Labs. Again, you can use the Map button to assign the tracking to any parameter.
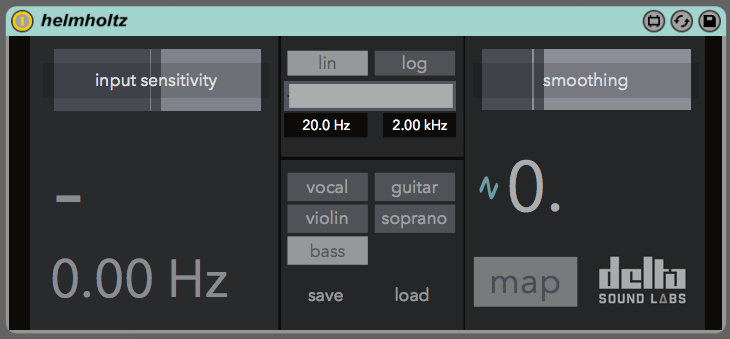
Helmholtz – Pitch Follower 1.0
Keys and scales
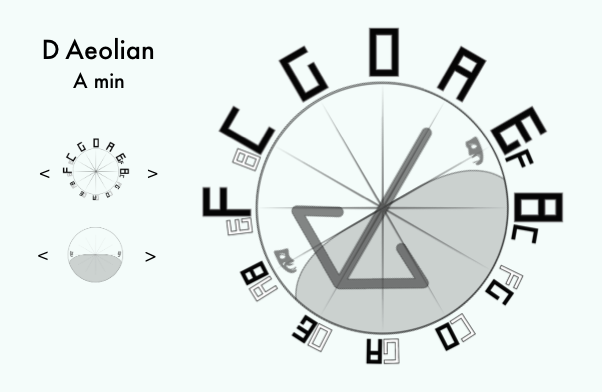
If you’re using 12-Tone Equal Temperament (or closely adjacent tunings), Ableton’s Scales and Scale Root (key signatures) can assist you live. You may already be aware that these can work with Clip editing, but they’re useful for playing live, too.
As with Clip Launch Quantization, you set the Scale Root and Scale Name in the toolbar. You also toggle Scale mode here. Note that this does not change tuning, which means some of the non-Western Scale names can be a little misleading (like Pelog), while others are frequently tuned to 12-TET in modern practice on western instruments and in popular music (like Hirajoshi and Iwata from Japan), but see Tuning Systems, below.

Various Ableton devices support Scale awareness — they’ll modify their behavior based on the selected Scale and Scale Root. Add these to a MIDI track you’re playing (or on Push standalone) and you’ll constrain your playing to the scale for more of that “no wrong notes” feeling.
- Arpeggiator
- Chord
- Pitch
- Random
- Scale
You can also use the Quantizer on Auto Shift (with audio input) to auto-tune, and tune the oscillators and filters in Meld. Look for the Scale icon on the Device toolbar:
You can also automate these changes. Enter the desired root and scale/mode in a Clip, and then trigger different Clips to change:
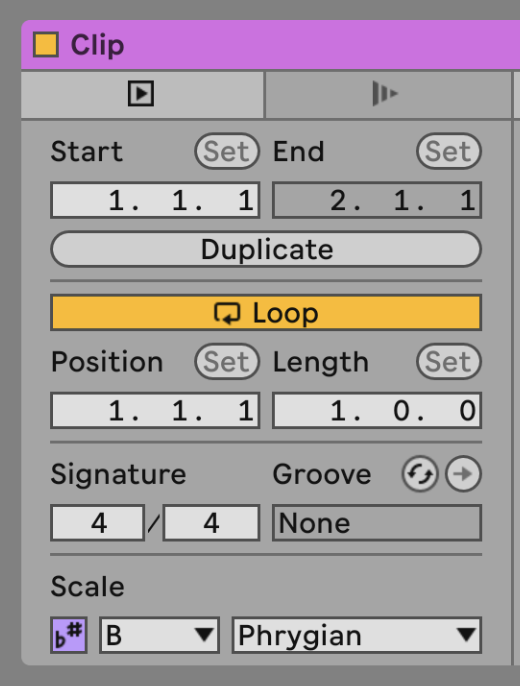
So here’s the strategy: automate those Scale changes, and magically all your arps and jams can be not just in tune, but “in mode” / in the scale.
For more on this topic, Ned Rush has a deep-dive tutorial
If you want to get really fancy, you can automate these changes from Arrangement view, since some people prefer to play from there — via another Max for Live device:
Advanced Scale Awareness Control for Ableton Live 12
And Ableton has a great FAQ on the topic:
Keys and Scales in Live 12 FAQ
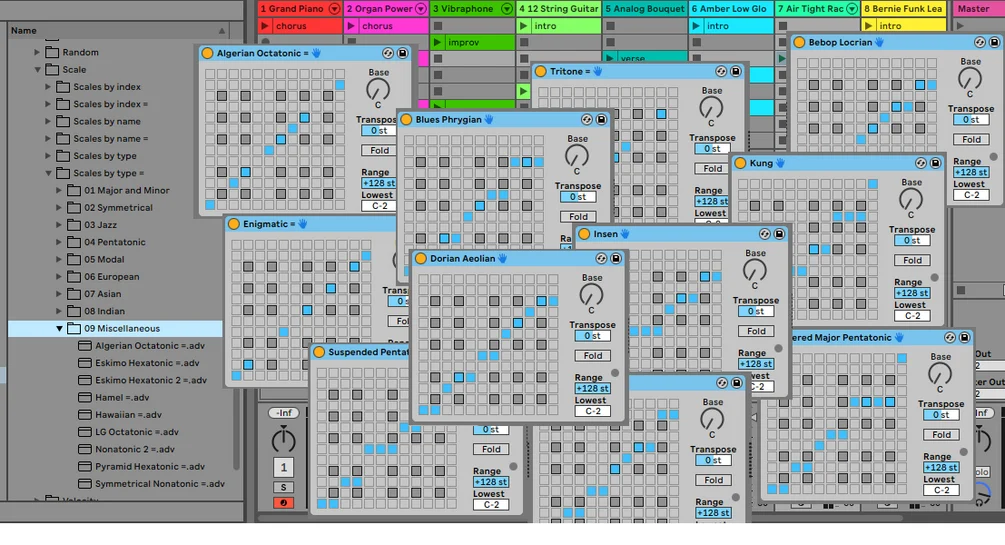
Live’s Scales are not editable (yet — I’m sure that’s a feature request from a lot of us). But if you’re willing to work with just the Scale MIDI Device, you can create presets for those. midi-2-the-max has a library of hundreds of these, for free:
Scale Library for Ableton Live 11
And if you find Live 11+’s Scale Awareness features to be too limited, Scale-O-Mat integrates with and expands on those features with a consolidated device. The basic advantage here is that it uses Live’s native Scale Device, but syncs all Scale Devices across your set with transposition.
Hardware and Scales
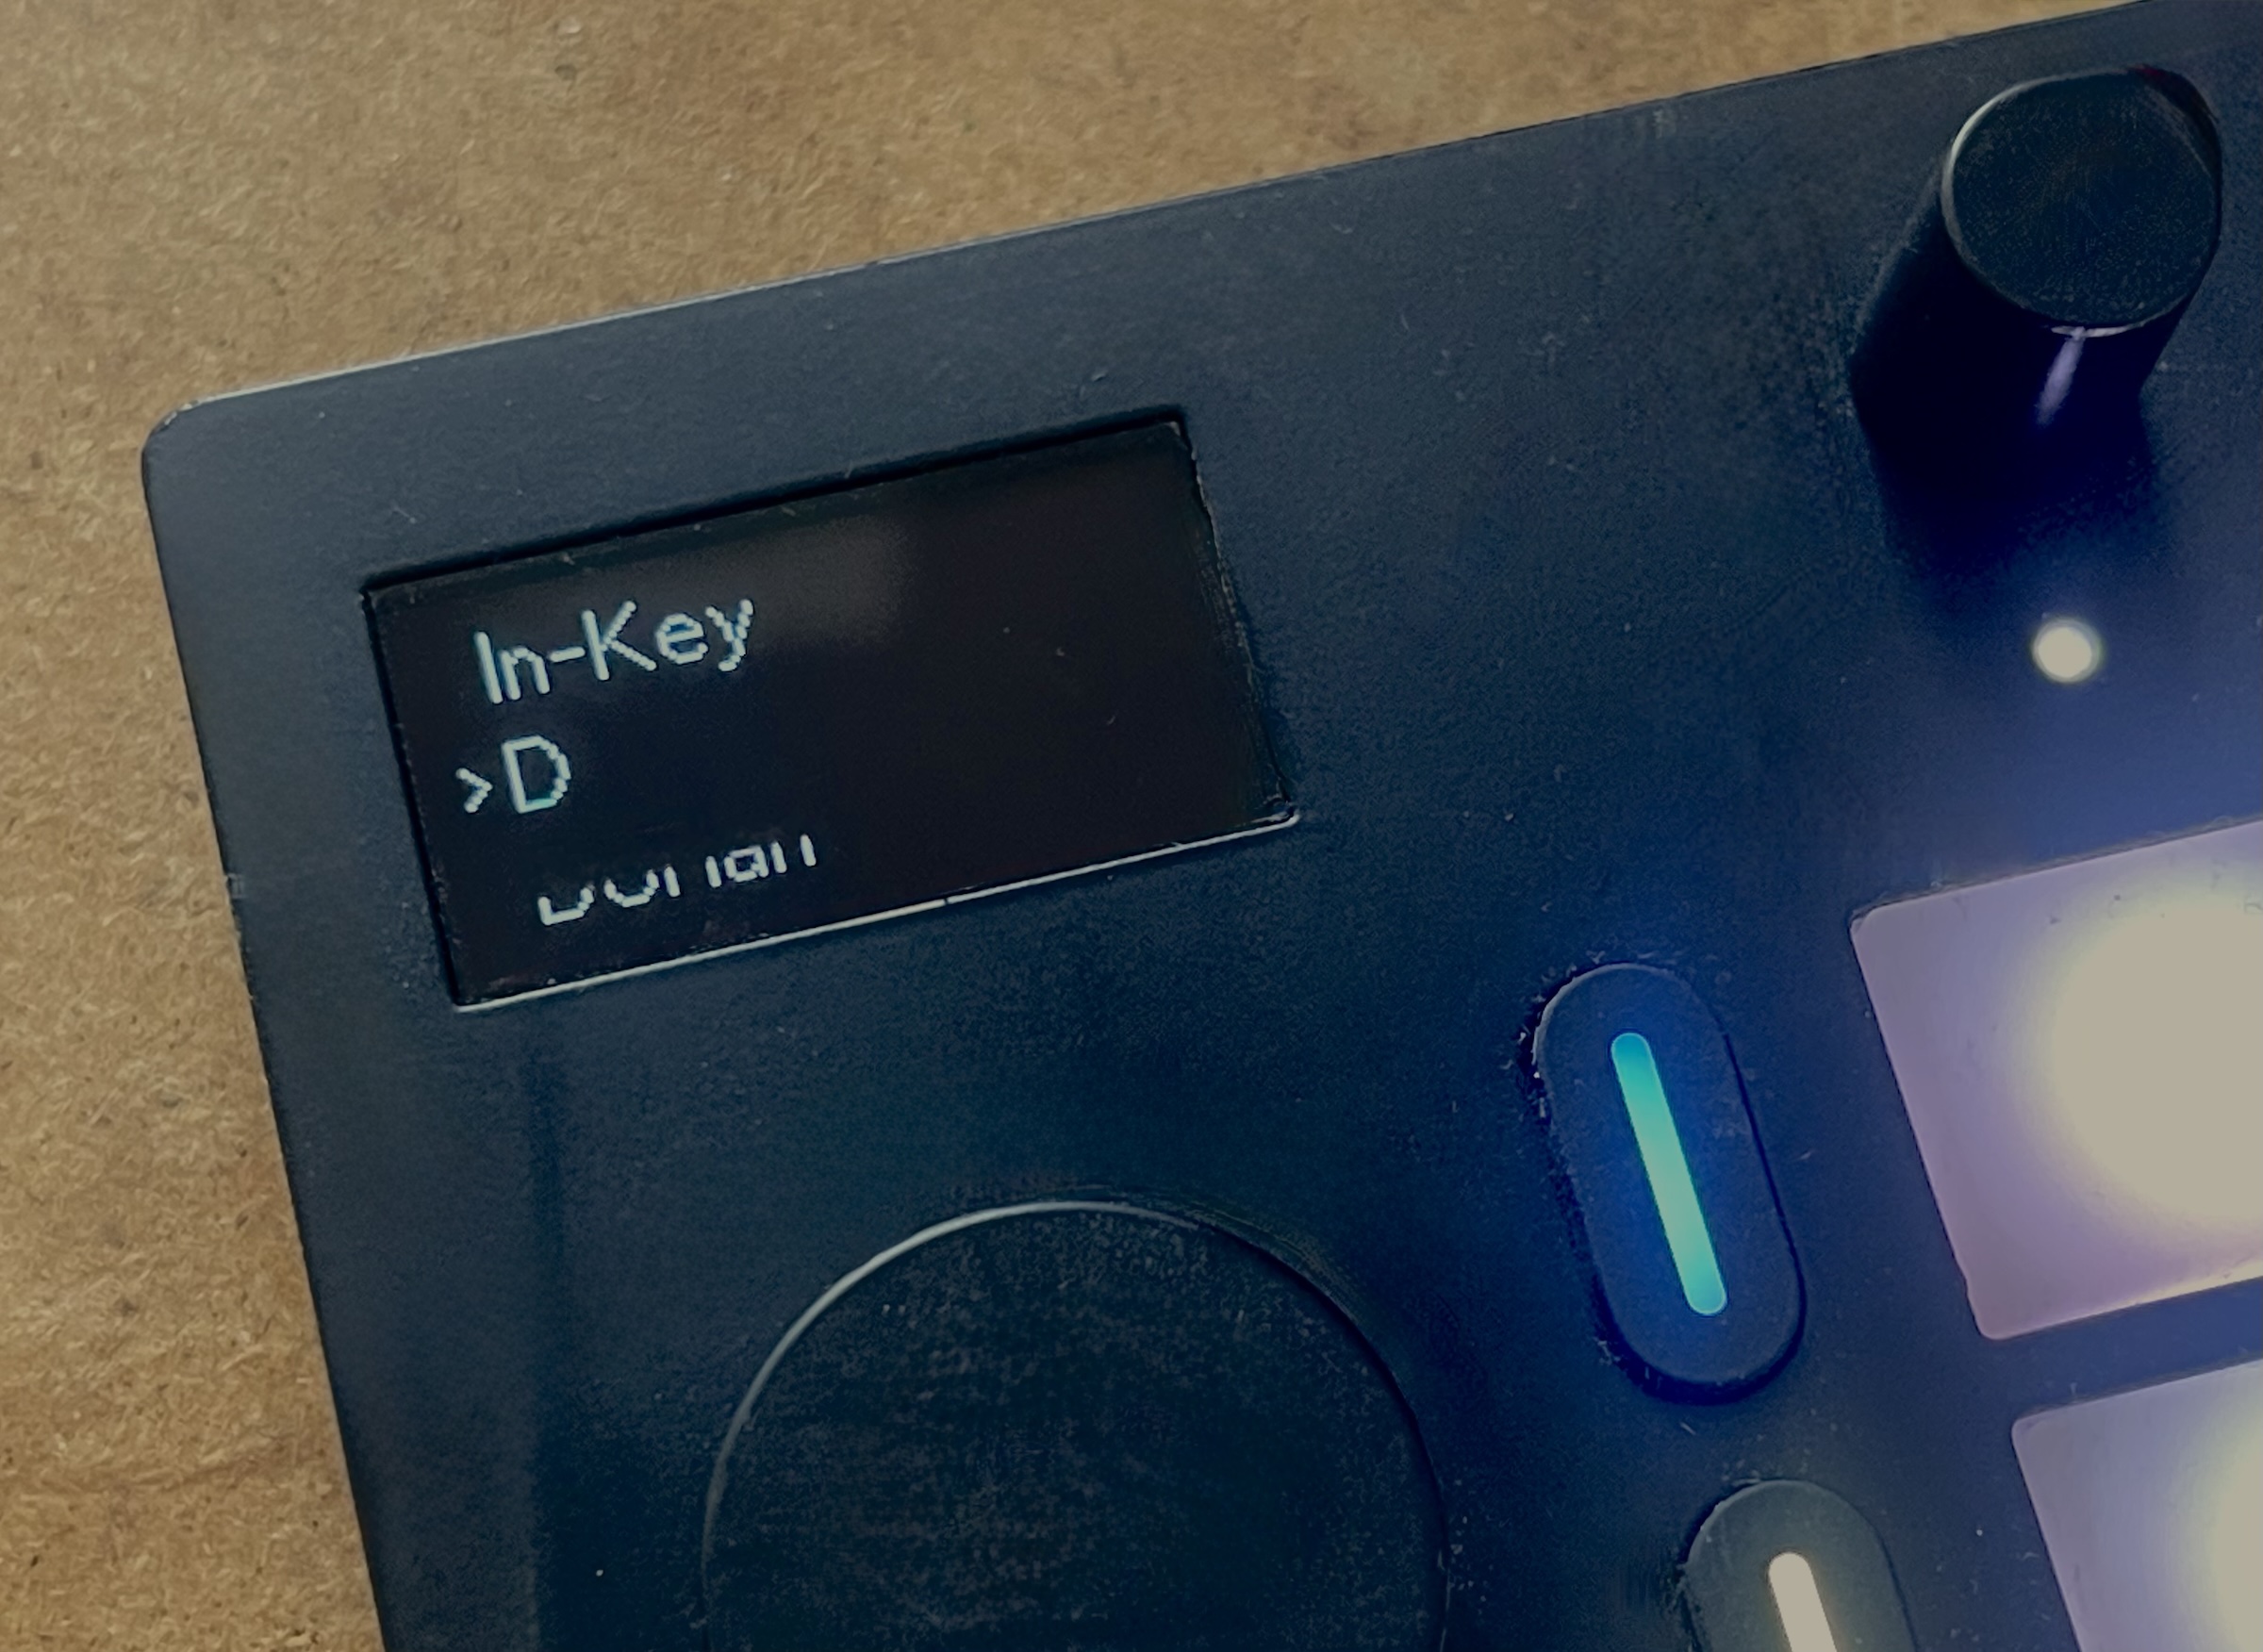
Of course, you can use onboard Scale settings on Push and Move, directly on the hardware. On Move, you’re looking for the “In-Key” options. Before your jam session is a great time to set up those instrument layouts in Move — and maybe even consider moving out of your desktop Live setup for something more portable and jam-friendly, indeed!
Push 2 and Push 3 have the same setup for Note Mode, which you can review in the Push 2 Note mode tutorial. Crucially, these are now saved with Sets, so you can at least make a set list with different Scales for different songs.
Tools to keep you in tune
If you want to jam in real-time, there are some add-ons to consider from the Max for Live community that go beyond what Ableton’s own Scale-awareness features can accomplish.
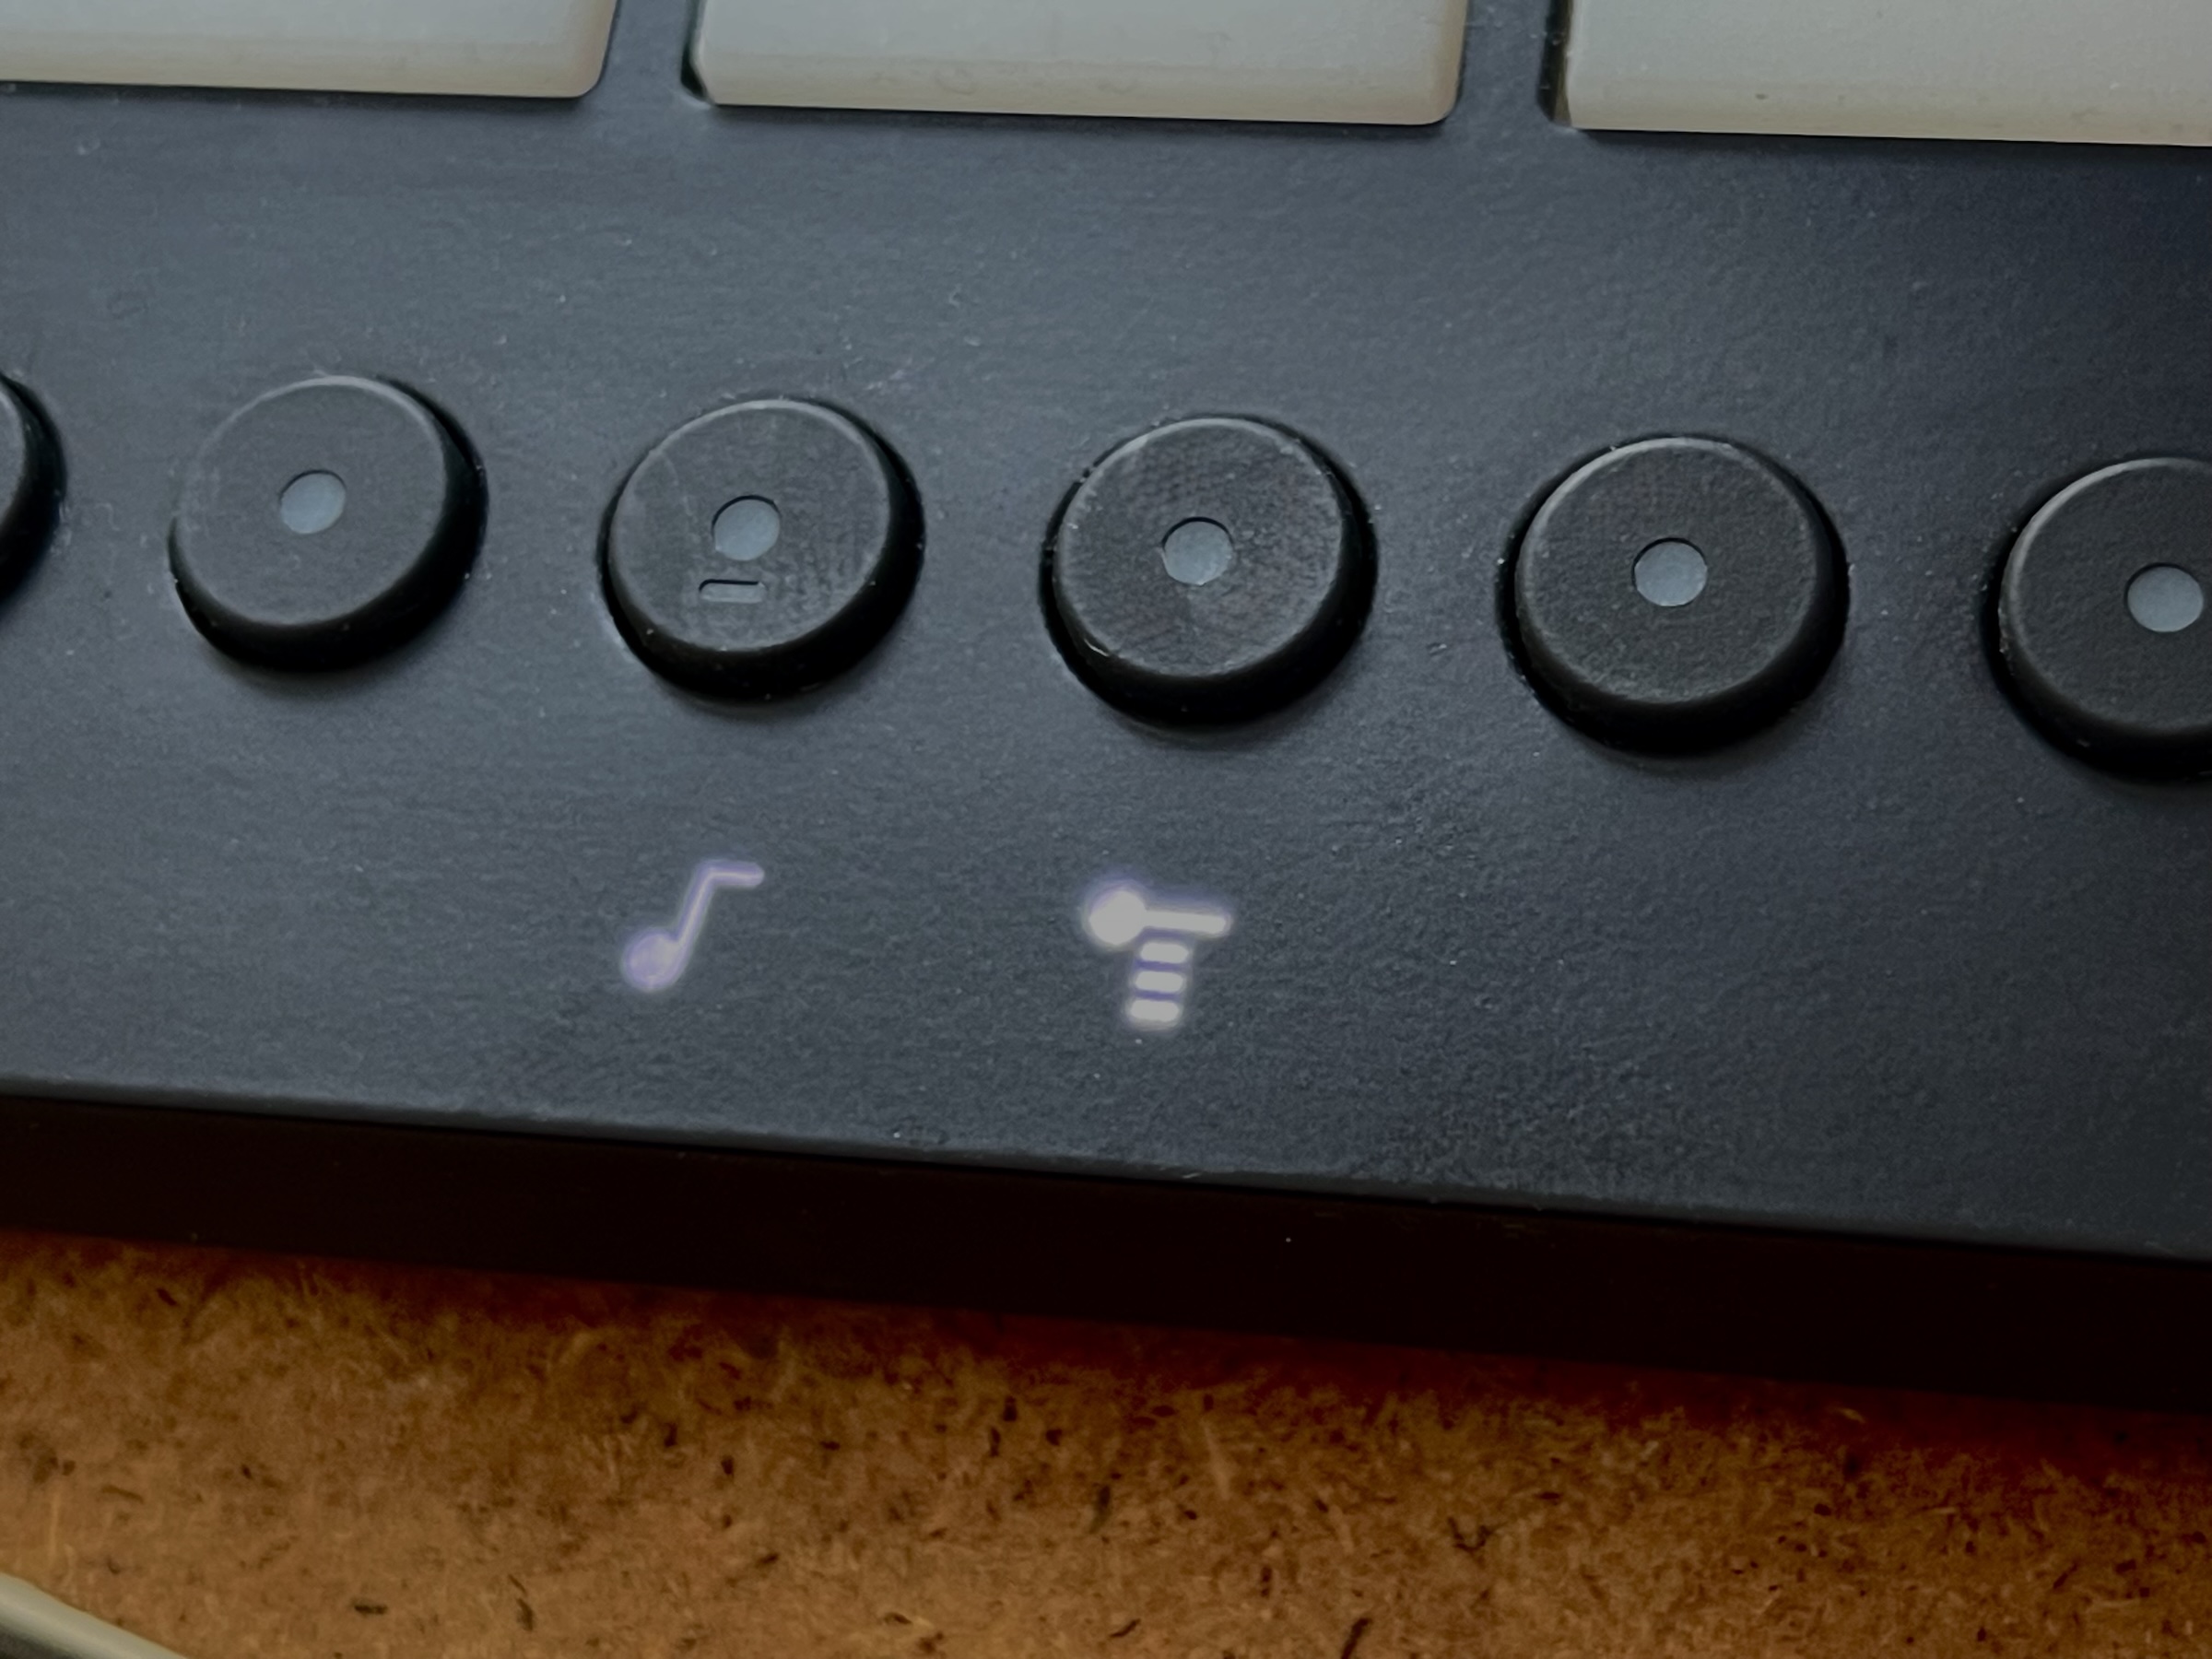
Tritonet v3 by Tolga Zafer Özdemir is a wild, recent device that lets you fly through the circle of fifths with live visualizations, hundreds of scales, chord generation, and MIDI (plus MPE) and audio (Resonator) integrations. It’s a nice fit with Push (or Move), but will also work with other MIDI controllers.
Chord Change by XY Studio Tools works with real-time chord progressions and instantly syncs across eight tracks at once — allowing you to “conduct” harmonic changes.
Tuning Systems
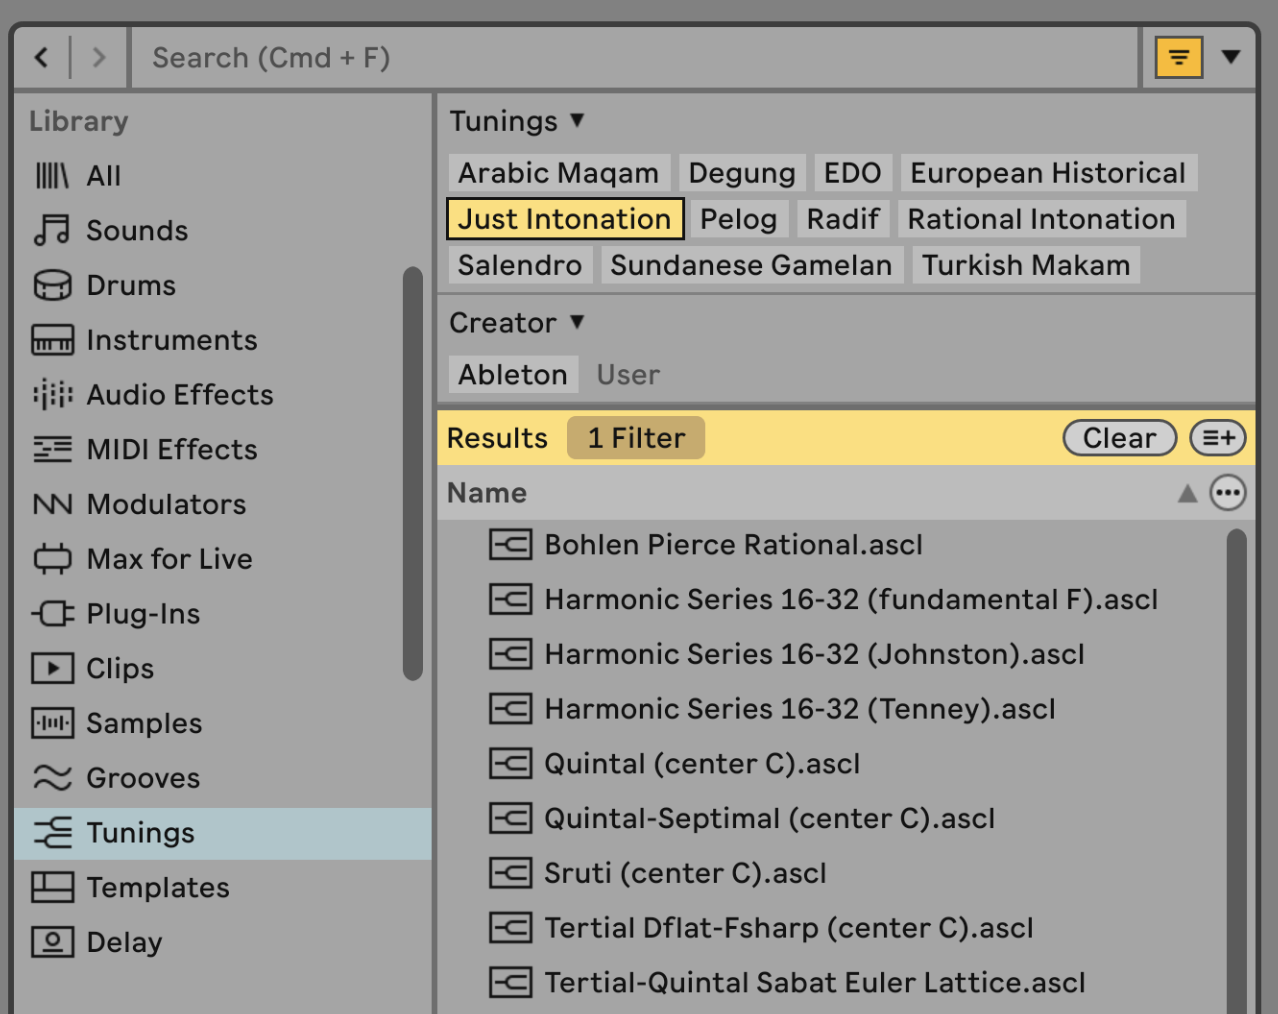
Not all instruments are tuned to 12-Tone Equal Temperament even in “common practice” Western or pop music, and certainly not across other practices. So Tuning Systems, introduced with Live 12, are another way to tune your Live session to what other players are doing. This could easily be a separate article, but let’s review quickly.
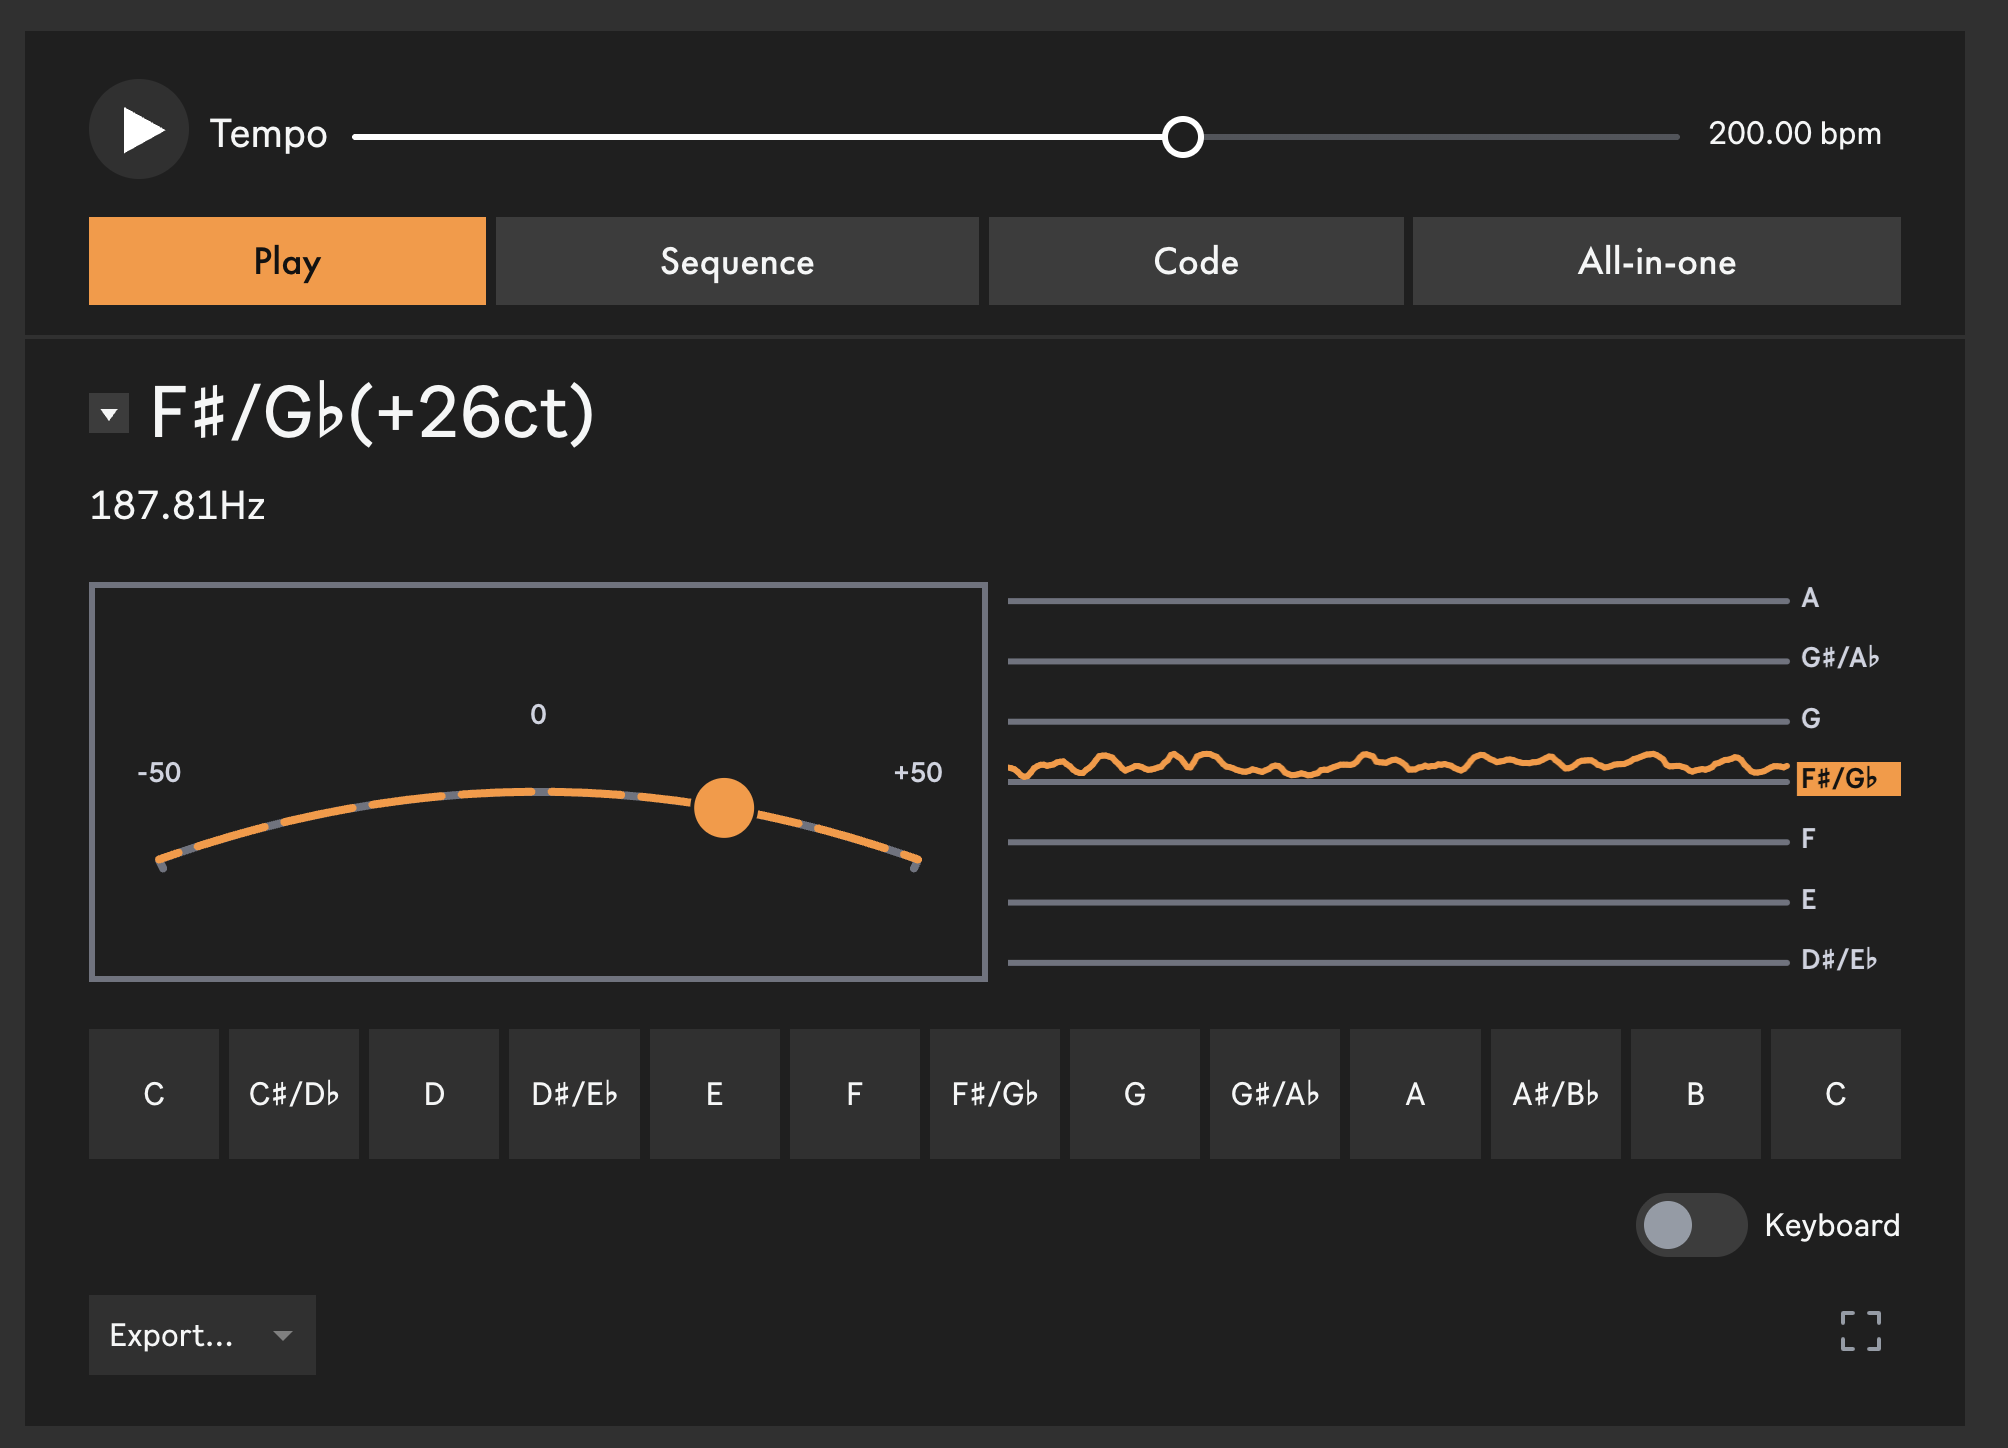
To try a Tuning System quickly, you can select a built-in preset from Live’s included settings or import any Scala file. Double-click it to load the Tuning System and impact all tuning-aware Devices across Live. This will disable Scale mode, because that mode presumes equal-tempered intervals and degrees. (You can switch it back on by disabling the Tuning System again.)
Once selected, you’ll see ranges and new reference pitches.

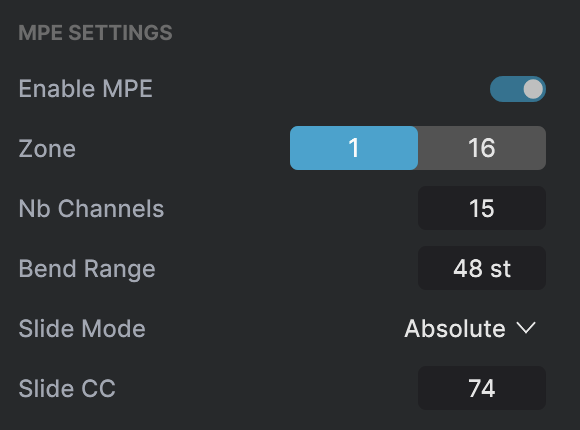
Ableton’s internal instruments (and some audio effects) all work well with Tuning Systems. For third-party support, you’ll want to choose an MPE-compatible plug-in and then enable MPE pitch. Right-click the Device to check that both Enable MPE Mode and Apply Tuning to Per-Note Pitch Bend are toggled on:
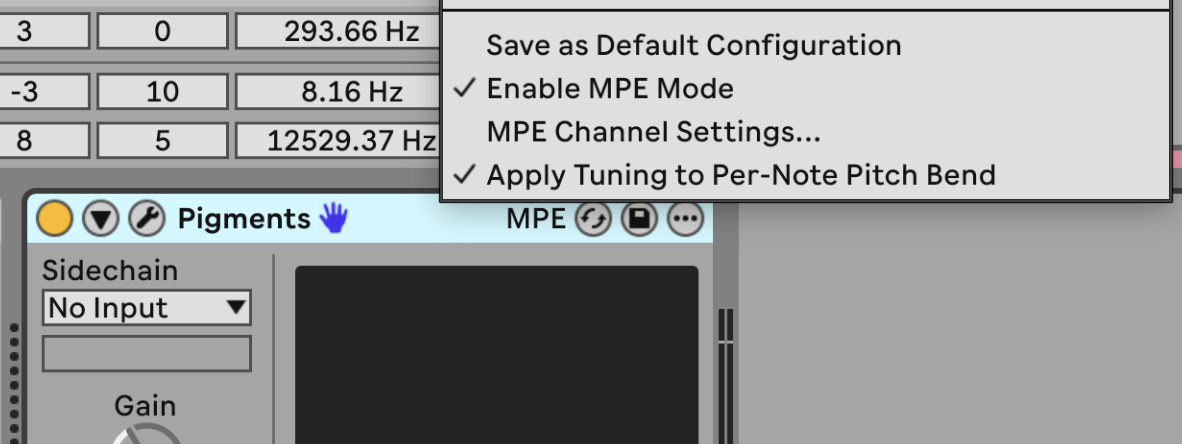
You may need to verify settings inside the plug-in. Arturia’s Pigments, for instance, does have its own internal MPE pitch settings:
Because of these layers of potential failure, I always test a new Tuning System with something like Drift first, then move on to the third-party plug-in. But hey, if this sounds too technical, sometimes this leads to happy accidents, too!
The good news is, you’ll find a lot of plug-ins now provide MPE pitch support, plus software modular environments like VCV Rack and Multiphonics CV-3, too. You don’t even necessarily need to be using the MPE features for expression — you might just use it for per-note pitch control.
All of this said, if you’re using Tuning Systems to play with another musician, there’s a very high chance you’ll want to make your own tuning. Ableton’s free tuning site includes detailed tools for learning tunings and creating your own, complete with MIDI and pitch input support. You can then export your finished Tuning System, and using it with Live is as simple as dragging and dropping it into the active Tuning System.
Make your own tuning – Ableton
The basic idea would be to sit with the editor and either adapt an existing tuning, or build one from scratch, while singing/playing.
For designing new tunings from scratch, I really like Leimma by Counterpoint and Khyam Allami. It has additional tools for creating ratios and fine-tuning measurements that you don’t get from Ableton’s browser tool (though the best is to use the two side by side). You can export via Scala file and drag it into Live just as with Ableton’s Tuning Systems:
For more on Ableton’s Tuning Systems, this is a great guide:
Alternative tuning tools
There are some additional ways to use tuning/microtuning.
MTS-ESP has the advantage of automating across devices, outside of the Ableton and MPE ecosystem here. You also get more advanced tools for editing tunings inside the software, whereas the approach above requires switching tools a bit.
There’s also this advanced tool, which I’ve barely gotten to try, but it has some unique microtuning features (morphing and adaptive just intonation) and works back to Live 10.
Scale Breaker by Chaos Culture
Get Live 12
If some of the Live 12-i-ness above made you long for an upgrade and you’re on an older version, remember that Ableton has both tailored upgrade pricing and now a rent-to-own option:
Live Shop and Upgrades
What’s next
There’s plenty more to explore. Coming up, we’ll look at playing in time — everything you want to know about clock, sync, Ableton Link, and latency. Plus, we’ll cover the new Ableton Link Audio, ways of exchanging projects, and a ton of fun ways to collaborate and jam live. If you have questions, ideas, or tips — or any feedback at all — comment or contact me. (Yes, the contact form works again!)
And hopefully, this will be one to bookmark and return to when you need help getting ready for your next jam. Enjoy.